The modern electric cooker is characterized by high efficiency, functionality and precision of settings. At the same time, the product consumes a lot of energy, which affects the characteristics of its connection to the network. An improperly selected and connected hob socket can cause fire, short circuit and electric shock to people. In order to initially exclude the likelihood of such situations occurring, you should correctly design and connect a power point that is guaranteed to withstand such powerful consumers as an oven, oven and combination oven.
Distinctive features
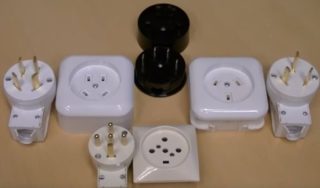
Standard sockets for an electric stove are not suitable, as they are not designed for heavy loads. They need to be connected taking into account the maximum power consumption, which can reach 8 kW. Ordinary household points that are installed in an apartment are labeled 16 A and can safely provide energy to consumers with a power of up to 3.5 kW.
The power socket for the stove has the following features:
- Large thickness of conductive contacts. May be 2-3 mm depending on the design load. The metal in power outlets and electric stove plugs is highly durable, hard and resilient.
- The presence of a grounding contact. It is necessary due to the fact that during operation there is a possibility of electricity breaking through to the case. Since conventional clamping tendrils are not designed for high amperage, contact is made using a pin and a separate hole.
- Stronger body. Stove sockets are made of refractory polymer plastic, which does not lose strength when heated. The case is robust, shock and pressure resistant.
Depending on the voltage supplied through the cable, the socket may have 3 or 5 holes. The number is determined by the number of phases and the presence of grounding. A standard 380 volt socket for the stove has 5 contacts, of which 3 are for connecting the phases, and 2 for zero and ground. But in apartments this option practically does not occur, such decisions are made for the arrangement of industrial premises.
Wiring requirements
Most homes do not have separate lines and outlets for high-capacity electric stoves. The sockets installed in the kitchen are connected to one circuit, which is designed for a certain load. If you use a modern hob, then until the end of its operation, you cannot turn on consumers such as an electric kettle, oven and microwave. This is not very convenient if you need to cook a lot and on several devices.
Houses built in the last century have aluminum wiring that can withstand a maximum load of up to 3.5 kW. The houses of the modern series are equipped with cables with copper conductors 2.5 mm², rated for 4.6 kW. This is quite enough for a medium power device. If there are more consumers, it is better to change the wiring to avoid overheating. It is advisable to purchase a cable with 3.0 mm² (6.2 kW) or 3.5 mm² (8.0 kW) conductors. When making a choice, you need to focus on the peak value of electricity consumption.
The best solution is a copper cable. This metal is highly conductive, flexible and resilient. Corrosion problem is solved quickly and easily by tinning the contacts.
Types of sockets for electric stoves
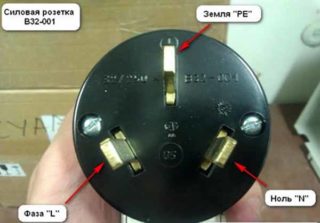
By design, the products are divided into rated voltage - 220 V and 380 V. The first type includes devices for use in kitchens of houses, summer cottages, cottages and hotels. The second type of product is used in restaurants, large canteens and food processing factories. Based on the purpose, the size, number of burners and power consumption differ.
By the number of connectors for a 220 V household network, oven sockets are as follows:
- phase, zero, earth (3);
- 3 phases, zero (4);
- 4 phases, zero, earth (5).
The devices also differ in terms of service life. It depends on factors such as resistance to electrolytic corrosion, abrasion and bending. The main indicator is the number of on and off cycles.
In this direction, the classification of quality is as follows:
- high - 100,000;
- average - 75,000;
- low - 50,000.
Based on the operating conditions and quality, the service life of the products varies within 10-25 years.
The installation of the socket for the electric stove can be done in open or hidden ways. The choice depends on the location of the equipment and the option of laying the cable. The open installation is versatile and can be used outdoors, on balconies and in wooden buildings. The hidden method is used in brick and reinforced concrete residential buildings. In this case, before connecting the socket for the stove, holes and grooves are made in the wall.
Resistance to external influences is essential. Products have 6 degrees of protection from dust and 8 from water. For this, plugs, covers and curtains are used.
Choosing a socket by the number of phases and grounding
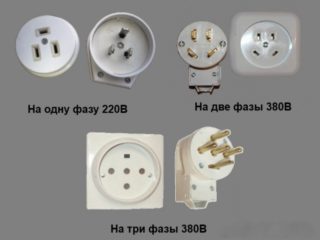
The choice is determined by the configuration of the fork that the cooker is equipped with. Almost all manufacturers complete their products with cables rigidly fixed in the case. The shape and type of plugs is determined by the standards that apply in the importing country.
For a conventional oven with a power of up to 6 kW, products with 3 connectors should be purchased - for phase, zero and ground. Such a circuit is designed for single-phase current that is supplied to multi-storey buildings. If the building does not provide grounding, you can purchase a regular 2-way power outlet.
Three-phase devices are used for powerful electrical equipment consuming 6-12 kW. Here the phase scatter circuit for 3 contacts, which are available on the mounting block of the device, is used. Grounding is mandatory, the safety of the cook depends on it.
Design tips
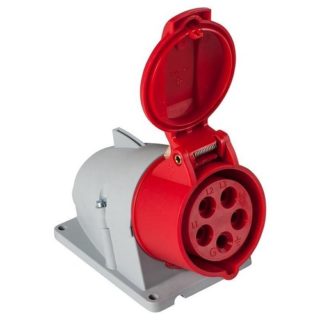
When choosing a product, it is necessary to pay attention to the availability and quality of parts that determine its reliability, durability and safety.
The following nuances affect the quality of product operation:
- Price. Good things cannot be cheap (at least 1000 rubles).
- Location of nodes. It should be compact and ergonomic.
- The rating of the device. Must have a peak load margin.
- Installation type - hidden or open. Here the choice is made between ease of installation and practicality.
- Availability of grounding. This function will protect the cook from electric shock in the event of an emergency.
- Appearance. It matters if the socket is visible.
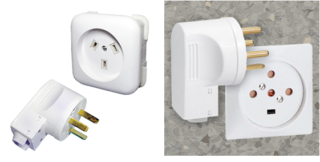
It is necessary to provide for the possibility of communication between devices of different configurations. In some cases, it is permissible to use a certified adapter from one plug to another. If there is a need to install a dual source, you should use a splitter with outputs for the required technical request. In one socket, you can connect a single-phase 32a plug for an electric stove, and in the second, insert a regular plug from a dishwasher.
Panel board preparation
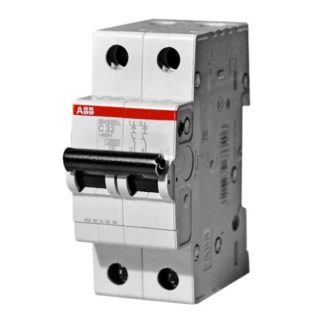
A competently designed and assembled shield will allow the correct distribution of energy between consumers and completely eliminate the risk of a short circuit. If you have even basic knowledge about the nature of electricity, you can make it yourself.
First, you need to calculate the number of household appliances and their total power. Based on this, an input machine is selected, designed for 32 A or 40 A. Then a drawing is drawn up, in which the wiring and sockets are drawn. The force line for the plate is made separately.
In multi-storey buildings, only open type shields can be installed. It is better to place them in places that are inaccessible to children and pets. Inside the box there are input and intermediate bags, mounting rails, RCDs, phase, protective and neutral conductors.
Priority should be given to boxes made of high temperature refractory plastic. This will prevent electric shock if one of the wires comes loose and touches the case. Mounting to the wall should be as rigid as possible, excluding accidental tearing of the box.
Connecting the socket
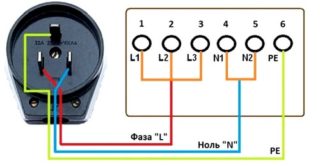
The connection is made in accordance with the electrical circuit of the device and the type of voltage entering the house. Before connecting, the ends of the wires must be stripped, treated with acid and soldered.
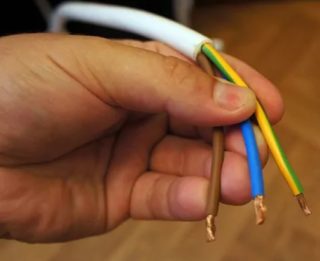
If there is a single-phase current in the network, the wires are connected in accordance with the marking of the contacts or their color designation. The green-yellow core is brought to the ground, the red to the phase, and the blue to zero.
The communication of a two-phase device is carried out in a similar way.
Wiring diagram:
- L1 - phase A (brown);
- L2 - phase B (white);
- N - zero (blue);
- PE - earth (yellow-green).
Three-phase sockets are connected to the network according to the following scheme:
- L1 - phase A (brown);
- L2 - phase B (white);
- L3 - phase C (brown with a white stripe);
- N - zero (blue);
- PE - earth (yellow-green).
After screwing the wires, you need to check the reliability of the commutation by slightly pulling them back.
Connecting contacts to the stove
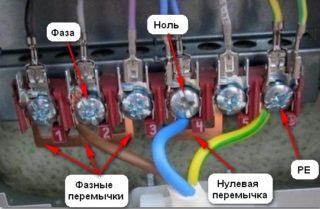
When purchasing imported products, you may encounter the lack of a power cable coming from the stove. Similar stories happen when buying used equipment. Since the boards in the ovens are standard and designed for all types of connection, you should start by selecting the socket and plug that match the wiring in the apartment. After that, it remains only to attach the cores to the plate.
Depending on the number of cores, zero, phase and ground are connected to the board. Before this, the polarity of the socket is identified. By default, the left connector is supplied with current, and the right one is returned to zero. The middle is ground. If there is no ground in the network, there is no point in fixing the yellow-green wire either.
If there are 5 or 6 contacts on the board, the connection is made according to the following scheme:
- L1 - phase A (brown);
- L2 - phase B (white);
- L3 - phase C (brown with a white stripe);
- N (1 or 2) - zero (blue);
- PE - earth (yellow-green).
Some manufacturers put jumpers between the contacts. If they are not removed, a short circuit will occur when the device is turned on.
How to move an outlet to a different location
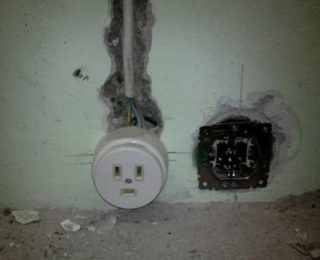
In accordance with SNiP, it is prohibited to use household extension cords to connect powerful equipment. This can lead to overheating, fire and short circuits.
You can transfer a point by installing it in a new socket using the old channel and new lines for wires.
Voltage is applied in the following ways:
- a special extension cord;
- laying a new line;
- extension of the cable, when the connection of wires is carried out by soldering, welding, crimping or terminals.
Each option has its own pros and cons. The decision is made on a case-by-case basis according to the circumstances.
Safety regulations
- Connect with a completely de-energized line at the inlet bag.
- In the work, use only high-quality material from trusted manufacturers.
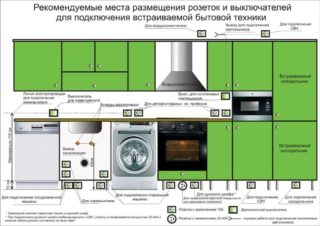
- Position the nests no closer than 50 cm from kitchen sinks, water, gas and sewer pipes.
- Be careful when connecting wires, check the correct connection before applying voltage.
Compliance with these rules will allow you to perform competent installation, using the stove will not cause problems for many years.

