Connecting wires in a junction box requires the master to comply with all conditions. In the event of an incorrect connection, not only household devices are at risk, but also the safety of the home. There are rules and regulations that must be followed when connecting conductors in a junction box.
- What is a junction box for?
- Ways to connect conductors
- Terminal blocks
- Wago Terminals
- Self-insulating clamps (PPE)
- Crimping with sleeves
- Soldering
- Twisting
- Clamp type "nut"
- Bolted connection
- Connecting cores with different cross-sections
- Carrying out works in land and water
- Basic wiring schemes
- Connecting a socket group
- One-button switch connection
- Connecting a two-button switch
What is a junction box for?
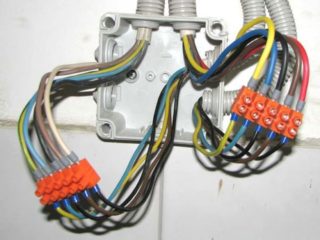
Wires and cables from electrical wiring must be distributed to different rooms in the apartment. Each room can have several food outlets. To connect all the conductors, a special device is used, which is called a junction box (also called a junction box or junction box). All conductors from consuming devices fit into them in accordance with the strict rules of the PUE.
Junction boxes are divided into indoor and outdoor. Internal ones are mounted in a special niche in the wall; only the box lid remains on the same level with the finish. External junction boxes are mounted on the wall.
There are round and rectangular boxes. The number of conclusions is 4, but additional ones can be made. For fastening, there is a thread on each terminal.
The advantages of a junction box include:
- Improving the maintainability of the system. An unattended contact is a potential threat.
- Systematization of commutation.
- Simplicity of preventive examination.
- Increasing the degree of fire safety. This is especially true in wooden houses, where the slightest spark can cause a fire.
- Savings in cabling.
According to certain rules, the conductors are connected in the box.
Ways to connect conductors
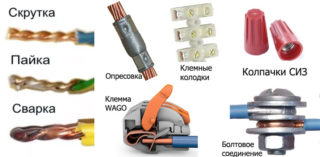
There are several ways to create contact between conductors in a junction box. The choice depends on the material of the cores, environmental conditions, the number of wires, the cross-section of the cables to be connected.
The most common connection methods are:
- terminal blocks;
- spring terminals wago;
- self-insulating clamps;
- twisting;
- crimping;
- soldering;
- clip type "nut";
- bolted connection.
According to the requirements of the PUE, you cannot simply twist the wires. It is unsafe for housing.
Terminal blocks
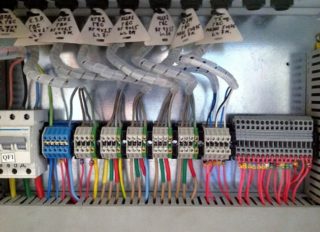
Terminals are understood as products made of plastic with an internal brass bushing with screws on both sides. Conductors are inserted into these places and tightly fixed. The method is very common when connecting wires in a junction box.
Benefits:
- different diameters of inlets;
- low cost;
- reliability;
- simplicity and ease of installation;
- the ability to connect copper and aluminum.
Disadvantages:
- low quality of the product itself;
- only two wires can be assembled;
- risk of rupture of thin veins.
For a more reliable fixation of stranded wires, other methods are used.
Wago Terminals
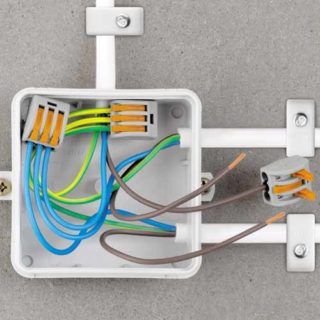
The wago pads are a spring mechanism. They are the most popular contact creation devices.Compared to standard terminal blocks, the docking takes place using a lever. It allows you to maintain the integrity of the conductor and not damage it. The conductor is stripped of insulation before use. Then the strands are inserted into the hole.
Pros:
- the ability to connect dissimilar materials - for example, aluminum and copper wires;
- joining of several cores at once;
- thin veins are not damaged;
- small size;
- easy to install;
- fastening reliability;
- the ability to install an indicator to monitor the state of the electrical network.
The disadvantages of Wago products include only the high cost.
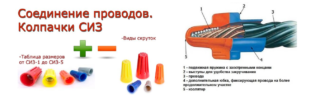
Self-insulating clamps (PPE)
Main advantages:
- low price;
- non-flammable plastic;
- ease of installation;
- wide range of color shades.
Among the disadvantages are poor fastening properties and the impossibility of joining dissimilar materials.
Crimping with sleeves
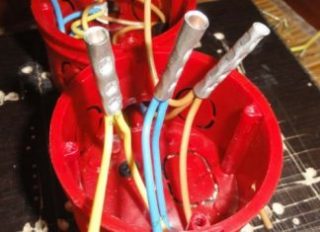
With the help of sleeves, you can create high-quality and reliable contact. The essence of the method is to install a wire protected from insulation into a special tube - a sleeve. The tube is then compressed and treated with insulating material. A heat-shrinkable tube or electrical tape is applied on top.
Pros:
- high quality and reliability of assembly;
- low cost.
Disadvantages of crimping:
- disposable mount;
- the need to purchase special expensive tools;
- for crimping copper and aluminum, a special sleeve is required.
Crimping is highly labor-intensive and requires certain skills from the master.
Soldering
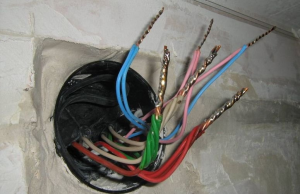
Among all the offered soldering is the most reliable way of joining. Before connecting, the conductors are stripped, after which the bare core is treated with solder. The wires are dipped in a bath and, after cooling, are treated with insulation.
The main advantage of this method is high reliability and quality.
Minuses:
- A professional tool is required with which the master must be able to work.
- High labor costs.
- The connection is disposable. It cannot be unsoldered.
Welding can be used instead of brazing. The principle of operation is similar, but there is an important difference - different skills when carrying out work. The specialist must be able to handle the welding machine.
Twisting
The connection of wires by twisting is prohibited by the rules of the PUE. The conductors can only be twisted if another method of fixing will be used.
Clamp type "nut"

This type of clamps is a device with two metal plates and four bolts located at the corners. The stripped conductor is fixed in the plate and covered with a carbolite sheath.
Benefits:
- low cost;
- ease of installation;
- combination of different metals;
- high quality insulation.
The disadvantages of "Nut" include the weakening of contact with time and the need to tighten it. Also, the clamp is large in size, which is why it is inconvenient to mount it in a junction box.
Bolted connection
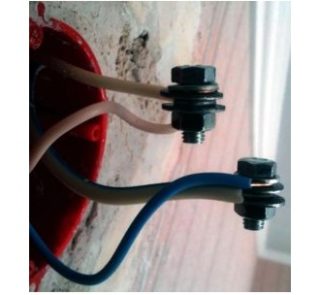
One of the simplest and most inexpensive ways to connect wires is contact with bolts. Only a bolt, washers and nut are required to work. The connection is quite simple - a nut is put on the thread of the bolt and the core is screwed on. Then another nut is put in and a second core is superimposed. Everything from above is pressed by a third washer and ends with a nut. The top of the contact is covered with insulation.
The bolted connection has the following advantages:
- cost;
- ease of installation;
- copper and aluminum can be combined.
Disadvantages:
- poor fixation quality;
- the need for a lot of insulation.
Also, the bolt is quite large and difficult to fit into the junction box.
Connecting cores with different cross-sections
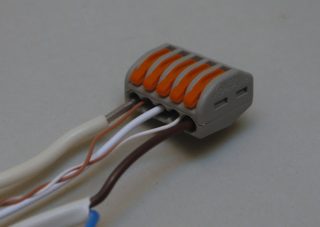
Cable products are manufactured with different cross-sections. The larger the area of the conductor, the greater the load it can withstand. To contact two wires with different cross-sections, wago terminal blocks are used. If the conductors are made of different materials, then a special block is required, inside which a special composition is applied to protect the contact from oxidation. Also, the conductors of different sizes can be soldered.
Carrying out works in land and water
The need to install wires in underground or underwater conditions is quite rare. In these cases, certain conditions must be adhered to in order for the contact to be strong and reliable.
The laying of wires in water can be carried out using a special electrical installation - a submersible pump. Then the ends of the conductors are sealed and processed with insulation. From above you need to put on a heat shrink tube. If the recommendations and operating conditions are followed, the contact will be of high quality and reliable and will last for more than one year.
If the electrical wire is laid in the ground, the same protection method is used. But if you want to make an even more secure connection, you can press the cable ends with the terminal block.
The junction box for the wires must be sealed. Additionally, it is filled with silicone. For protection against rodents, the wires can be routed in a strong tube or cable.
Basic wiring schemes
In addition to connecting the wires in the junction box, you will need to branch them into sockets and switches. You can disconnect the wires in different ways depending on the type of devices and the type of wiring.
Connecting a socket group
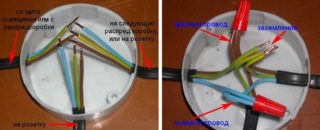
The rosette group is usually allocated as a separate independent line.
There are three wires in the box with different colors. Each has its own purpose. Brown is the phase conductor, blue is zero, and yellow-green is ground. Other colors may be used less frequently.
Before laying the wires, they should be cut to the same length and a margin of 10-12 cm should be made.
Beforehand, it is recommended to check the assignment of the cores with a tester.
One-button switch connection
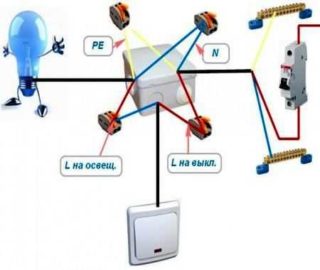
If a switch is connected, the number of groups will also be three. The connection method will be slightly different. There are three entrances - from the box or electrical panel, from the lamp and from the switch. The phase must be connected to the switch button. From the output of the switch, the conductor is led to the lighting device. The light will work only in the case of closed contacts on the switch.
Connecting a two-button switch
Two-key types of switches are often used. They are capable of providing two groups of luminaires. Their connection scheme is somewhat more complicated. A three-wire cable is connected to the switch. One of its conductors is a common contact of the switch, the rest are sent to the outputs from the buttons. The phase is combined with a common contact. Zeros should be connected from both groups of lighting fixtures. The phases from the luminaires and the conductors from the switch are combined in pairs. One pair - from the switch to the phase of the first lamp, the second - from the switch to the second lamp.

