Electrical wiring in any room is divided from one general or private panel. The assembly of switchboard equipment is carried out by professional craftsmen. If it is not possible to contact the appropriate service, it is necessary to familiarize yourself with the general safety requirements and particular points. The service life of equipment, wiring, as well as the safety of life, health and property of the owners of the premises depends on the correctness of the actions. In a private house or apartment, it is somewhat easier to perform work, but the general rules remain.
- Concept, purpose, types of electrical panels
- Classification of electrical panels
- Body material
- Assembly Requirements
- Cable entry into the shield
- Separation of cables inside the switchboard
- Modern modular protection devices
- Assembly of modular panel elements
- Final assembly
- Assembling a 220V switchboard in a private house
Concept, purpose, types of electrical panels
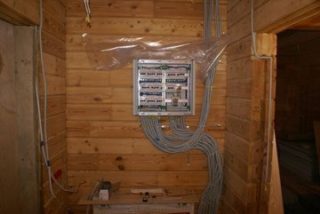
Installation of an electrical panel is necessary for wiring cables in the final premises (industrial, residential, others). The choice of the type of devices depends on the total load, the number of devices.
An electrical panel is a complex of individual technical elements that allow you to distribute electricity to sockets, switches, appliances. Required components:
- DIN rail - serves for fastening circuit breakers to clamps; it is a metal plate with fasteners. If required, can be cut to the required length and size.
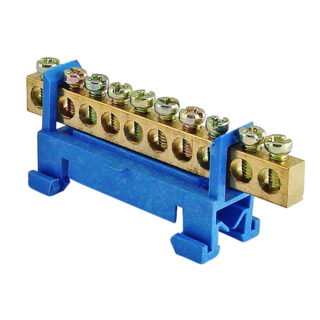
- Bus - one allows the dispersion of zero voltage wires, the second is intended for grounding contacts. They are installed in open and closed versions, the latter are isolated from touching.
- Automatic devices - devices designed for automatic disconnection of the electrical circuit in the event of overloads (surges, voltage surges). The number of devices and power are selected as needed.
- Wires, cables for connecting contacts.
- A device for accounting for consumed electricity (meter), as required.
If the number of devices increases, you can expand the apartment switchboard by adding the required number of elements.
Classification of electrical panels
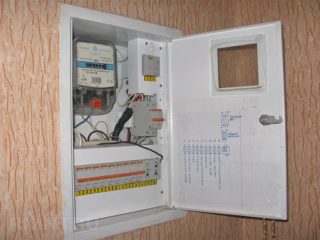
Devices are divided according to several parameters - methods, place of installation, level of protection of the case. The installation technique is distinguished:
- waybills;
- built-in;
- floor.
The first ones are installed on a vertical surface, directly to walls, supports and other similar structures. The main nuance is that the whole complex of equipment with the case is located outside.
The assembly of electrical panels of the second type involves the preparation of a special recess in the wall (another surface). The case fits completely, only the protective cover remains on the outside. Floor electrical panels are fixed on a horizontal plane (floor, stand).

The place of installation of the switchboard is selected depending on the needs of the building, room. There are internal and external devices. The latter can be installed outdoors, attaching to the outer parts of the blocks. However, an additional housing is required, a cabinet for protection from weather conditions, possible technical damage.
The degree of protection is indicated on the case with Latin letters IP and numbers. The most common varieties:
- IP20 and 30 - installation in closed dry rooms is allowed, there is no protection from moisture, only from the penetration of foreign elements;
- IP44 and 54 - higher mechanical protection, installation of a switchboard is possible in buildings and rooms with high humidity, outdoors, excluding direct ingress of water;
- IP55 and 65 - a high level of protection against moisture and dust, withstand aggressive indoor and outdoor conditions, isolated from any contact.
There are other categories of protection, but they are less common. Outside, shields of floor and surface types are installed.
Body material
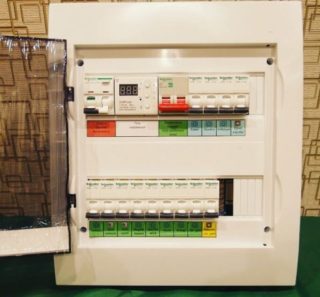
The base of the device is made of two types of materials: metal, plastic. Another name for buildings is blocks. Plastic is more often used to assemble small electrical panels for an apartment, small rooms. The outer cover is usually made of a transparent material for ease of use - the display of the electric meter is easily visible behind it.
Metallic ones can be supplemented with glass or transparent plastic elements. Assembling panels of this type involves high voltages, so it is important to reduce the likelihood of contact with internal parts. Glass and plastic covers allow reading without opening the control cabinet completely.
DIN rails are made only of metal, regardless of the material of the case.
Assembly Requirements
Work carried out with electrical devices and wiring is classified as particularly hazardous. Therefore, the assembly of the electrical panel implies compliance with certain requirements:
- filling with elements, taking into account the recommendations that are given in technical documents, it is prohibited to exceed the number of devices;
- the presence of an electrical protection sign is mandatory, the permissible voltage of the device is indicated here;
- the materials from which the electrical panel and its parts are assembled must not conduct current and ignite;
- marking is mandatory on cables, special tags are used to mark individual groups of elements;
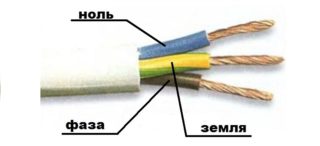
- the terminals are connected to the wires one at a time, the buses are distinguished by color (black - phase, blue - zero);
- if several circuit breakers are used, the connection between them is made using a special bus conductor;
- grounding is mandatory for the body and cover;
- if a private house is built of wood, it is impossible to lay internal wiring, therefore, special pipes and boxes are used.
The technical documentation of the electrical panel contains the necessary information: type of device, class, procedure for protection against moisture and dust, installation recommendations and precautions. The established requirements should be strictly observed. Otherwise, short circuits, burnouts, complete equipment failure are possible.
Cable entry into the shield
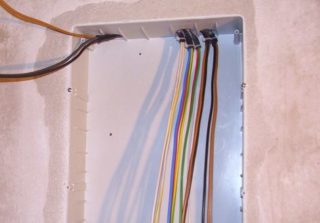
Placing the main cables in the electrical box takes time and attention. The subsequent wiring in the dashboard and the final collection depend on the correctness of the procedure.
Factory standard devices are manufactured in such a way that it is convenient to wind the cables. Holes are provided at the top and bottom to screw in the wire, just press the perforation with your finger. The classic diameter is designed for pipes of 1.6 and 2 cm in cross section.
It is easy to put cables into the hinged electrical panel. It is important to fix the body well and pass the pipes one by one. If the shield is built-in, follow the step-by-step instructions (the procedure depends on the type of device). The base is fixed on alabaster and leveled.
In cheap shields, holes are often missing. You need to cut it yourself. It is important not to damage the internal components.
It is not recommended to leave a long "tail" inside the shield. The wires must be cut to the desired size, this will facilitate the subsequent installation of RCDs and other devices.
Separation of cables inside the switchboard
Assembling an electrical panel for an apartment and a private house implies the correct routing of wires inside the case. First, the outer insulating layer (rubberized, colored) is removed from the cables. It is important not to damage the cores of the wires, after which you should leave a control mark so as not to get tangled in the following steps. Ordinary paper tape will do, it fits like "light / children's room", "light / bedroom". It is possible in another way, the main thing is that not only the master could distinguish the components of the group and their purpose. The arrangement with modular elements is carried out in accordance with the purpose of the cable (phase, zero, ground).
It is important to measure the correct length for the cable to be sufficient. Usually the wire is left the size of two heights of the electrical panel, the excess is cut off.
Modern modular protection devices
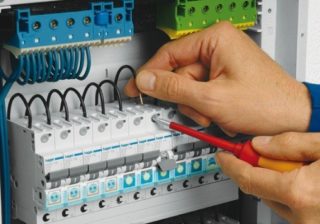
The demand for electricity is growing steadily. Moreover, most of the distribution equipment has been in operation for more than a dozen years. Therefore, the quality of the current obtained often leaves much to be desired. There are other reasons for energy fluctuations - natural, technical.
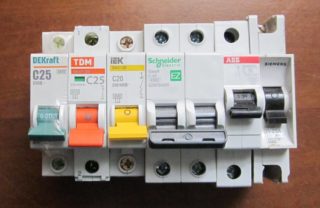
To secure electrical devices and a shield, modular protection devices are installed - automatic machines. Modern devices quickly react to the appearance of overcurrents and open the electrical network
In the shields, the same rule for connecting machines works as in other devices - power is started only from the top of the device.
Bare cable cores are fixed to the module terminals with special latches, for example, screws. It is necessary to prevent pieces of insulation, moisture and dust from getting on the contacts - if it does not appear immediately, then electricity may disappear in part of the room or in its entirety (depending on the group of connected terminals), possibly a fire.
It is forbidden to connect cables of different cross-section to one AB terminal. The thick one will get good contact, and the thin one will get bad, and during operation it will start to melt.
If the cable core is solid, for a better connection it is recommended to bend it in a U-shape, then twist it. This provides a larger contact area and better conductivity. For stranded wires, use special fasteners NSHVI-2 and NSHV.
Assembly of modular panel elements
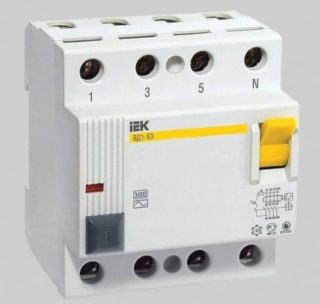
If the connection is being made for the first time, it is important to follow the step-by-step instructions in order to properly assemble the electrical panel and automatic modules. It is important to remove unnecessary elements, to provide sufficient lighting. First, prepare the required blocks:
- circuit breakers;
- relay for voltage control (protection of household appliances from power surges);
- RCD;
- differential type machines;
- cross modules.
If you have some skills in working with electricity and wiring, it will not be difficult to assemble a single-phase meter. The assembly of a three-phase shield is carried out according to the same scheme, the only difference is in the number of cores and closed contacts. The elements are fixed to the rail with clamps in the specified order. After they check the correctness of the connection, only then proceed to the terminal contacts. Loosen screws, use combs to distribute wires.
The phase for RCDs, modular machines and other components is distributed from the input switch. Zero is taken from the clamp of the machine at the input of the RCD. The free end of the neutral cable is connected to the zero of the main bus (switching is carried out with a single blue wire). If unused contacts remain, they should be secured with a screwdriver.
After that, a final check is carried out according to a previously prepared electrical panel diagram. Then voltage is applied in test mode. The amount of electricity at the terminals is measured with a multimeter or other device.
Final assembly
The switchboard for electrical wiring in an apartment or a private house is assembled after fixing and checking the functionality of the modular elements. The power supply is cut off again. The parts installed on the rail are placed in the case, the screws are tightened (usually on the sides, in the center).
The main and grounding zero bus are fixed. When laying the wires, they are collected in bundles (it is important not to allow twisting, interlacing). Protective ones are mounted to the PE bus. The sequence of switching on must correspond to the diagram of the electrical panel. Each bus is marked (zero, phase, ground).
A control comparison of the resulting design with the original electrical panel diagram is carried out.
The final check is possible only after installing the sockets, switches, which are provided for by the wiring plan.
Assembling a 220V switchboard in a private house
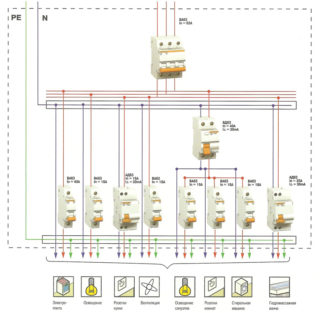
To properly assemble an electrical panel in your own home, you need to familiarize yourself with the nuances of such a structure:
- the level of power allocated to the project - the choice of an electric meter, automatic machines depends;
- the place of installation of the shield - affects the type of case;
- number of branches - each requires a separate protection module;
- reliability of the power grid - the quality of power supply lines, the proximity of large facilities, and the like are taken into account.
The electrical panel in the house is installed for a long period of time. It is recommended to carefully approach the choice of elements, calculate and take into account the possible increase in the load: the appearance of additional rooms, devices. In rural areas, the overhead lines are in average or poor condition, it is better to install more protective blocks.
The electrical panel is the first element of the wiring of a private house, apartment, and other premises. It is not recommended to skimp on design details; you should choose reliable manufacturers and trusted stores. However, primary attention is paid to the general house level of voltage, power consumption. It is important to install a sufficient number of protection modules, to insert a voltage relay. Carefulness and observance of the instructions will help to make the electrical panel safe, and the service life is long.

