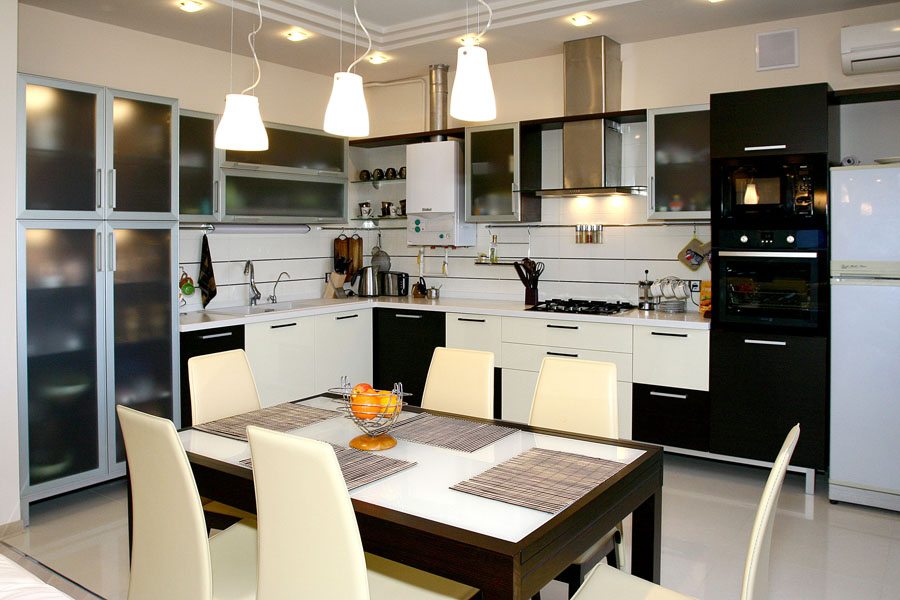
When wiring the electrical system in an apartment, a rather popular method of installing devices is used - connecting a loop of sockets. It is important to figure out how to install electrical appliances safely, and in which case this method cannot be used.
Connection methods
There are two main schemes for connecting outlets in an apartment. Radial, which is also called "asterisk", provides for the supply of a separate line to each outlet. This method requires additional financial investments, since a lot of expensive cable will be needed. Difficulties arise if the apartment has already been finished and the walls have to be channeled. The advantages of the method are simplicity and reliability. It is recommended to use it for connecting powerful electrical appliances.
The second method is parallel or stub, when several points are connected to one line at the same time. Such a scheme increases the economy, but reduces the safety and reliability of the wiring. Use it when you need to connect power to a group of outlets. Individual sections can be formed depending on the location of the devices.
Sometimes it is impractical to connect sockets with a loop. Such a device is permissible only when the power of all included devices does not exceed the power of the cable supplying the outlet.
Features of installing a group of outlets with a loop
The disadvantage of this method is that if the wire is damaged in one outlet, the subsequent ones will also not work. With a decrease in their number, the reliability of the system operation increases.
According to the PUE, the sockets must be connected without breaking the PE conductor. Otherwise, they are left without grounding. The group must be connected to the 16A machine with a 2.5mm cable, and the power of the connected consumers does not exceed 3 kW. If the load is higher, a separate line is brought out to each device.
It is necessary to make calculations in advance in order to know how many sockets can be connected in series. You need to set the type, power and number of electrical appliances. Correlate data with room size and layout. If a large number of outlets are needed, it is better to lay several lines.
Installing the socket strip

A certain set of tools is required to work:
- voltage indicator;
- level;
- universal screwdriver;
- pliers;
- pencil and construction knife;
- press tongs;
- thermotube;
- puncher.

First, a wiring diagram is performed. It indicates the location of junction boxes, sockets, switches. Mark the route along which the wires will go. They should be located strictly vertically and horizontally, have no more than one bend at a right angle. The depth of the channels is up to 2.5 cm, the width is 3. The length from the box to the outlet is no more than 3 meters. The diagram should be saved so that during the next repair during work, do not get into the wire.
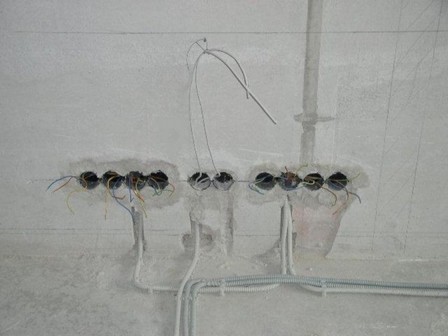
The most time-consuming work is chipping the walls. It is more convenient to do this with a special tool, but you can also do with improvised means - a hammer, a chisel, a "grinder", a drill with an 8–10mm victory drill. It should be held perpendicular to the wall, work at low speeds. Cool the drill in water periodically.
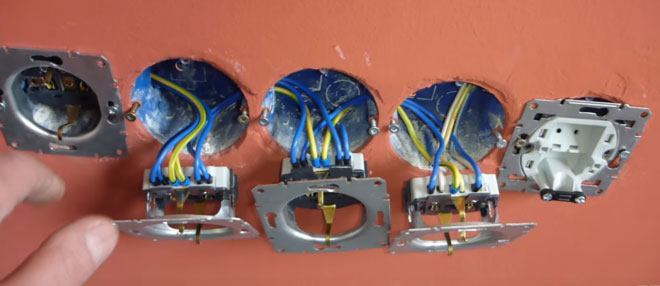
Next, holes are made for socket boxes. The sleeves are mounted on alabaster or plaster.To prevent the solution from hardening quickly, PVA glue can be added to the water. The standard box is 45 mm deep. Everything you need can easily fit into the socket box.
For feed-through sockets, it is better to use a 60 mm recessed sleeve, as it will house the incoming and outgoing cables.
Installation of branches in the socket
The wiring can run inside walls or along their surfaces. The first option is simple in execution, but loses in aesthetics. Concealed wiring provides for wall finishing after installation. However, when the need arises to repair the electrical network, the walls have to be destroyed.
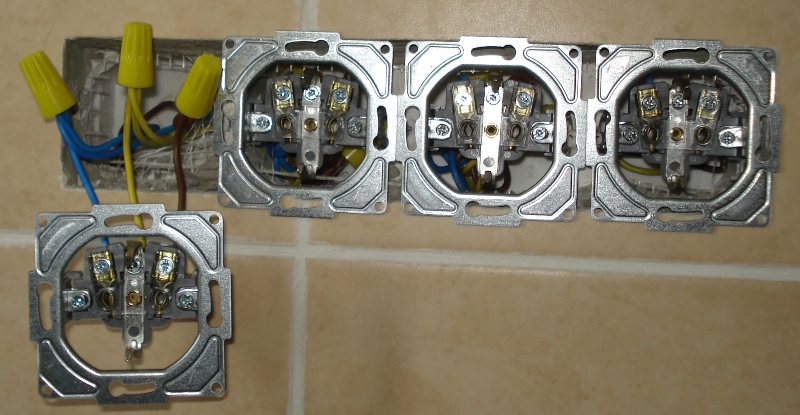
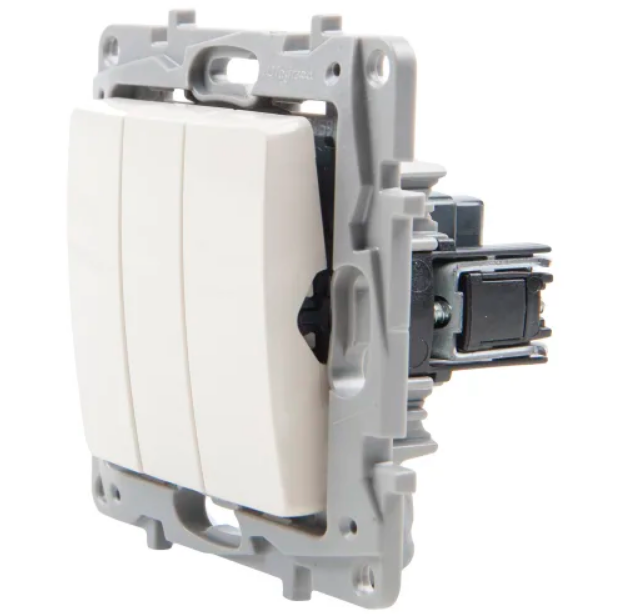
The connection of devices to the power cable must be safe and reliable. Each outlet must have a housing to protect it from electrical current. Hanging ones have their own box. To install the built-in, socket boxes are used. They are made of dielectric materials, securely fix the device in the wall, prevent moisture ingress and are fireproof.
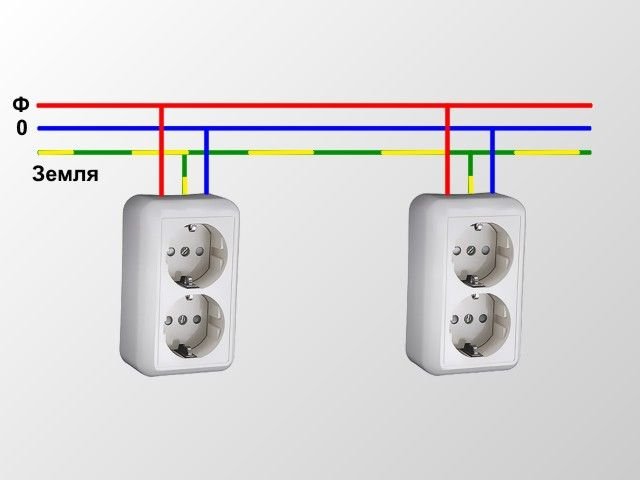
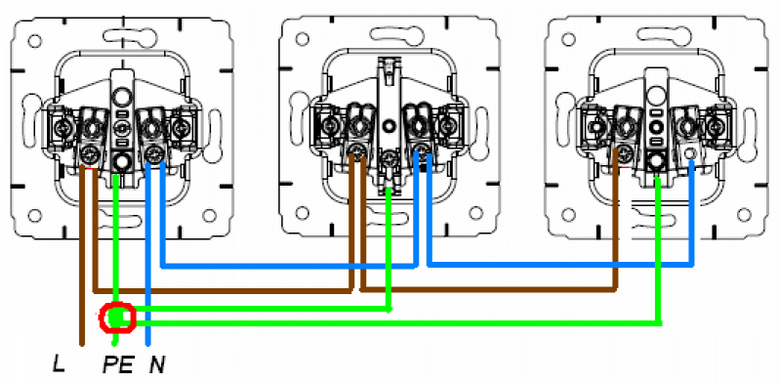
Connection of several sockets is carried out with a three-core cable. The first is connected to the power cable from the junction box. Then all the sockets must be connected together. In this case, all three cores are connected by a loop - phase, zero and ground. The connection on one terminal of the PE conductor reduces reliability and degrades the contact. Therefore, the ends of the ground wire are crimped to the branch terminal. This place is insulated with a cap. The terminal must have a rectangular washer.
Grounding is installed in each socket, there is enough space for laying wires. This method is considered reliable and guarantees protection. It is indispensable when additional installation of several outlets is required. Eliminates large-scale work. It is used under light loads in an apartment or house, under normal conditions.
The rule of arrangement of electrical installations prescribes to prohibit the connection of the PE conductor to a break. For the safety of a person and his home, it is important that the wiring meets all standards and requirements.
The procedure for installing the loop
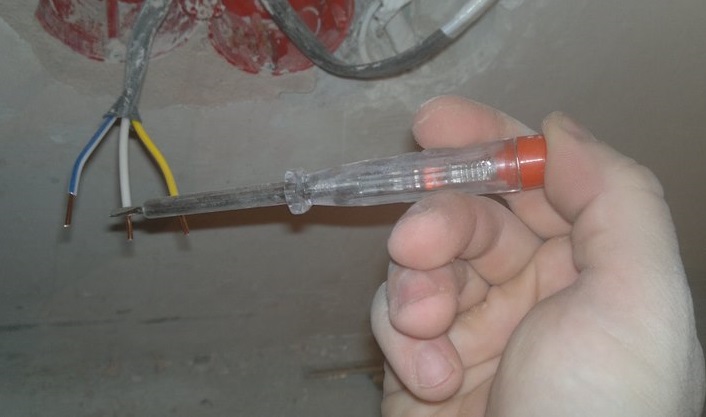
All work requires a professional approach and compliance with safety regulations. You need to know how to properly connect an outlet group. Before starting, it is necessary to de-energize the entire apartment in order to disconnect both the phase and zero. The absence of voltage is checked by an indicator at the place of work. Installation is carried out in the following sequence.
- Site marking and preparation.
- Shtroblenie walls.
- Laying the cable from the junction box to the first socket.
- Preparing the wire for the jumpers.
- Installation of socket boxes.
- Prepare branches to connect PE conductors.
- Line installation and laying of wires.

Correct connection of the socket loop through the wire connection in the PPE cap - Connection of neutral and phase conductors and grounding conductors.
- Fastening of working elements in a socket box and installation of front covers.
The quality of the installation depends on the types of contact elements. Models with a flat-spring method of connection are considered reliable. In an extreme case, it can be a plate clamped with a bolt. The cable underwater to the outlet should protrude no more than 80 mm beyond the wall surface. It should be shortened if necessary.
The braid of the cable is removed, the wires are bent to the sides. On the left is the phase, on the right is zero, in the middle is the ground wire. Their ends are exposed by 10 mm using an insulation stripper or a knife. The socket with self-locking spring terminals simplifies operation. It is enough to push the stripped end of the wire into the hole until it stops.
Then it is necessary to check the reliability of fastening of all cores with a pulling motion. First of all, the reins are packed, and the whole structure is inserted into the socket box, pre-fixed on the sides with screws.Check the horizontal level according to the level, then the screws are finally tightened. The last to be installed is the front panel, the overlay frame.
Sockets can be connected with a low-power electrical loop. This method is justified if you urgently need to add a couple of additional outlets. The operation of powerful devices requires the installation of a separate terminal. The amount of energy required for household needs is increasing, the requirements for the quality of wiring and the reliability of sockets are increasing.

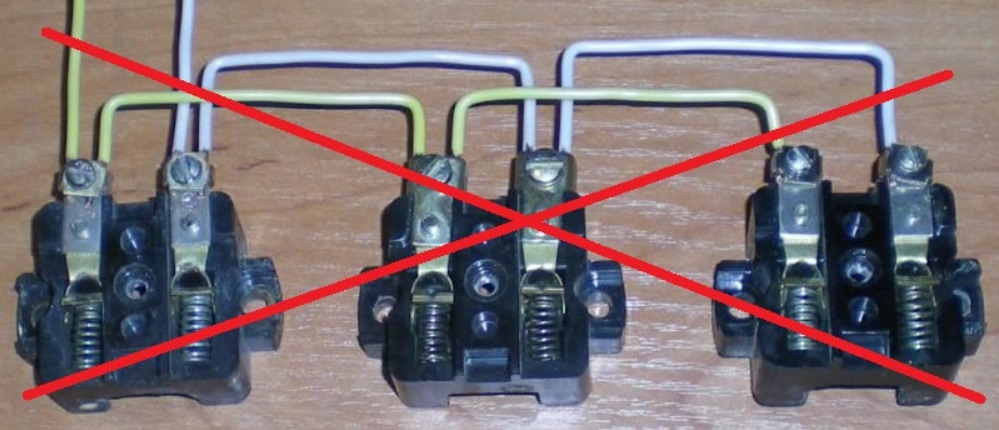
On the diagram, the phase wire and ground are mixed up
write that the PE wire cannot be broken, but in the video you will violate the PUE, connect it with a loop through the screw, and not with a tap ... ...