The hob is a compact analogue of a stationary stove. The panel will not spoil any interior solution, because it does not stand out, the headset cuts into the countertop like a sink. The peculiarity of the inductive glass-ceramic surface is that it itself does not heat up, but transfers heat directly to the dishes.
Preparatory stage for panel installation
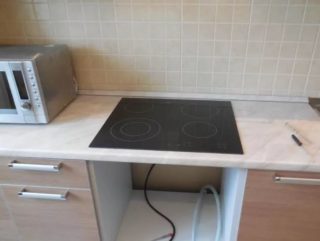
The idea of installing a hob should be constructively considered at the design stage of the power supply wiring. This allows you to select the model, wires, appropriate in terms of power, pierce a separate channel for the cable, and install the required outlet. The purchase is preceded by an analysis of the wiring in the house or apartment. A kitchen electrical panel in place of the old stove will create a series of difficulties. Wiring in a house or apartment maintains its maximum allowable power value of simultaneously switched on devices. For small-sized cars such as "Khrushchev" - this is 5.5 kW. The choice of electrical appliances can be limited to a range of low power.
The inductive equipment program is able to independently cut the heating of part of the burners. Cooking will become protracted, the panel will lose its main trump card - heating speed. If you are unsure of the stability of the power supply, avoid touch-sensitive cookers. In conditions of low or jumping voltage, they will behave capriciously.
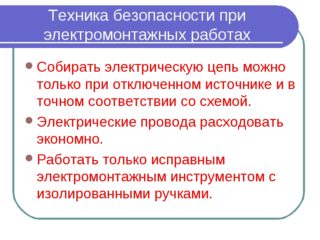
In the absence of basic wiring skills, entrust the connection to professionals. Failure to follow clear instructions and safety rules will have devastating consequences.
Materials for mounting electrical panels
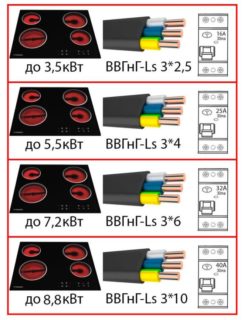
Power up to 3.5 kW allows you to use the usual 16 A European socket. Average consumption for modern functional models of hobs is 7-8 kW. In this case, you cannot do without a 40 A power connector. The rules for connecting electrical appliances determine the location of the outlet: no higher than 90 cm from the floor, below the oven or away from it. There is an indent at the bottom in case of flooding.
Plug connection for current 40 A overall - 5–7 cm. The gap between the wall and the kitchen set will be inconvenient. An alternative is to remove the back wall of the cabinet or cut a hole in it. The hob is connected to the power plug with a PVA wire or its analog, which is included in the package of the device.
The contacts of the supply wiring and panel wires are connected directly using GML sleeves or a back box. Such a connection complicates wet cleaning of the surface. To de-energize the stove, you must turn off the circuit breaker in the switchboard each time.
The choice of cable is calculated according to the formula, based on the power consumed by the device. If the thickness of the conductor is insufficient, the circuit breaker will operate, otherwise the wiring itself will burn out or provoke damage to the equipment. The conductor material is copper. Suitable types of cable are marked VVGng-Ls or NYM.The cross-section of the cores can be calculated independently by referring to the PUE table. 3 * 6 mm2 - a universal option, if a decision has not yet been made in favor of a particular model.
The ends of the conductor stripped from the insulation are formed into monolithic pins by pressing with NSHV tips. The branch circuit is protected by an RCD device or a difavtomat.
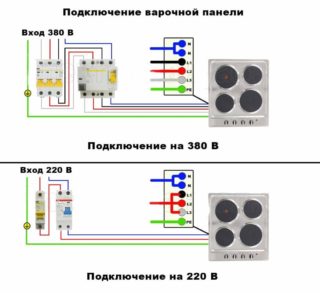
Inductive surface power supply diagram
Line connection in the switchboard
The cable outputs in brown, black and white winding are phases that come to the machine from below on the bolts marked 1, 2, 3. The zero in the blue insulation is fixed to N. The yellow-green protective conductor is taken to the ground bus.
Wiring connection node in the socket
Power pair - detachable connection. An induction hob socket usually has 3 pins. To connect the cable, it is necessary to disassemble it, strip the conductors of the PVA cable from insulation. Phase and zero are fixed on the side contacts, guided by the marking. If the wire of the plate has 4 or 5 outputs, one or two pairs are connected by crimping for a common tip. You can twist a black wire with a brown one, and a gray one with a blue one. Reception is not entirely safe, because the ground wire turns out to be half the thickness of the working conductors, which is contrary to the norms. Alternatively, the excess ends are insulated and diverted. At the same time, the electrical appliance may malfunction, and not all of the heating fields will turn on.
Instead of a plug connection, a block with two rows of terminals is used - a connector. The dimensions of the back box are 100 * 100 * 50 mm. A pair of screws from top to bottom or from left to right fix the incoming and outgoing phases, zero and ground. The disadvantage of such devices is that they do not always withstand the given power. For three-phase connections, a spring-loaded convector is sufficient (current passing up to 24 A), for single-phase - a screw (36 A) is required. The KlK-5S model has the priority of use.
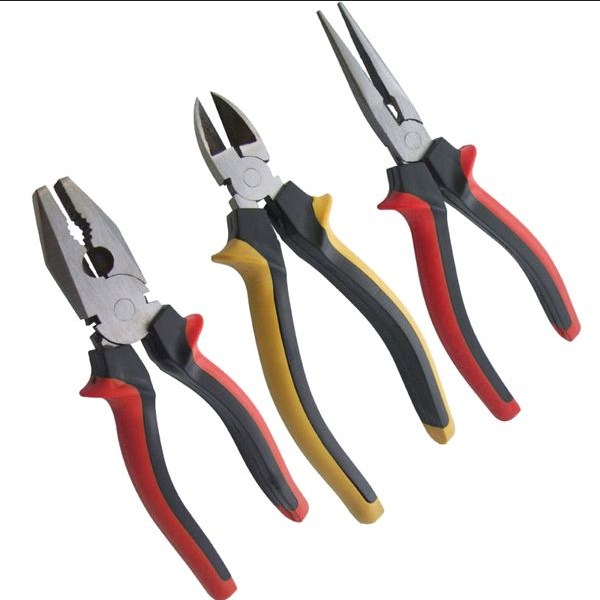
The conductors of the wiring are combined with the consumer's wires using sleeves. The diameter of tubular products made of electrical copper is selected according to the cross-section of the cable. If the thickness of the conductors at the ends of the sleeve is different, the thinner one is sealed with an additional wire. The edges of the sleeve are clamped by a press with pliers (pliers are not suitable for this task), wrapped with electrical tape or sealed with heat shrink tubing. The connected lines are neatly laid in a socket box. The method requires experience from the performer and the availability of a special tool.
Connecting the hob to the mains
Contacts come out in the lower part of the hob body: wires are released or a block with terminals is designed (3–6 pieces). The package includes metal jumpers. When connected to a three-phase line, all terminals are used. This option is rarely used, more often two phases are taken for the convenience of distribution over the burners. Two areas of medium heat will be in one phase, and strong and weak in the second. The third wire is insulated and discharged.
Free terminals with an active one are combined in a single-phase connection in parallel with plate adapters.
Typical circuits of electrical appliances of famous brands
The Bosch brand has arranged five contacts in a row: 3 for all phases of a three-phase network and 2 for zero. The ground connection is separate and is used for all types of connection. In a single-phase and two-phase connection between 1, 2, 3 or 1, 2, metal jumpers are placed, the core is attached to 3 or 2, 3, respectively. The jumper is used between 4, 5. The working zero is attached to 5.
Hansa placed the outputs on phases 1, 2, 3 on the left - jumpers are used when connecting to a network with a lower phase, but the wires are fixed to 1 or 1, 2 terminals. On the right, there is a contact for zero (4) and for grounding.
Electrolux has 4 or 5 bolts in a row. Above 3 phase or 2 and a free cell, below the neutral and ground.
A practical kitchen assistant will turn into a source of danger if the installation technology is violated. Connecting the hob to the home power supply yourself can be facilitated by choosing the correct model according to the parameters of the existing network and preparing the wiring in advance. Knowledge of the regulations and careful study of the manufacturer's instructions will ensure safety.

