Connecting an outlet is a procedure that has to be performed during construction, overhaul of residential, administrative and utility buildings. To complete this event, there is no need to call a professional electrician, everything can be done by hand. The main condition for carrying out work on the line is strict adherence to safety measures. The devices can be connected only after the apartment is de-energized. You also need to familiarize yourself with the possible connection diagrams of sockets and the rules for their placement.
- Socket device
- Common types
- Installation method of wiring and socket
- Components
- Connection type
- At what height to install the sockets
- Diagrams for connecting outlets to the electrical network
- Installation process
- Preparatory work
- Connecting wires to the socket
- Connecting the socket
- How to properly connect the socket from the socket
- Features of connection in three- and four-wire networks
Socket device
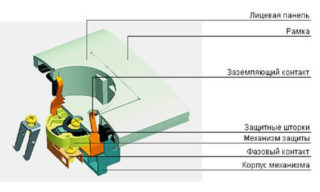
An outlet is a device with the help of which energy consumers are switched to the electrical network. Products of various types are designed for voltages of 220 V, 380 V and amperage up to 25 A.
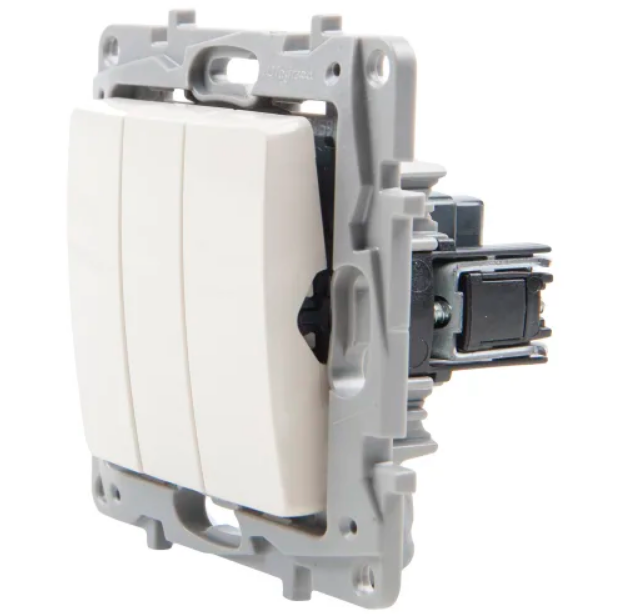
The device consists of the following parts:
- box - designed to accommodate internal parts and mechanisms, to protect them from environmental influences;
- body - serves for fastening and connecting the components;
- terminals - for connecting wires (clips or bolts);
- contacts (petals) - for contact with the plug of the supply cable;
- holding device (legs) - hold the body in the socket;
- lid - covers the insides, performs a decorative function.
Modern electric points are equipped with automatic stabilizers, residual current devices (RCDs) and displays.
Common types
Manufacturers produce goods that have a wide range of applications, intended for use in certain conditions.
By the number of consumers, the products are divided into single and double. To create blocks of 3-5 points, the sources are combined into one system.
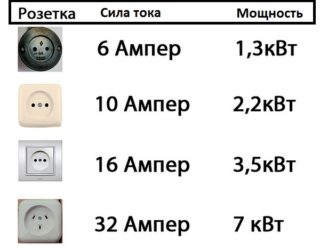
With regard to the ability to withstand the load, the devices have the following power indicators:
- weak - 1.7 kW;
- medium - 3.4 kW;
- strong - 6.6-10 kW.
The most popular in everyday life are products designed for a voltage of 230 V and a current of 16 A.
According to the level of protection against electric shock, the products are divided into ordinary and with grounding. Protected sockets have external contacts, which are brought out to a separate terminal, to which the ground wire is connected.
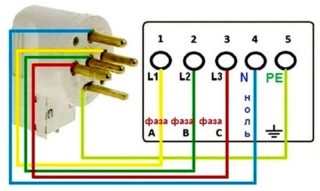
Since devices and equipment with certain properties are used in various spheres of life, the nests have a configuration corresponding to them.
The number of connectors is as follows:
- 2 - phase and zero;
- 3 - 2 phases and zero;
- 3 - phase, zero, ground;
- 4 - 2 phases, zero, ground;
- 5 - 3 phases, zero, ground.
An important characteristic is the level of protection of the outlets from moisture. This indicator is marked on the product body with letters IP and numbers.
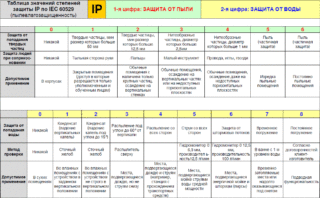
The classification according to the degree of protection is as follows:
- IP 0-24 - no;
- IP 25-40 - splash-proof;
- IP 41-54 - against weak water flows, equipped with a cover;
- IP 55 + - absolute, have a sealed plug.
The main difference between products is the way they are placed.
Installation method of wiring and socket
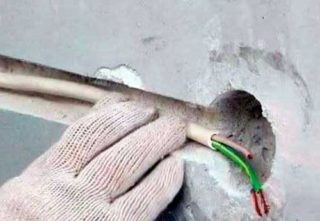
Depending on the material from which the bearing surface is made, the choice of the method for laying lines and installing devices is carried out.
In accordance with the requirements of SNiP, the following installation options are possible:
- Internal. It is used in brick and concrete buildings. With a sufficient thickness of the bearing walls, it is practiced in houses from foam blocks. Cables, junction boxes and sockets are buried in the base and sealed with mortar. The commutations are hidden, in case of their damage, the power supply is restored by opening the channels or installing a new line. Laying is carried out only in vertical and horizontal directions. The wrong option is diagonal. This approach to saving material, time and effort is prohibited by regulatory documents.
- Outdoor. It is used in the electrification of buildings made of wood, wall blocks made of polyurethane foam and plasterboard. This rule is dictated by the requirements of fire safety and the low bearing capacity of the foundations. You need to know exactly how to connect the outlet in such buildings so that the system is efficient and durable. Cables and points are fixed on the surface of the walls, openly or in channels.
Each method has its own pros and cons. The choice is made on the basis of an analysis of all factors regarding the regulatory framework and ease of use.
Components
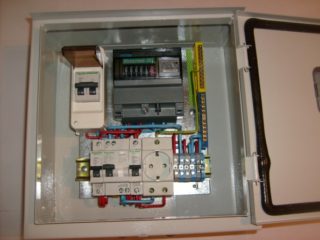
The general arrangement of the electrical circuit in a building is the same for indoor and outdoor structures.
They include the following elements:
- Introductory flap. It contains fuses, switching blocks and packet switches. One or more lines emerge from the flap.
- Cables. They diverge through the building to the end points, which are sockets and rocker switches. Powerful devices (water heaters, electric stoves) are recommended to be connected directly to the bags. The cable type is determined based on the maximum load of the household appliance. For wiring to the ceiling, a line with conductors with a cross section of 1-1.5 mm is enough. For the lower level, this indicator should be at least 2.5 mm.
- Sockets. Devices with two or three terminals are selected depending on the operating conditions. Sockets with grounding should be installed in the bathroom and in the kitchen. Where it is not planned to use powerful technology, you can mount devices with a phase and zero.
- Key switches. Products can have from one to three buttons, some models are equipped with LEDs. To avoid additional work on the laying of lines, combined devices are used, combined with sockets.
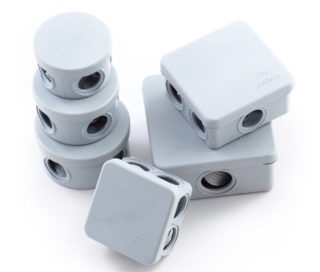
- Mounting boxes. Designed for routing lines in every room. Busbars, clamps, bolts and nuts or twists are used to connect the wires.
- Ground line and loop. A copper wire with a cross section of 10 mm or more is used as a conductor; the circuit is made of copper or iron profiles and fittings. The pins are driven into the ground by 200-300 cm.
The meter can be installed inside the apartment, in the entrance or in a special box on the street.
Connection type
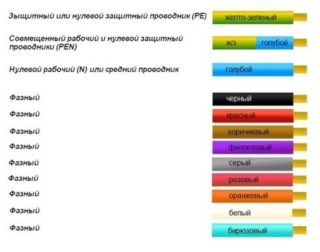
The choice of outlets in the house is determined by the type of wiring that is installed in it. In buildings of various series, cables with 2, 3 and 4 cores are laid. Labeling will help you figure out what they are for.
The color of the insulation corresponds to the following characteristics:
- red (brown) - phase;
- blue - zero;
- green-yellow - earth.
If all wires are colored the same, you must use the indicator to establish their accessory.
Before connecting the outlet, you need to determine the places for placing household appliances.
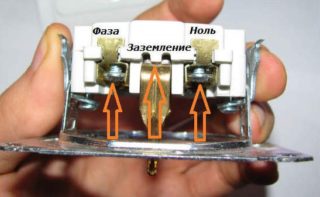
Switching can be done in the following ways:
- If there is a ground, but not connected, the zero and the phase are screwed on, the yellow-green wire is bent and isolated.
- Two phases are suitable - both cores are twisted and attached to one contact, or one of them is transferred to an adjacent device.
- Three phases. The option is the same - along the wires to the points, zero connects three contacts.
Disconnecting the sockets is carried out in cases when it is necessary to replace the product or carry out its maintenance - clean the contacts, tighten the bolts, and fasten it more tightly in the box.
At what height to install the sockets
Electrical points cannot be set wherever you want, based on the aesthetic or practical side of the issue.
There are the following standards for the placement of devices:
| An object | Distance (cm) |
| Floor | 20-120 |
| Doorways | 100 |
| Angles between walls | 80 |
| Gas pipes | 50 |
| Water and sewer pipes | 60 |
| Heating devices | 100 |
| Gas and electric stoves | 30 |
| Water taps | 40 |
Failure to comply with these parameters may result in a fine from an inspector or a complete disconnection of housing from the network.
Diagrams for connecting outlets to the electrical network
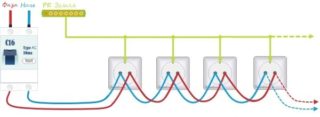
When conducting electricity into the house, the following schemes are used:
- Parallel (loop). It is used in cases where the property is equipped with a three-phase line. A separate wire is connected to each point, through which electricity is supplied. This option is convenient in that you can simultaneously connect to several powerful consumers at once.
- Consistent. It is used in houses where the cable consists of only two cores - phase and zero. In such cases, jumpers are installed between the terminals with the same poles. It should be remembered that the total load cannot exceed the power of one point.
Regardless of the choice of the circuit, you must use wires with a cross-section corresponding to the peak loads.
Installation process

Installation of sockets is a procedure that is carried out in a specific sequence.
First you need to prepare the following tools and materials:
- puncher;
- Bulgarian;
- level;
- roulette;
- indicator;
- knife;
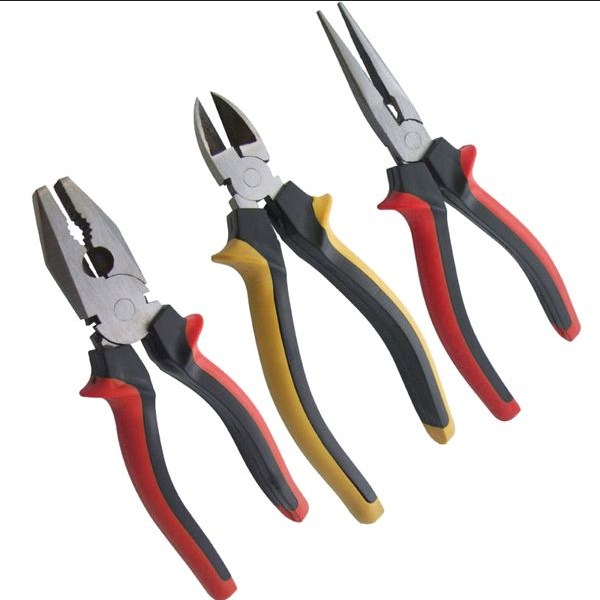
- pliers;
- screwdriver;
- pencil;
- putty knife;
- cement;
- sand;
- primer for concrete.
Protective goggles, gloves and a respirator must be worn when installing the electrical system.
Preparatory work
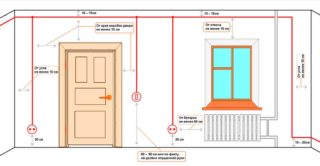
The scope of this process depends on whether a new cable will be laid or everything will be limited to replacing the outlet.
The sequence of actions when the electrification of a building under construction or its overhaul is carried out:
- Drawing up a diagram and conducting a markup. Calculate so that the holes for the mounting boxes are on the same vertical or horizontal line.
- Shtroblenie walls. Grooves are made for the cable and round holes for the points. After drilling, they are connected to each other to install jumpers. The openings are cleaned of dust and crumbs, treated with a primer. If the external method is chosen, channels or fasteners are installed - plastic boxes, metal or plastic pipes, ceramic insulators, strings.
- Installation of socket boxes. The plugs are broken off from them, after which the products are coated with a solution and inserted into the holes. Excess putty is removed.
When the mortar is completely cured, it is sanded flush with the wall surface.
Connecting wires to the socket
To prevent damage to the cable due to building shrinkage or moisture contact, it should be pulled through a corrugated plastic tube. After that, the channel is walled up in the grooves. The ends of the cable are led out into the junction boxes so that there is enough material left for the connection. Further actions are carried out after the solution has completely hardened.
Connecting the socket

Before connecting the wires to the outlet, you need to make sure that they are not energized. To completely protect yourself, you should turn off the main switch.
After that, you need to do the following:
- Remove the insulation from the cable, and then from the cores, exposing the metal by 10-12 mm.
- If the wire is copper, twist it and solder it. This will prevent it from oxidizing.
- Connect the ends of the conductors to the holes on the terminals. Tighten the bolts as tight as possible.
- Insert the socket housing into the back box. After alignment, fix it with the presser feet.
- Install the cover. Check the tightness of the fastening with a plug - insert it and pull it out of the connectors several times.
After that, you can supply electricity and use the point.
How to properly connect the socket from the socket
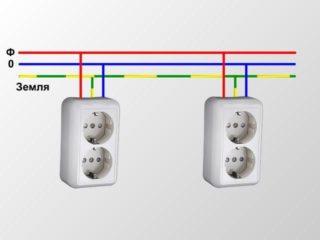
The most popular way to connect outlets is by installing jumpers between their terminals.
The advantages of this solution are as follows:
- ease of implementation;
- there is no need to grind walls for a new line;
- speed of carrying out;
- minimum consumption of materials.
There are also disadvantages:
- a large number of connections contribute to heating the circuit;
- there is a risk of wire breakage and short circuit;
- you still have to drill and cut - you need to make channels and a hole for the glass.
If you carefully follow each stage of the work, the structure will turn out to be strong and safe.
Features of connection in three- and four-wire networks
The presence of a three-wire network in the house means that, in addition to the phase and zero, there is a ground line. To connect to such a wiring, you need to purchase sockets with three terminals. Phase and zero are attached to the extreme contacts, and the ground in the middle.
Four wires mean two phases are fed into the house. The second conductor can be used to directly connect double points. When connecting to a single socket, it is advisable to isolate and bend the second phase, since two cores will not enter into one hole.

