An unusual and affordable solution for fencing is the installation of a 3D fence. This design has a certain volume and forms a kind of relief. Sections are made from ordinary steel rods, so their cost is very affordable.
What you need to know about 3D fences
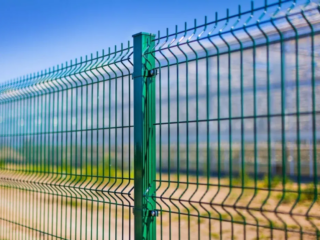
The most beautiful option for fencing is a metal lattice with forged attachments. This model is very expensive. A voluminous fence is a kind of compromise between low price and higher aesthetics.
The basis of the 3D fence is an ordinary metal mesh - a gitter. It is welded from a steel bar, giving the flat section a relief. In order for the material to last a long time, the steel is protected with a layer of zinc. A more modern option is nanoceramics. This layer is stronger, more resistant to water and snow and lasts longer. Polymer powder paint is also used for protection.
The fence needs to be repainted periodically. If damage, scratches, chips are found, processing is necessary immediately.
The sections are available in different sizes. For fencing garden and summer cottages, the most popular models are used with the following parameters:
- dimensions - 2.5 * 1.03 m. since the mesh is translucent, this height is quite acceptable;
- in section 3 V-shaped waves, creating a relief;
- diameter of rods - 4–8 mm;
- the sizes of the cells are different, for the fence it is better to have options with cells of 100 * 50 or 200 * 50 mm.
ZD fence refers to air and light permeable structures. No permission is required for the installation of such a fence.
Advantages and disadvantages of the design
Installation of a 3D volumetric fence provides a number of advantages:
- Compared to a conventional mesh fence, the Hitter version looks much more aesthetically pleasing.
- Fencing serves from 20 to 50 years, subject to proper care.
- Since the structure is transparent to light and air, such a fence visually makes the site more spacious.
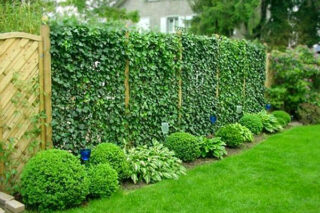
- This is a great base for a hedge if the owner still wants more privacy.
- Fence sections are additionally reinforced with vertical rods with horizontal rods. This extends the service life.
- The canvas is produced in various standard sizes.
- The section weighs very little. It is easy to transport and install. There is no need to install massive support posts for the fence. Installation of a 3D fence is very simple.
The cons are related to the characteristics of the material:
- The fence needs to be looked after.
- The net is transparent, so any passer-by can observe the inhabitants of the house.
- The fence protects against animals, but does not impede human entry. Its mechanical strength is low.
The three-dimensional fence is stronger and more resistant to wind loads. It is allowed to mount both internal partitions from a gitter and from the side of a street or a busy highway.
Preparatory work
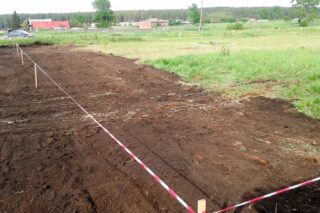
Installation of a country 3D fence begins with preparatory work. These include site marking and material calculation. They do it at the same time.
- Determine the boundaries of the site. If bushes or weeds grow in these places, the plants are uprooted.
- They mark where the gate and wicket will be located. Pegs are driven into the ground at the place of installation of the pillars for the gates.
- Pegs are installed at the corners of the future fence. Tie them with a cord.
- The markings start from the pegs that mark the gate. Intermediate stakes are placed at a distance of 2.5 m from each other.
- After marking, it is easy to calculate the amount of material by subtracting one from the number of pegs.
There is no need to lay a foundation for a light fence. More often, the mesh is attached to hammered or screwed-in metal posts.
Required materials, tools
The following tools and materials are required for the installation of a 3D summer cottage fence:
- crushed stone, sand and cement for the manufacture of concrete;
- ravine sand and coarse gravel for the pillow;
- profile or round pipe;
- hacksaw for metal or grinder;
- screwdriver;
- level and plumb line;
- fasteners - supplied with sections.
You will need auxiliary equipment: a shovel, a bucket, a container for mixing concrete, a construction mixer.
Step-by-step installation instructions
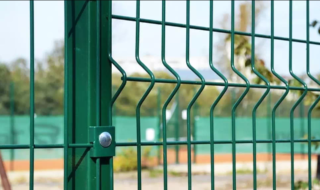
Do-it-yourself fence from a metal 3D mesh begins immediately after marking. The work is divided into 2 stages: installation of support pillars and fixing the sections to them.
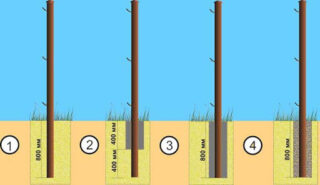
Driven piles are often used for support. However, this is not always possible. The standard height of the fence in the country is 2 m. This means that the post must be buried 1.2–1.4 m into the ground. It is rather difficult to drive such a post into the ground without using machinery. Digging a hole and concreting is easier.
- Cut the pipe into pieces of the required length.
- Trenches 1.4 m deep are dug at the marked places.A layer of sand and crushed stone 20 cm thick is tamped at the bottom of the pit.
- The post is placed in the hole and fixed in an upright position. The verticality is checked using a plumb line.
- The pit is poured with concrete. A plug is immediately placed on the post. Moisture getting inside the pipe contributes to the appearance of rust.
- The fastening of the 3D fence to the posts begins 1 week after concreting. During this time, the material has not yet gained working strength, but it has already grabbed enough.
- How to attach a metal 3D fence to the posts depends on the height of the fence and the configuration of the product. Most often, proprietary fasteners are used, but in extreme cases, bolted connections or welding can be dispensed with.
- At a height of up to 2 m, 3 clamps with fasteners are put on each rack. They retreat from the ground by 5-7 cm.
- Insert the section into place and secure with staples. You can cope with this work alone.
The mesh goes on sale painted. If desired, you can re-paint it in any suitable color.
Painting should be done regularly to protect the material from rain and snow.


