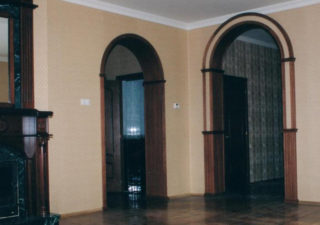
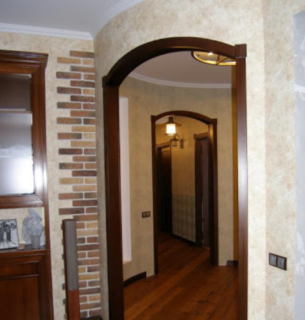
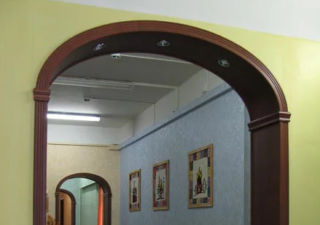
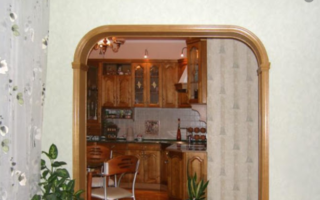
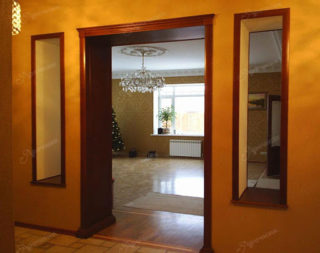
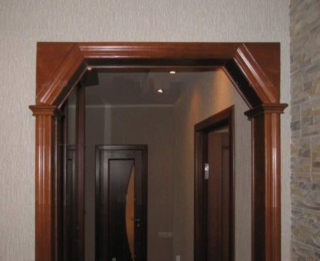
Architectural arched structures are performed in blind and open doorways, they frame the spans between the columns. The vaulted structure works on a thrust in both directions, it is arranged symmetrically relative to the central axis vertically. Despite the complexity, house owners make a drywall arch with their own hands to emphasize the individuality of the home.
Varieties of arches
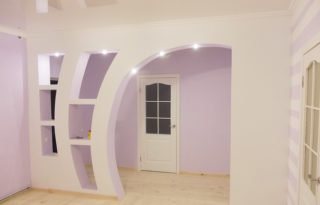
The arch is a curved overlap of a smooth contour, while the structure performs a decorative function or is a load-bearing element. A distinctive detail of the curved frame is the vault, its shape can be different.
Varieties of arched arcs are performed:
- symmetrical;
- asymmetrical.
An example of the second type is a semi-arch, while one side is made in the style of the classics, and the other is made in an original form, which differs in outline.
In an arch, the load force is transmitted along a tangent line, in contrast to a beam, in which rectilinear mechanical stress occurs. The arc is compressed more than stretched, and a thrust reaction is obtained.
Before making a drywall arch, you need to take into account that with an increase in the height of the arch, the horizontal pressure decreases.
Classic
A sophisticated type of plasterboard or wooden structure involves framing in the form of an arc with an imitation of a castle brick in the middle of the frame. Capitals in such a structure are made only in vertical sections or in front of the heels of the arch.
The correct radius and rounded configuration are the main differences between the classic interior overlap above the door. Several arches are placed side by side; for this, blind openings are visually framed in order to obtain a beautiful and comfortable view of the room.
Modern
On a semicircle with a large development, clear sections of the transition from rectilinear segments to a curved arc are noticeable. The Art Nouveau style in the arches lowers the height of the opening, in contrast to the classical version, the configuration is a small segment of the correct circle, for which a slight rise is made.
Often this configuration is repeated when installing two-tiered ceilings in order to highlight separate zones without violating the integrity of the room.
False arches on blind openings in the wall visually increase the space, the room gets individuality and sophistication.
Ellipse
The interior vaults of the ellipse configuration are performed with different arc rise. If the radii of the large and small semicircles differ little, then such an arc resembles the classic version of the arch. Elliptical structures are present in various interior styles due to their unobtrusive originality. Elegant vaults are used in low-rise rooms.
Romance
The structure of the arch includes strips - small transverse parts along the length of a straight section. The elements improve the appearance of the structure, but also add to the cost of the salary, since the work takes a lot of time and skill.
An arch in the style of romanticism is made with an opening width of at least 80 cm.If such conditions are not present, other types of vaults are installed. The rounding at the ends should be in the range of 27 - 30 cm.
Portal
It involves the installation of capitals, which are located along the entire height of the vertical posts, the horizontal section is equipped with cornices, friezes. Sheer posts can be made in the form of columns with rustic stones and pilasters.
Simple forms require minimal labor and materials, portal-type vaults are used in different interiors, often placed in narrow doorways.
Trapezoid
A trapezoidal arch is suitable for interiors with simple decoration, small apartments. Trapezoidal framing separates areas such as the living room from the cooking space. Such ceilings are suitable for eco-style, when the interior does not imply many complex shapes and decorations, moderation is welcomed in the decoration.
Preparation and measurements
Do-it-yourself installation of an interior plasterboard arch begins by taking the dimensions of the opening. During operation, the obtained values are also regularly corrected for accurate installation in the opening.
Template preparation procedure:
- measure the width of the span and find its center;
- determine the radius of the future structure;
- transfer the dimensions to cardboard, draw a circle using an impromptu compass;
- the template is applied to the drywall sheet and cut out.
The marking of the arch is done on two sheets, while they must completely coincide. A rectangular section is cut out along the thickness of the wall, which will subsequently be bent. The axis of the arch is chosen so as to obtain minimal compression, in which case the arch will turn out to be strong and stable.
Necessary tools and materials for work
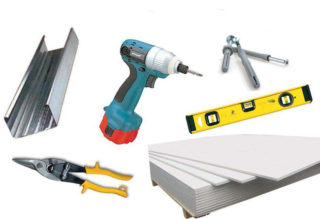
All devices are prepared in advance so as not to be distracted by searches. Drywall is chosen with a thickness of 6.5 mm so that it is more convenient to bend it. You will need CD, UD profiles, ES suspension brackets, which are used for the step-by-step manufacture of the frame.
Required tools:
- drywall knife;
- tape measure, level, plumb line;
- screwdriver;
- iron scissors;
- screwdriver, pliers, hammer;
- spatulas, mesh machine, roller, paint container.
Self-tapping screws "flea" are used to connect the profiles, and drywall is fixed to the metal with self-tapping screws 25 mm long. The staples are fixed into the wall with self-tapping screws with plastic dowels 8 x 100 mm in size. To align the edges, place plastic corners that can bend. Finishing will require putty, primer, serpyanka mesh, latex paint.
Drywall arch
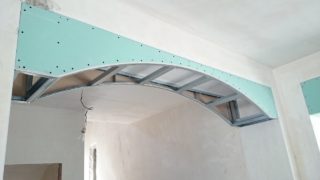
The frame made of a galvanized metal profile serves as the basis for the installation of plasterboard parts of the arch. Cut 2 guide pieces along the width of the span and attach them to the wall at the top. On the sides, 2 profiles are mounted, but their length depends on the previously cut arched template. Such profiles are fixed to wooden walls with screws 50 mm long in increments of 10 - 12 cm.
Before installation, the arched metal profile is cut with scissors so that the cut does not reach the end, while the part could be bent with an arc. It is attached to the wall with a solid base down to make an emphasis for mounting a rectangular part. The profiles are shifted inward along the width of the wall at a distance of 6.5 - 7 mm so that the installed arched plasterboard parts are flush with the plane of the wall.
Made of wood
The arch frame and the covering itself are made of wood. Such designs will require bars with a cross section of 40 x 40 mm and plywood for arched parts. According to the instructions, all parts are treated with linseed oil or antiseptics to prevent the destruction of the arch over time. An arc of plywood is cut out with a jigsaw.
Do-it-yourself work on making an arch from wood requires a certain skill. The edges and sawn surfaces are cleaned with sandpaper so that the raised villi do not violate the exact dimensions of the product when joining. For fixing, self-tapping screws for wood or screws are used, the length of the hardware is chosen depending on the place of attachment.
Brick
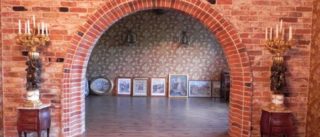
First, brick pillars are placed on both sides of the opening, if such a structure is provided for by the design. For laying the vault, a metal template is made, which is installed on supports in the opening. The pattern is welded from reinforcement and a strip of metal, which is bent in the desired radius.
The brick is laid out on a curved base so that the seams at the bottom of the template are 6 - 8 mm, and slightly diverge upward. Stones are laid, starting from the center, to obtain an even arrangement to the edges of the arch.
The metal welded template is dismantled after drying and strengthening of the masonry (1 - 2 days) to prevent destruction. In the process of work, the seams are clogged with mortar and embroidered with a special device.
From a profile pipe
The use of a square or round pipe speeds up the installation of the structure. Such structures are placed on spans outside the building so that the arch can resist wind forces.
Requirements for bent pipe vaults:
- the section of the profile is selected so that the structure looks harmonious in the overlap of a large or small span;
- the moldings are bent on special machines, while they do not allow wavy sections and breaks along the length of the arc;
- use the same profile in one design so that there are no distortions due to the different mass of parts.
Tube bending machines give the most accurate results, but the owner cannot purchase equipment for one-time work. It is better to order bending of identical arcs in a metal workshop, and cut out rectangular parts with your own hands.
Other materials
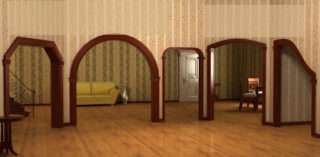
Manufacturers make ready-made decorative arches for interior spans. Experts measure the dimensions of the products at the installation site and prepare the design in accordance with them. In the customer's house, the arches are placed in the opening in a short period of time.
Types of materials:
- MDF panel coated with a laminate or veneer, for end pieces and platbands, a thickness of 16 mm is used, and radius elements are made with a thickness of 8 mm;
- there are arches made of natural wood, for example, walnut, beech, ash, oak;
- plastic products are cheap and diverse in appearance.
Finished products attract the customer by the fact that fitting, cutting is excluded, so there is no dust and debris.
DIY instructions for installing an arch in a doorway
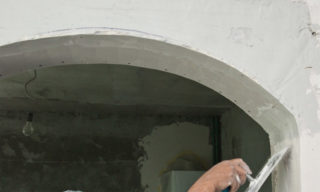
After the frame, the side walls of the vault are placed, in which the arcs of the required radius are cut.
Further step-by-step instructions:
- Parallel cuts are made on a rectangular piece of drywall to bend it into an arc, cut through the top layer of paper.
- Turn the strip upward with notches and apply it to the arched span, gradually forming the desired shape without undue effort.
- The part is fastened with self-tapping screws on both sides of the arc after 10 - 12 cm, moving from the center to the edges; for fixing, a screwdriver with adjustable twisting speed is used.
If a person makes an arch for the first time, you need to choose simple shapes without intricate details. After installing all the elements, the edges of the arch are trimmed with corners to align the line.
Finishing
All surfaces of the vault are covered with a plastic plaster mesh. Thick places are leveled with a starting putty, and thin layers are applied with finishing compounds. Take ready-made solutions in buckets or dissolve dry mixtures in water.
After drying, each layer is sanded with special nets, first apply No. 60, then switch to No. 120 or 240. After applying the nets, the surface must be primed before applying the next layer of putty or paint, use a roller so that no brush stripes remain. A dye is added to the white color to obtain the selected color.

