Despite the development of new technologies and the invention of efficient heating devices, Russian stoves and their varieties do not lose their popularity. These are rather bulky structures, but in autonomous mode they warm the house well, you can cook a lot of delicious dishes on them. The brick walls of the hearth do not always fit into the interior. In this case, you can paint the stove in the house according to the style of the room. Here you need to make the right choice so that the new coating is practical and durable.
Why painting is needed
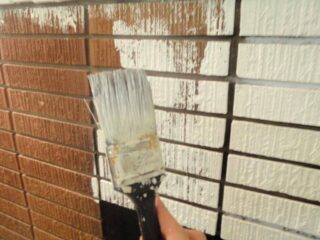
The interior of the home must be ergonomic, presentable and efficient. This applies to every element of the environment, otherwise the desired result cannot be achieved.
The decision to paint a brick oven in a house is based on the following reasons:
- Aesthetic component. Correctly selected paint will well mask the red brick, allowing you to achieve the perfect combination with furniture and decoration.
- Accuracy. The application of paint makes the surface monochromatic, allows you to close the characteristic pattern of the masonry in the form of a lattice, which is not to everyone's liking.
- Saving time, effort and money. If you paint a brick oven in a wooden house with high quality, then you do not need to plaster it first.
- Enhanced security. The solution fills all cracks and cracks, prevents the growth and appearance of new such defects.
After hardening, the plaster solution acquires the properties of thermal insulation. This will increase the heating time of the walls and reduce the total heat capacity.
Types of paints
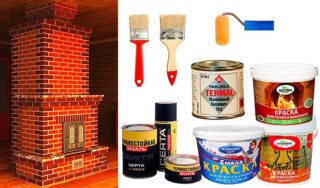
The trade network offers a wide range of paints and varnishes that can be used to paint a brick oven in a house without plastering.
- Enamel. Differs in layer density, strength and shiny surface. Looks good, washes easily, but tends to crack.
- Oil. It is considered the best option for interior painting. The compositions are well applied, lay down evenly and smoothly. They are resistant to high temperatures and have high protective properties. The disadvantages are long drying and long-term preservation of an unpleasant odor in the room.
- Heat resistant varnish. The substance has a positive effect on the strength of the outer layer of the walls. The work uses colorless and powder-pigmented brands of compositions. Smooth gloss looks impressive, but requires careful handling.
- Drying oil. Time-tested remedy with antiseptic, strengthening and decorative properties. The solution is inexpensive, retains the color and texture of red brick, with a slight darkening of the shade. The surface remains viscous, and therefore it should be varnished.
To paint a brick stove, you can come up with ideas yourself, ask friends or get acquainted with the finished work. There are no rules in this regard, only their own priorities.
Criterias of choice
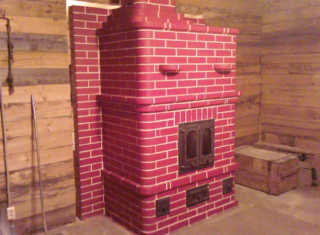
The criteria for this issue are as follows:
- lifting cost in finance;
- smooth texture on which dirt and dust will not accumulate;
- color suitable for the interior;
- matching furniture and finishes;
- lack of excessive variegation;
- the ability to do it yourself.
As a rule, there are no problems with the choice and process of staining.
Requirements for stove paint compositions
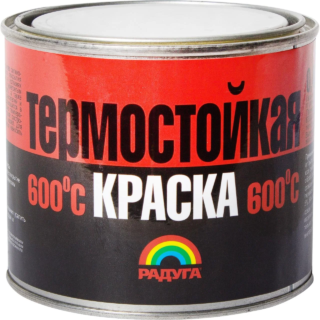
In addition to purely aesthetic properties, means for facing brick ovens must have certain technical characteristics:
- resistance to temperature changes;
- immunity to extreme heat;
- resistance to moisture and detergents;
- long service life;
- drying speed;
- lack of unpleasant odors;
- ecological cleanliness;
- Fire safety;
- color preservation.
Manufacturers indicate step-by-step instructions on the rules for using the material on the packaging. This information should be carefully studied when purchasing and before using the solution.
Special paints and varnishes for the oven
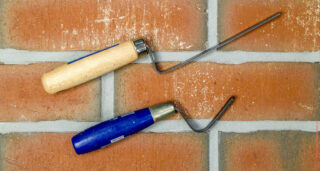
If you do not want to bother yourself with the search for goods, you need to contact a specialized store that sells means for stove business.
There you can buy the following compositions:
- Organosilicon. Glass and sand dust is used as a filler. The coating is durable, abrasion resistant and attractive shine.
- Heat resistant acrylic. Resins used in products in combination with polymer fillers and hardeners, when cured, form strong surfaces that are immune to thermal expansion.
- Alkyd emulsions. An excellent option for facing home hearths. The mortars are practical and durable; to create an even layer, two or three layers will be required to cover the red brick.
To paint the seams between the bricks on the stove, you need to purchase a clay primer and a composition to make it smooth.
Self-preparation formulations
If you have available materials left over after repair and construction, you can make painting staves yourself and almost free of charge.
Simple homemade remedies:
- Chalk and lime based. The solution is made with a composition of 1 liter of chalk, 1 liter of lime, 1.5 liters of water, 200 ml of wood glue and 20 g of blue. To change the color of the lesion, before whitening, add 50-100 g of pigment to the solution.
- Natural varnish. Take 1 liter of egg white, 1 liter of milk, 100 ml of brick dust. After application and drying, the varnish must be coated with linseed oil. This will protect it from contamination and the release of a specific odor.
The quality of homemade formulations will be lower than that of purchased ones in many respects. Repair of such a coating will have to be done more often.
Painting technology
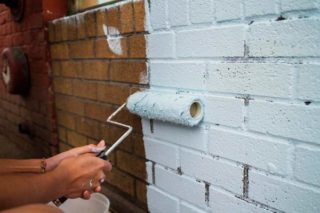
You can paint the stove after it is completely dry and the first firebox is installed. Work should be done at room temperature after wet cleaning.
To work, you will need the following tools:
- a hammer;
- Bulgarian;
- scraper;
- roller;
- bath for solutions;
- several paint brushes;
- spray gun (allows you to achieve the desired result with a minimum waste of time and effort);
- ladder;
- protective accessories (goggles, gloves, respirator).
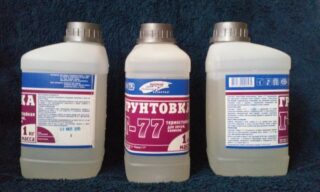
List of materials:
- paint;
- ingredients for self-preparation of the solution;
- primer;
- mixture for sealing defects;
- mounting film;
- sandpaper;
- cardboard or plywood.
The first step is to prepare the foundation:
- remove old plaster, tiles or other finishes;
- get nails, dowels, screws, wire out of the masonry, if necessary, cut them off with a grinder;
- beat off or scrape off the remnants of the masonry mortar:
- cover up holes and cracks;
- process the base with sandpaper to increase adhesion;
- wipe the surface from dust;
- treat bricks and seams with deep penetration impregnation;
- prepare materials for protection, floor, hob, furniture and walls from possible splashes;
- if required by technology, melt the braziers to heat the object to the desired temperature.
After the readiness of the workplace, tools and materials, you can start painting.
This process is quite simple and has the following features:
- The solution must be mixed immediately, since performing this process in portions is fraught with a mismatch of shades on the surface. Manufacturers indicate the consumption of material on the container.
- The brush gives texture to the outside of the hearth, and the roller distributes the paint evenly over the entire surface.
- It is necessary to press the tool with sufficient force to ensure that the solution is rubbed into all the unevenness of the walls of the oven.
- To achieve uniformity, the coating must be applied at least two coats. Then the decision on the next pass is made after examining the current result of the work.
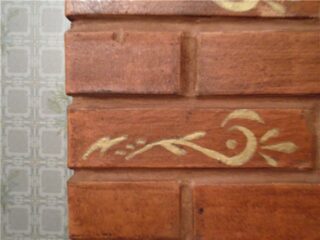
- To make the hearth more attractive, you can decorate it. Everything here is determined by the taste of the owners. Paintings, patterns, graphics, abstract, fireplaces with burning wood are applied to the facade. You need to use the type of paint previously applied.
You can heat the hearth a day after the decorative layer has completely dried.
How often should you paint in the future
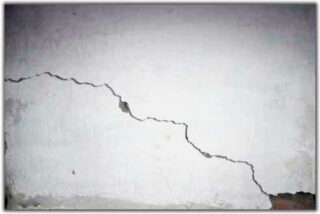
The term for renewal of the coating is determined by the degree of its wear.
Signs:
- cracks;
- detachment;
- dark deep spots;
- loss of color;
- strong indelible dirt.
Often the reason for the new staining is the renovation of the interior or the obsolescence of the hearth.
Masters do not recommend using coloring agents for metal and with metallic substances in the composition - they are not able to maintain their color and quality at high temperatures. Natural lacquer on milk costs almost nothing, but it can emit a corresponding smell that not everyone will like. Semantic images are only at first pleasing to the eye, but after a couple of years they get bored, which forces us to replace the finishing of the stove.


