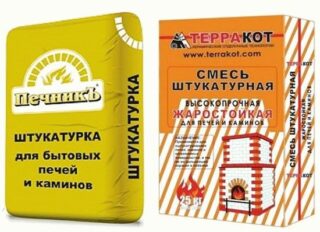
The brick oven is plastered after the masonry has dried. The layer is laid as a decoration or as a base for finishing with tiles, stone, tiles. Use home-made standard sand-clay compositions with the inclusion of milk of lime, asbestos fiber, cement. You can purchase ready-made finishing mixtures in which the proportions of sand and clay for plastering the stove are observed in the factory.
- Features of plaster solutions for the oven
- Classification of plaster and requirements for it
- Simple solutions
- Complex mixtures and their types
- How to make the solution yourself
- From clay
- From fireclay clay
- With added cement
- Instructions for plastering the stove
- Tools for the job
- Surface preparation
- Reinforcement of the plaster layer
- Plastering
- Defects and their prevention
- What should not be plastering the stove
- Plaster grout
Features of plaster solutions for the oven
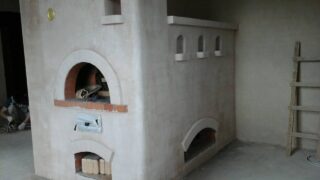
Fireplaces, stoves are plastered to improve the look and additional sealing of the masonry. In case of cracking of the joints, the reinforcing layer will not allow large cracks to form. Previously, a thick layer of material was applied to trim the surface, which subsequently cracked. Modern mixtures are divided according to the purpose of use.
Two types of heat-resistant plaster mixes are produced:
- For rough finishing. Apply about 1 cm thick.
- For finishing alignment. Its layer is 2 - 3 mm, and the composition contains fine substances to create a smooth surface for whitewashing or finishing painting.
A solution for plastering a stove can be prepared independently, it is used to decorate hearths along with a store one. Exact proportions are introduced into the composition, allowing the layer to remain solid for a long time. If you do not follow the technology, the plaster will crumble, crack, fall off in pieces, you will have to grease the stove wall annually after the end of the heating season.
Classification of plaster and requirements for it
Distinguish solutions depending on the number of components:
- simple, including clay and sand;
- complex of three or more ingredients.
Asbestos is present in the solution, the material prevents small cracks on the furnace wall. Sometimes chaff and straw are added instead of asbestos, since it is hazardous to health.
Ready-made heat-resistant plaster for stoves and fireplaces, manufactured in production, contains kaolin dust, functional impurities. Such solutions withstand temperatures up to + 400 ° C, and they are easy to prepare, you just need to add water. For 1 kg of dry composition, add a glass of water and stir, then mix again after 15 minutes of settling.
The disadvantage of a store-bought mixture is that it is used only for an hour, then the solution sets and becomes unusable.
Simple solutions
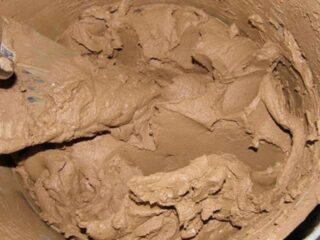
should be soft, homogeneous in consistency. Check it by putting it on a shovel, turning the blade down. If the mass slides off a smooth surface gradually, the solution is suitable for use.
A simple solution is prepared according to two recipes:
- Dilute the clay with water for a day, then add liquid to the state of sour cream. The mixture is filtered through a sieve, only then mixed with sand.After 15 minutes, check the degree of detachment so that water does not appear on the surface.
- Quick kneading method. Take equal portions of clay and sand, add ¼ of the volume of water.
For the composition made according to the second method, it is imperative to put a reinforcing gasket before applying the plaster.
Complex mixtures and their types
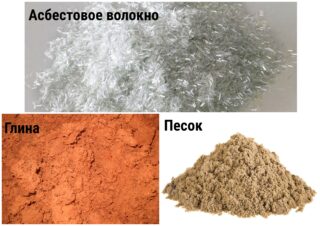
Solutions contain several components, depending on the composition, the types of complex mixtures are distinguished.
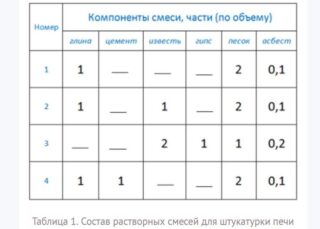
Ingredients are introduced in a certain proportion, which are determined for each variety:
- asbestos-clay-sand - the ratio of components 0.2: 1: 2 (respectively, asbestos fiber, clay, river sand);
- lime-clay-sand with asbestos - 0.1: 1: 1: 2 (asbestos, clay, milk of lime, sand);
- asbestos-clay-sand with the addition of cement - 1: 2: 0.1: 2 (Portland cement, river sand, asbestos fiber, oily clay);
- gypsum-limestone with sand and glass fibers - 1: 2: 0.2: 1 (alabaster, slaked lime, fiberglass quarry sand);
- lime-sand - 01: 1: 2 (asbestos fiber, slaked lime, river sand).
When stirring, take into account that building alabaster (gypsum) hardens faster than other components. Compositions with its inclusion are made in small portions. Materials are sieved, especially river sand. Mix well dry before diluting with water.
Sometimes stove-makers add table salt to the clay mortar for plastering the stove. Sodium chloride has no effect on the quality of the solution, but the component improves the hygienic properties of the finished layer. After hardening, insects will not start on the surface and in the crevices.
How to make the solution yourself

Use an electric drill with a mixer, or stir the mass by hand to prepare the plaster. Water is taken clean, without silt, fatty film on the surface. Rainwater is ideal, but this condition is not required, therefore, a filtered liquid is used.
Lime is an excellent plasticizer. Good viscosity of the substance contributes to the greatest adhesion of the plaster to the base. There is no universal mortar that can be used to plaster a brick stove in a house of any kind and in different operating conditions. It is better to consult with an experienced stove-maker before plastering a brick hearth.
From clay
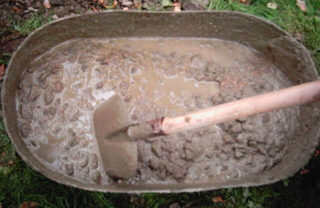
The advantages of the material in comparison with lime and Portland cement are fat content. Most often, stove-makers try to plaster a brick stove with clay, since the composition is strong, elastic and plastic, resists a sharp rise in temperature.
Cooking process:
- the clay is pre-soaked in a container for 24 - 48 hours;
- knead the lumps, mix until a creamy consistency is obtained;
- filter before use;
- sand, slaked lime, asbestos fibers, liquid clay are poured into the container, water is added, mixed.
A simple solution is stored under a lid made of cellophane, roofing material. Complex mixtures are used during the day, and with gypsum - immediately after mixing.
From fireclay clay
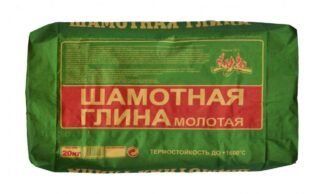
Fired kaolin (clay after heat treatment) partially loses its plasticity, but becomes heat-resistant.
Release material:
- with moisture absorption 2 - 10% (highly annealed);
- with up to 25% absorption of ox (low annealed).
Chamotte clay is poured into the trough, sand is placed on top, water is poured. Stir, cover and leave for 72 hours. After re-mixing after the indicated time, the mortar is ready to plaster the outside of the oven.
Complex compositions with glue, fiberglass, asbestos do not need to be defended, they can be plastered immediately, having previously impregnated the wall with a primer.
With added cement
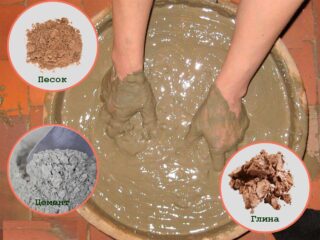
For a cement-clay-sand mixture, the M 400 brand is used.The cement hardens in 20 - 25 minutes after mixing with water, but the final process will end in 4 hours. Prepare such a volume that can be developed during this time.
Work process:
- from sand, oily clay, filtered water, make a solution in the consistency of a thick dough;
- asbestos, cement are introduced into the mass, water is added and quickly mixed.
The composition can only contain cement in the form of a binder, or lime is added to it. A mixture with added cement works well in damp places. It is used for plastering chimneys in the attic and outdoors.
Instructions for plastering the stove
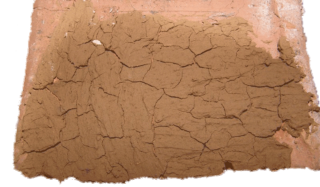
The layer is smooth or embossed with a repeating pattern. If plastering under a tile, make a layer 5 - 6 mm thick. On the protruding corners, you can put a profile with perforation, which will facilitate the removal of the plane. The elements are placed, observing the level.
Working with chamotte mixture requires skill. Such a layer can crumble, crack. A special glue is added to the composition to increase the cohesion and plasticity of the solution.
Tools for the job
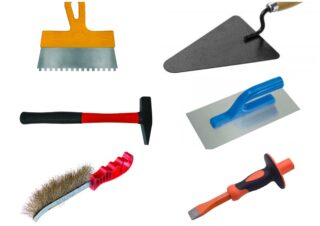
A measuring and testing tool is prepared. This group includes a tape measure, a building level and a carpentry square.
Other fixtures and tools:
- special hammer for driving nails;
- hammer for tapping on a chisel, the chisel itself;
- iron shears for cutting steel mesh;
- masonry trowel (trowel);
- small and large spatulas;
- grater, half-grater, trowel, brush with iron teeth.
Brushes of different sizes are used for priming and whitewashing. A building rule is applied to check large planes against lighthouses.
Surface preparation
Remove the old plaster, trying to completely clean the working plane from layers and dust. The new oven is also cleaned of dirt and dust using a brush with bristles or steel teeth. On the surface, the masonry joints are deepened to increase the adhesion of the brickwork and mortar. To do this, take a chisel and a cam hammer. Again dust and weakened pieces are removed after impacts, the surface is primed, reinforced.
Reinforcement of the plaster layer
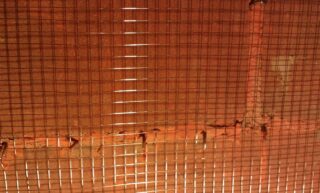
A galvanized metal mesh is pulled on the wall for plastering the stove with links of 5 - 6 cm. It is nailed with overall caps into the seams of the masonry. The interlayer is placed so that it slightly departs from the surface of the masonry; for this, small wooden spacers are used.
Sometimes the solution itself is reinforced with chopped straw, fiberglass, hemp. The mesh on the surface is completely covered with plaster.
Plastering
The thickness of the layer is made at least 8 - 10 cm, if not for tiling. Metal plaster beacons are used to facilitate alignment.
The work includes processes:
- installation of beacons on plaster;
- first plastering with a liquid solution (spraying), drying;
- the second layer of the main thickness with leveling of the plane, drying.
The layer is covered with a trowel, leveled with a grater, a scraper, smoothed with a trowel with a plug-in rubber edge.
Defects and their prevention
Cracks occur due to improperly selected concentration of plaster components. The ingredients are carefully measured to avoid this. When drying the layer, heating with a small amount of fuel is allowed. Overheating leads to crumbling of the layer.
Cracks appear when the stove shrinks. The parameters of the foundation are correctly calculated so that the stove does not move in height over time. Sometimes the integrity of the plaster suffers from improper distribution of internal hot streams. This can be avoided if the arrangement of channels and caps in the body of the hearth is correctly designed.
What should not be plastering the stove
Asbestos should not be used in Russian sauna stoves, in living rooms, since the substance releases a harmful substance into the air.The material is changed in solution with other fibers, threads.
Cement-sand mortar, which is used for other construction work, is also not used to cover up the stove masonry. The plaster will turn out to be strong, but it will be devoid of plasticity, so it will not last long.
Do not use ready-mixed Rotband. There is a point in the instructions for it, where it is indicated that the operating temperature has an upper limit of + 30 ° C. The furnace wall heats up higher.
Plaster grout
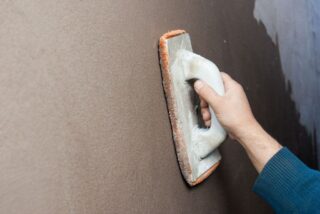
The thickness of the trowel should not be more than 2 - 3 mm. As a result, you should get a smooth and even plane.
The best composition is a solution with the inclusion of ground chamotte clay, fine sand and alumina cement (aluminate). It is obtained from a fast-setting binder after grinding limestone and bauxite clinker. If it is difficult to find such, Portland cement is used.
Chamotte will give the grout thermal and chemical resistance. You can rub the surface during the plastering process or separately.

