Decorative plaster of the ceiling allows not only to give the home the desired entourage, but also to hide some surface defects, the elimination of which could take a lot of time, effort and money. This is not an easy event, but with the right approach to business, it can well be done by hand. To achieve the desired result, you need to familiarize yourself with the types of finishing material, the technology for its preparation and application to the surface.
What is decorative plaster on the ceiling
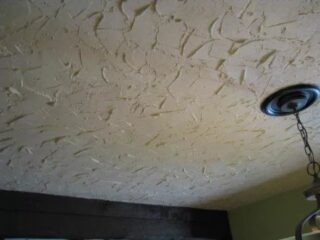
Decorative plaster for the ceiling is a viscous mass with an inhomogeneous structure. It consists of a base substance, bulk filler and binders.
Materials of this type are used as a basis:
- Polymeric. Made of acrylic resin and silicone. They are distinguished by elasticity, a wide range of colors, resistance to moisture, temperature changes, and are immune to mold and mildew.
- Silicate. They contain liquid glass and alkali, which gives them excellent antiseptic properties. The coating is highly resistant to mechanical stress, but reacts worse to temperature fluctuations.
- Mineral. They consist of lime, cement, their mixture with the addition of crushed minerals and colored clay. An interesting property is the gradual increase in strength during operation.
Additional components play an important role in the technical characteristics of the finish. They are responsible for the stability of ingredients, strength, elasticity, durability of the finish, and its resistance to the development of pathogenic microorganisms. Decorative plaster on the ceiling can include substances such as acrylics, epoxies, polyurethane, crushed stone, lime powder, preservatives, thickeners and antiseptics.
Granules or stone chips are used as filler. The appearance of the pattern and the relief of the created surfaces depend on their number and size. In the absence of fillers, the texture is created using special tools.
Plaster compositions presented in the trade network are divided into ready-to-use mixtures and dry, which must be diluted in water. The choice is made based on the specifics of the planned plan, your own financial capabilities and skills.
Composition advantages
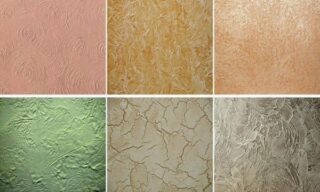
Decorative plaster is highly popular due to its many advantages.
- pliability and plasticity, allowing you to create drawings of any complexity;
- the ability to effectively and imperceptibly repair overlap defects - cracks, dents, bulges;
- compatibility with bases made of almost any material - concrete, brick, wood, metal, drywall;
- a wide range of colors and fillers;
- resistance to mechanical stress;
- resistance to mold and mildew, environmental safety;
- long service life.
The interior decoration is easy to maintain. It can be washed with rags, brushes and foam rubber using normal household laundry detergents or dishwashing detergents.
Varieties of plaster by type of texture
Conventionally, the material can be divided into the following varieties:
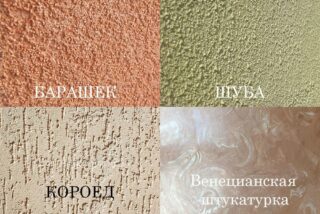
- Textured.It is the most popular product line on the market. Plastic granules, wood chips and fibers, stone chips and pieces of mica are used as fillers. As a rule, textured plaster on the ceiling imitates the surface of a rock that has been eaten away by time.
- Venetian. A mixture of stone and lime flour is added to the base. The finished surface looks like real marble, with a characteristic shine and veins, it looks representative, expensive and elegant.
- Structural. Small stone fractions are used for filling. The ceiling has a homogeneous texture with minor grooves typical of tree bark.
- Plaster. It is used without small fillers, as it is designed to create volumetric shapes with a sloping or broken configuration.
- Silk. In accordance with its name, natural cellulose, silk fiber, glue and decorative additives are added to the gypsum-based composition.
- Facade. A substance of special strength, resistant to all types of environmental influences. In apartments, it is best applied in damp areas such as loggias, balconies, kitchens and bathrooms.
The choice is made after trying on the color, texture of the material to the interior of the room and its aesthetic priorities.
Required tools and materials
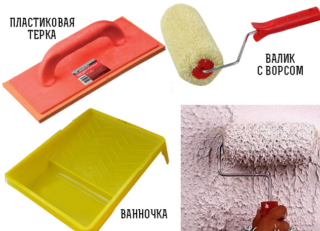
To make a decorative plaster ceiling you will need a very small and inexpensive set of tools and materials.
To complete the preparatory work and application of the composition, you will need the following devices:
- wide, narrow and notched trowel;
- drill with mixer;
- Master OK;
- trowel;
- paint brush;
- roller;
- rolling figured roller;
- container for solution and for rinsing the tool;
- stepladder with top shelf;
- protective glasses and gloves;
- construction helmet.
From the materials you need to purchase:
- the selected type of plaster with a margin of up to 20%;
- base primer;
- additional filler;
- dyes;
- finishing cladding (paint, varnish or wax);
- sponge.
The frozen solution is very difficult to wash off. You should stock up on rags, mounting tape, cellophane, cardboard, old wallpaper and newspapers.
Preparation for work
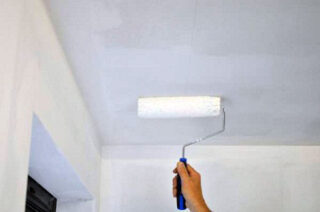
The quality and durability of the decorative coating largely depends on the preparation. It is recommended to perform the following activities:
- Examine the base for loose fragments, large depressions and protrusions, grease stains, soot and rust.
- Grind off the sagging, fill the holes with putty, clean the holes, gaps and seal them with sealant or tile adhesive. It is advisable to immediately resolve the issue of sealing in order to permanently get rid of the risk of flooding from above.
- Alternately treat the slab first with an antiseptic and then with a deep penetration primer.
This procedure applies to a relatively flat base. If it has significant differences in height, a screed is made. To do this, a zero level is determined, beacons are placed and a layer of putty with a thickness of 2 cm or more is applied. Further, the dried screed is treated with an antiseptic and a primer. The question of removing the old finish is decided in each case individually, based on its condition and composition.
DIY ceiling plastering instructions
The creation of a decorative ceiling is a step-by-step process that is carried out in a specific sequence.
- Mix the solution correctly. This should be done in accordance with the manufacturer's instructions. The use of additives at our own discretion can degrade the quality of the final product. You need to cook such a volume of the mixture so that it can be used up before it thickens. If the composition is purchased ready-made, it is enough to simply mix it.
- Apply plaster to the ceiling. You need to start from the corner farthest relative to the window in order to be able to visually control the horizontal.The mixture is applied to the surface and spread over it in wide swinging movements along the wall until the strip is completed. If the composition hardens quickly, it needs to be immediately given an invented shape. The process of creating and processing strips of plaster is repeated until the entire ceiling area is covered with it. Then you should inspect it and eliminate the detected defects.
- Carry out finishing. If necessary, sharp corners are rounded off with a grater or sandpaper. Then the decorative plane is cleaned of dust, covered with an antiseptic and a primer. After the surface has dried, it is finished with paint, glaze, varnish or wax. You need to choose a liquid that best matches the type and composition of the cladding. Water-based fluids can be applied immediately and waxed after 5 days at the earliest.
All that remains is to hang the chandelier, remove the trash and enjoy the results of your labor.

