There are many objects of different sizes and shapes, with which property owners seek to decorate it, highlight it among the surrounding buildings, and give it an interesting and original look. Weather vane is one of the options for such decorations. Despite the abundance of modern solutions, this detail of the external interior remains relevant to this day. It performs, in addition to decorative, practical functions. It is not difficult to make a weather vane with your own hands, but for this you need to decide on its structure, role and purpose.
What is a weather vane and its functions
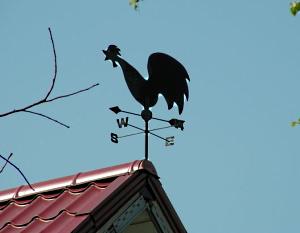
A weather vane is a device that takes a certain position and performs additional functions under the influence of air pressure on its executive parts and mechanisms. In any case, external influence is necessary for the operation of the device. With complete calmness, the wing on the roof will be just a fixed element that does not solve any practical problems. It is a completely different matter when air masses are set in motion.
The installed roof vane can perform the following functions:
- determination of wind direction;
- issuance of indications of the speed of movement of air masses;
- protection of chimneys from the ingress of foreign objects, precipitation, insects, birds and rodents, prevention of back draft;
- repelling pests using vibration and noise generated by the propeller;
- a landmark clearly visible from afar;
- decoration of the building, giving it a unique entourage.
In some cases, property owners use a homemade weather vane - a cockerel, a horse or a fish - as a talisman for housing, driving away evil spirits from it.
Device and dimensional drawings
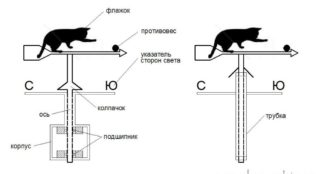
- Base with bearing. Designed for mounting on a supporting surface - pipe, roof, outrigger beam or steel pin.
- Axis. It is inserted into the bearing. Used to place structures that catch the wind, decorative fragments and other options that designers come up with.
- Checkbox. Indicates the direction of the wind. Typically aerodynamically shaped to provide the least resistance to flow.
- Counterweight. Set opposite the checkbox. It has a greater weight and size, due to which it turns as accurately as possible in the wind.
Quite often, a cross is installed on the axis under the flag and counterweight, at the ends of which letters indicating the cardinal points are fixed. A popular solution is to make a do-it-yourself air vane. Despite the apparent simplicity of the project, it requires precise calculations and diligence in assembly.
Varieties of weather vane
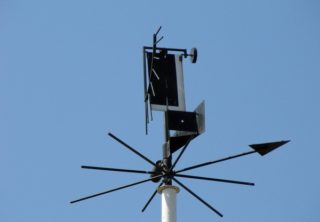
The very first weather vane was made as a device for determining the direction of the wind. Then, as improvements were made, functions for setting flow rate, movement and vibration were added. The aesthetic side of technology has also improved significantly.
There are such types of weather vane:
- Meteorological. These types of devices are distinguished by their verified dimensions and accuracy of shapes. In the first place is not the appearance, but the correctness of the readings given out. Parts are forged and welded together.
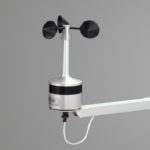
- Measuring wind speed.A propeller or sensing plate is used as an indicator. The air flow is determined by the speed of rotation of the screw or the angle of inclination of the plate. An auxiliary effect of the propeller is noise and vibration, which scares the animals away.
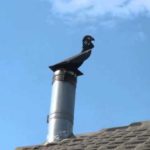
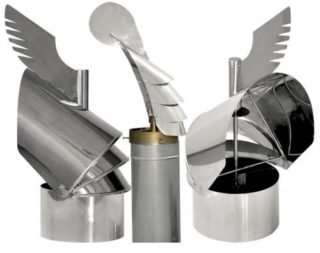
- Chimney. Devices of this type combine several functions at once. The main thing is to protect the chimney from foreign objects entering it. At the same time, a weather vane on the chimney prevents the wind from blowing into it and indicates its direction.
- Decorative. Products serve more for decoration than for obtaining any information or performing protective functions. A typical example is the cock-weather vane, which is usually installed in rural areas, but sometimes also on the roofs of city houses.
When designing, making diagrams and drawings, you should consider the size of the device and the height of its installation. In order for the weather vane to be clearly visible, it must be installed at a height of 10 m from the ground, 3 m from the roof and be at least 60 cm in length and 40 cm in height.
Materials used

There are no restrictions on the material for manufacturing. There are no rules and regulations for such products. It all depends on your own imagination and ability to handle household tools.
Materials differ in the following parameters:
- specific gravity;
- margin of safety;
- fastening method;
- the need for additional processing;
- lifetime;
- exposure to the influence of the external environment;
- presentability.
Do-it-yourself installation of a weather vane on the roof is a rather difficult and risky undertaking. Each stage must be carefully thought out and planned. As a rule, the installation of the device is more difficult than its manufacture. It is necessary to prepare fasteners and safety equipment. It should be borne in mind that a strong gust of wind can knock down a structure, pull it out of its nest, which is fraught with destruction for the roof, buildings and injuries for people around.
The most common materials for a weather vane:
- Metal. Sheet metal and stamping are distinguished by all the necessary qualities that are necessary for the manufacture of a lightweight but durable device. You can use one of the available materials - stainless steel, brass, copper. All of them have sufficient ductility for bending and forging, good strength and corrosion resistance. Here you need to take into account the methods of connecting parts. Steel needs welding, while non-ferrous metal can be soldered. But here there are restrictions on the location. Soldered products must not be placed above the chimney, as the high temperature may melt the solder. Welded devices have no limitations, but there is difficulty with assembly and subsequent polishing.
Wood Wood. Initially, all weather vane was made of wood, until new technologies made it possible to use other materials, including waterproof plywood. The tree has a number of positive qualities, among them lightness and ease of processing. Unfortunately, the resource of this material is limited to several seasons. Under the influence of moisture and ultraviolet radiation, the wood darkens, becomes covered with cracks and crumbles. If there is free access to the base of the structure, this disadvantage can be neglected, since it will not be difficult to make a new wind turbine.
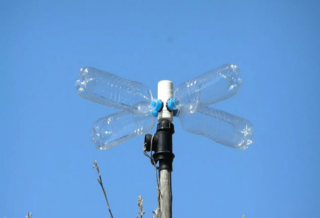
- Ancillary items. In any home there is always a lot of materials that are inherently consumable and cost nothing. These include plastic bottles, discs, containers. Polymer products are lightweight, flexible, parts can be glued, stitched, fastened with rivets and bolts. Since such products do not differ in sufficient strength, it is impractical to put them on the roof. It is better to use wooden poles or steel pipe supports as a support.They will be enough for several days of work, and then the windmill can be removed and replaced with a new one, also disposable.
Cardboard and paper should not be used to make wind turbines. These materials are best used to design and build tutorial models and templates.
Wind vane rotary mechanism
During assembly, you can use one of the following technologies:
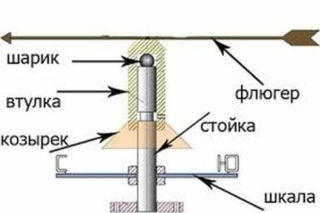
- On bearings. This method is considered the most reliable, durable and successful in terms of the absence of noise. You need to take a steel pipe with a circular cross section and press standard rotation bearings into its ends. Then the pipe is fixed on the roof, the points are welded to it. A pin or pipe is welded to the body of the weather vane, the cross-section of which corresponds to the inner hole of the pressed-in bearings. The scheme is complex but practical. The collapsible design will facilitate access to the wind turbine for maintenance, repair or replacement.
- On the ball. Pipes with different sections are used when the inner diameter is 1-2 mm less than the outer one. A steel or wooden plug is welded into the middle of the larger pipe. Then pieces of a narrow pipe are welded to the roof and weather vane. It remains to connect the fragments, having previously filled the upper part of the outer case with grease.
When choosing a method for manufacturing a rotary mechanism, you need to use the most durable and reliable parts. The wind turbine will be in operation almost constantly. The impact of friction leads to rapid abrasion of parts, vibration and loud noise. The best solution is water pipes, bicycle and car bearings.
Making a weather vane with your own hands at home
To make a wind turbine that is good in all respects, you need to take care of the tools and equipment in advance.
As a rule, the minimum set for creativity consists of the following devices:
- tape measure, ruler, caliper, track, level, protractor, marker;
- hacksaw, grinder, jigsaw;
- scissors for metal;
- welding machine, soldering iron;
- screwdrivers;
- drill.
The list can be reduced or expanded depending on the specifics of the project.
To make a weather vane, you should perform the following manipulations:
- Draw a sketch, tie it to a building or courtyard. Draw up a diagram, calculate materials.
- Apply markings on the workpieces, cut out, cut the material into parts.
- Make a base (stand for the wind turbine axis). It should be attached to a rafter, beam or Mauerlat.
- Assemble the swivel mechanism, check its performance, the absence of squeaks, jamming, smoothness of the stroke.
- Make the body of the weather vane. If necessary, treat it with antiseptics, paint. It is better to polish non-ferrous metal to a shine.
- Assemble the entire structure, perform precise adjustments and calibration.
A self-made weather vane must be periodically cleaned of dirt, treated with impregnations, lubricated rubbing and rotating parts.

