Ceiling primer provides adhesion, surface evenness and mold protection. Such construction work can be carried out independently. When choosing a composition, consider the type of finishing coating. Familiarize yourself with the application technology to avoid mistakes.
Purpose of the primer

The purpose of surface priming is to improve the adhesion of plaster, putty, paint, glue. The product covers irregularities and cracks in the base, prevents moisture from penetrating into vulnerable areas. This is especially important for individual materials. For example, according to the technology, adhesive mixtures must maintain moisture for a certain period.
The primer performs the following functions:
- even distribution of paint;
- anti-corrosion coating;
- protection against mold and mildew;
- increasing the service life of the finish;
- preventing the appearance of stains on the finish coating;
- imparting strength.
Special compounds protect the ceiling from oil, rust, soot and grease. Additionally, uniform drying is ensured without moisture loss.
Primer types

The main criterion for choosing a primer is compatibility with the material of the ceiling base. Often the surfaces are made of concrete, less often wood. The mixtures are divided into groups depending on their performance characteristics:
- Reinforcing compounds are designed to bond the substrate. Used for plastered ceilings.
- The impregnating primer is needed for loose substrates. The product contains latex, which penetrates to a depth of 100 mm. The result of processing is a monolithic base.
- Adhesive mixtures create a film on the surface. This composition can be combined with any paints.
After primer treatment, white paper wallpaper can be glued to the walls. Even after 3 years, they will not show oil or grease stains.
Ceiling primer base

The main purpose of the primer mixtures is to reduce the level of moisture absorption of the ceiling base. The absence of this stage before plastering leads to low adhesion to finishing materials and drying out.
Depending on the type of surface, one of three types of mixtures is chosen:
- Acrylic products are applied to concrete, wood, fiberglass, plaster, cement. A water-based composition is used before painting with a water-based emulsion.
- Alkyd primer is relevant for tiles, glass, steel. It is forbidden to apply on drywall or plastered surfaces.
- Mineral-based products are used on ceilings made of bricks, aerated concrete and aerated concrete. Manufacturers strengthen the composition with cement, gypsum, lime.
Deep penetration ceiling mixes penetrate the ceiling to a depth of 2 cm. Some manufacturers add substances to improve protection against mold, mildew and decay.
The acrylic primer dries from 6 to 12 hours. The term depends on the type of ceiling base.
Tools and materials

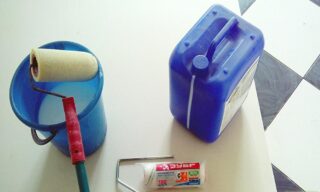
Priming is a complex process aimed at surface preparation. Before starting work, you need to collect the tools and materials with which the primer is applied to the ceiling:
- broom, scoop or industrial vacuum cleaner;
- ladder;
- gloves, glasses, headwear;
- rag, 5 liter bucket;
- sandpaper to eliminate minor defects.
Follow the manufacturer's recommendations when preparing the primer.Knead the material in the correct proportions. Treat the surface thoroughly.
Preparation of the base
Before construction work, clear the room of objects cluttering the space. If the floor is covered with laminate, tile or parquet, cover it with plastic. Before priming the ceiling, get rid of the old coating and start preparing the surface:
- remove the plaster;
- check the joints for voids;
- treat the potholes with cement mortar or putty;
- vacuum the base.
It is recommended to finish the ceiling before finishing the walls, otherwise there is a risk of damage to the wallpaper or painting.
Ceiling priming technology
Observe safety precautions when priming the ceiling. Use personal protective equipment: headgear, respirator or gauze bandage, gloves. For work, prepare rollers, brushes, water and a container.
For painting

Before priming for painting the ceiling, determine the consumption of the product. The norm with a fork is indicated on the package. This is due to the fact that the absorbency of the composition depends on the type of surface. Select the type of coverage and multiply it by quadrature.
Recommendations for priming the ceiling before painting:
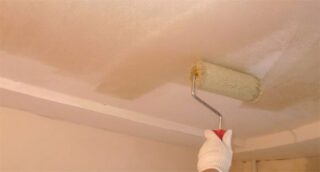
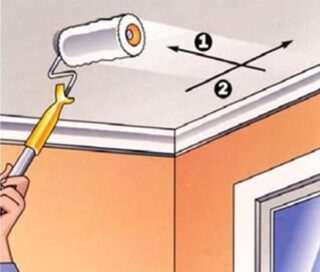
- Put a small amount of the mixture on a foam roller and rub thoroughly until foam forms. Such actions contribute to squeezing air out of the porous surface.
- Brush hard-to-reach areas.
- Leave the ceiling on for 20-30 minutes.
- Fully wet the roller and apply a second coat to compensate for soil loss due to absorption.
- After 24 hours, start painting or plastering the ceiling.
It is recommended to apply a primer before painting wood, drywall and other materials. It will strengthen the coating, increase adhesion and reduce finishing costs. Priming is carried out quickly, does not require skills and special efforts.
Before putty
Before starting work, read the instructions, which indicate the consumption of material per 1 sq. M. Drying time varies depending on the composition. Consider this factor when planning the next stage of finishing.
Instructions:
- Remove dust with a vacuum cleaner or brush.
- Apply the composition with a spray bottle, avoiding omissions.
- Treat the porous surface three times.
- Two coats are sufficient for priming a concrete ceiling.
Leave an interval of 2 hours between coats.
Before starting work, read the instructions and recommendations of the manufacturer. In some cases a combination primer for one surface is required. Use a universal primer to solve this problem.


