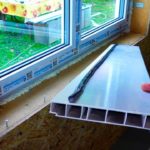
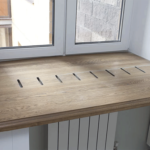
Replacing old wooden windows with more practical models made of metal-plastic and glued beams is possible with your own hands. This event is not difficult, but rather creative. The main thing is the correct choice of material, construction design and adherence to work technology.
The main functions of the window sill
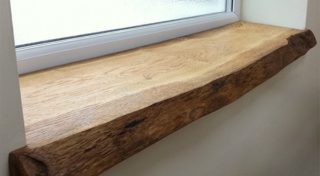
The purpose of the window sill is as follows:
- closure of the mounting opening remaining after the installation of the window;
- giving the opening a harmonious and complete look;
- ensuring correct circulation of warm air from heating radiators;
- additional space for small items on a temporary or permanent basis.
Showing imagination and ingenuity, people make window sills of this type:
- Greenhouse. If you make a wide window sill, in harmony with furniture or decoration, you can put many flowerpots with plants on it, turning the room into a blooming garden saturated with aromas.
- Desktop. The option is applicable to rooms of any size. The structure can be collapsible, folding and stationary, capture one or more windows.
- Sofa. It is used temporarily or permanently as a place where you can spend some pleasant time admiring the surrounding landscapes.
- Countertop in the kitchen. An excellent solution for a hostess who always lacks a workspace. The panel can be used for cooking and eating.
A competent approach to the manufacture of window sills will allow you to solve several problems at once in terms of design and optimization of its usable area.
Varieties of products by material of manufacture
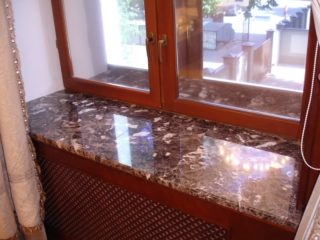
The most common materials for the manufacture of window sills:
- Wood. This is a classic, proven over the centuries. The material is environmentally friendly, warm to the touch, and easy to process. Wooden windowsill can be varnished, stained or water-based paint. Since the product will be exposed to contact with water, it is worth choosing wood types that are resistant to moisture. You can save money if you make a window sill from slats with your own hands. Products are not afraid of changes in humidity, they will never be driven.
- Natural or artificial stone. Such plates look elegant and personable. They are not afraid of shocks, UV radiation and dampness. The strength of the panels is sufficient to withstand a load of several hundred kilograms. The surface is wear-resistant, does not change its color for decades. It should be borne in mind that the stone is quite expensive and is not suitable for the interior of every apartment.
- Particleboard and MDF. Chipboard laminated boards are characterized by sufficient strength, presentability and durability. To order, you can make a panel of any color and texture in order to fit it into the interior of the room as effectively as possible. Making a window sill from a furniture board with your own hands is a great way to save money on the services of professionals.
- Plastic. The panels have a honeycomb structure, are made of PVC and are sold ready-made. The master only has to decide on the dimensions, color and texture of the goods. The price of products is quite affordable and will not hit your pocket The downside is that hollow bodies have limited strength. They are easy to push through, burn through or pierce with a sharp object. After that, it will be almost impossible to repair them; replacement will be required.
It is necessary to comprehensively analyze all the features of the materials and only then make a decision.
Standard sizes
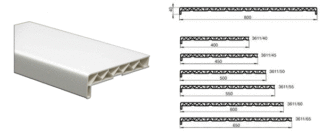
The parameters of window sills are developed based on the properties of the materials from which they are made, as well as on the needs of consumers. The dimensions are set by the manufacturer based on the minimum tensile strength of the products and the capabilities of the existing equipment.
Maximum length to width ratio:
- Chipboard - 600x80 cm;
- stone - 300x120 cm;
- wood - 400x60 cm;
- plastic - 300x60 cm.
Thickness standards:
- Chipboard - 17-28 mm;
- stone - 20-30 mm;
- wood - 30-50 mm;
- plastic - 20-35 mm.
The price of the product is calculated according to the size. The buyer can choose the best option for himself that meets all the criteria of the project.
Required tools and materials

As a rule, for self-installation, a set of tools is enough that most home craftsmen have:
- level, square, tape measure, ruler, marker;
- puncher;
- construction gun;
- hacksaw or electric jigsaw;
- spray;
- hammer, mallet.
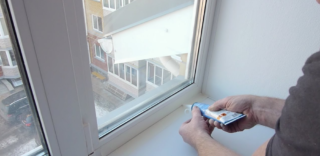
Materials should be purchased:
- polyurethane foam;
- antiseptic;
- primer;
- sealant;
- one of the types of paintwork;
- corner plastic profiles.
To protect your health, you need to work with goggles and gloves.
Preparatory work
After installing the window, a wide gap remains between the slope and the frame. It is easier when the window sill is replaced. The opening remains intact, the master only needs to prepare a hole for the panel. It may not always coincide with the dimensions of the new thing, then both objects will need to be adjusted.

Preparation may include the following steps:
- Inspection of the panel opening. If necessary, it expands so that it is 2 cm wider on each side than the frame.
- Cleaning the hole from crumbs and dust, treating with an agent against mold and mildew in accordance with the instructions.
- Raising the level of the support platform if the clearance exceeds 5 cm.
- Sawing the slab to the correct size. The optimal protrusion is considered to be 10-15 cm beyond the wall level. Undercutting, fitting the product to the opening.
- Rounding corners, sanding and polishing.
- Preparation of material for spacers. These can be bars, pieces of plastic and other improvised items.
Finally, the wood panel is primed and finished.
Do-it-yourself window sill installation
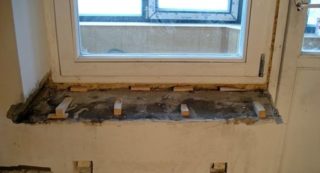
In order to correctly and efficiently install a wooden window sill with your own hands, you need to follow these steps:
- Draw up a detailed drawing and a step-by-step work plan.
- Immerse the panel in the opening, using spacers to rigidly fix it at an angle of 2 degrees with an inclination from the frame so that accidentally spilled liquid does not stagnate on the wood, but flows down to the floor.
- Press down on the window sill at a rate of 50 kg / m². The best option is plastic water bottles.
- Fill voids with low expansion polyurethane foam. Wait until it hardens, cut off the excess.
- Wait at least a day, then remove the oppression.
- Fill up the remaining gaps between the slab and the slope.
Beacons and grout can be used instead of foam. Such a fastening is more reliable, since there are no voids under the slab.

