The installation of metal-plastic windows can be considered complete when there are no openings, cold bridges between them and the walls, complete waterproofing is achieved and the finish is applied. One of the steps in this process is the installation of window sills. This procedure is simple and can be easily done by hand. To achieve the desired result, you should familiarize yourself with the range of materials used, their properties, and installation rules.
Varieties of window tides
There are no special rules regarding the installation of drips on windows. Manufacturing options:
- Plastic. They are produced in the form of plates or honeycomb plates with a thickness of 1-1.5 cm. They are distinguished by an attractive appearance and excellent sound insulation characteristics. They are produced in a wide range of colors, so it can be matched to almost any frame. The downside is that plastic is flammable, expands greatly in heat and is destroyed by ultraviolet radiation.
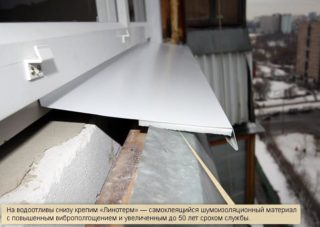
- Metallic. As a rule, molded galvanized steel with polymer spraying is used in the manufacture. The products are inexpensive, look good, but they make a lot of noise when it rains, and over time they rust. The problem can be partially solved by using a lining under the sheet of soundproof materials. Copper and aluminum are rarely used, since, with almost the same characteristics, they are much more expensive than iron.
- Concrete. The most budgetary solution, which often does not require additional costs, since after the repair there is always surplus of building materials. The slab is cast separately or directly on the wall of the house. The concrete is strong, durable, does not make noise when it rains. Moisture resistance is achieved using additives and impregnations. A nondescript surface is polished and painted.
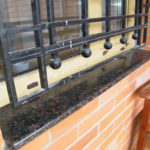
- Stone. The use of granite and marble is justified when the installation of ebbs on windows is carried out in a house that has a finish similar in composition and color. The stone is strong, durable, absolutely immune to environmental influences.
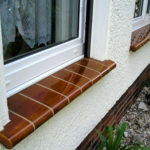
- From facade tiles. Not a bad solution that allows you to get an effective and practical result. Ceramic is resistant to all weather, looks good and is easy to clean from dirt. Replacing the damaged fragment will not cause any particular complications.
Selection of ebbs for plastic windows
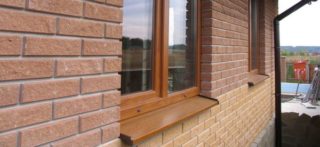
The specificity of the products is that they are installed outside, are accessible to the eyes of others, are exposed to all kinds of environmental influences and subjective factors.
You should focus on the following criteria:
- Tightness. The coating should not let through or even absorb moisture. Its main task is to protect the walls of the house from water.
- Strength. The structure is constantly subjected to vertical pressure when people lean out into the street for one purpose or another. Do not forget about the likelihood of heavy objects falling from above.
- Presentability. Ebb tides give a finished look to the window itself and the entire facade as a whole.
- UV resistant. Radiation negatively affects some types of plastics, paints and pigments, leading to the appearance of a network of cracks and discoloration.
- Compatible with frame and box. This applies not only to the shade, but also to the style of performance.
- Rigidity.The calculation should be made for the strongest gust of wind so that it cannot bend the protruding part of the structure. If this happens during a heavy rain, the consequences for the wall will be dire.
When purchasing factory-made products, you need to pay attention to the attachment to the profile, side edges and bottom folds.
Correct measurements
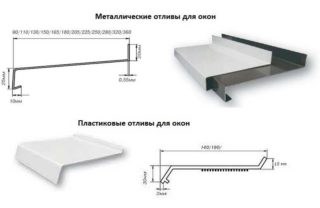
Do-it-yourself installation of ebb tides on windows will be successful only under the condition of competent planning, part of which is taking measurements.
When performing this process, you should adhere to some rules:
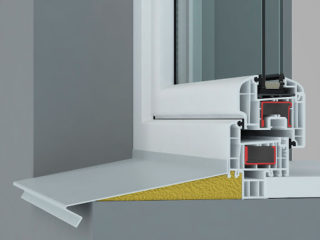
- The product should be installed so that its edges extend beyond the cut of the facade of the building at a distance of 3-5 cm. This will prevent the ingress of flowing water onto the wall and subsequent penetration to the foundation.
- Any structure should go under the bottom edge of the box by at least 1 cm so that the drops flowing down the glass fall on the low tide.
- The slope is at least 10 degrees away from the wall. This is sufficient for efficient water drainage.
- The width of the outer panel is taken such that it fits into the side openings by 2-3 cm.
- The distance between the bottom of the ebb is filled with polyurethane foam. If the opening is more than 5 cm, it should be extended with cement mortar. The recommendation is based on the fact that the foam crumples under pressure, and this can lead to breakage of the plate or tile.
After taking measurements, you need to draw up a small but detailed project with a description of the installation sequence.
Required materials and tools
You will need the following tools and materials:
- perforator, screwdriver, construction gun;
- hacksaw for metal;
- level, tape measure;
- mallet;
- pliers;
- spatula, paint brush;
- spray;
- riveter;
- sand, cement;
- facade sealant;
- screws, dowels.
To protect the skin, eyes and breathing, gloves, a respirator, goggles or visor should be used. Since you will have to put the window sill at a height, safety devices are required.
Installation of ebbs on plastic windows
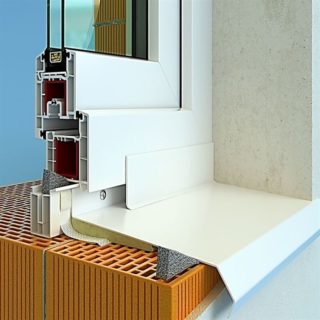
The installation of ebbs is accompanied by the use of solutions and adhesives. You need to start work in dry, warm and calm weather.
Installation instructions:
- Removing the old window structure. Inspection of the opening, carrying out its repair and leveling.
- Measurement of the parameters of the slope on which the window sill will be installed. If necessary, it is built up with cement mortar, giving the desired slope.
- Making side cutouts in the wall for the panel. They should be wide enough so as not to scratch the protective coating, but not so large that the profile dangles in them.
- Laying on the base to drain the waterproofing tape. It protects against leaks in the event of rising air currents during precipitation.
- Cutting a strip of a given length and width. If it is galvanized steel, you need to work out the cut points with any anti-corrosion agent.
- Screwing the low tide with self-tapping screws to the support profile. It should be fastened at intervals of 10-12 cm in order to exclude the possibility of the product being pulled out by a strong wind or a snow mass falling from above. If the window sill is made of several parts, their edges are lubricated with a sealant and riveted.
- Installation of a frame with a window sill in the opening. After fixing the structure with wedges, it must be finally secured with anchor bolts.
- Moistening with water from a spray bottle the surfaces of all cracks and openings. Filling the seam between the ebb and the frame with polyurethane foam. Sealing side slots in the wall.
- Attaching and gluing side boards.
While the foam hardens, the window sill needs to be pressed down with a heavy object.A board and a few 5-liter water bottles are best for this. You can use the window structure three hours after foaming.
It is recommended to install the ebb troughs simultaneously with the installation of windows. At this stage, they can be attached in accordance with the technology - to the support profile. In case of damage to the window sill, it will no longer be possible to replace it in a similar way, or a huge amount of work will have to be done for this.
If, nevertheless, the ebb has become unusable, its replacement must be carried out so that the new fragment with its upper edge goes at least 1 cm under the lower frame profile. This requirement also applies to products made of stone and ceramic tiles.
If it is not possible to make a wide opening, the joint is closed with a plastic profile planted on the glue.

