Ceiling lining with finishing material is not always enough to give the room a complete look. Installing a ceiling plinth eliminates this problem. Products are made from plaster, plastic, polyurethane foam. To install them correctly, you need to understand the properties of the curbs, as well as the technology for fixing them.
Types of ceiling plinths
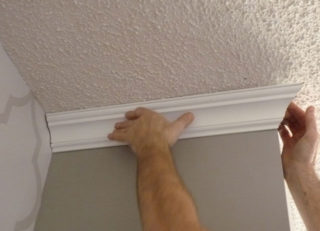
Ceiling skirting boards help to complement the interior with the necessary decorative elements, making it complete. In addition, the presented products are able to hide minor defects in the geometry of the room, decorate the joint between adjacent surfaces. Baguettes are narrow, medium, wide. Their choice depends on the height of the ceilings, the dimensions of the room. There are skirting boards with a pattern, without a pattern with a relief, without a relief.
Products differ in the material of manufacture.
Styrofoam
The popularity of expanded polystyrene foam lies in its low cost, a wide variety of designs. The material is lightweight. Various engravings and carvings may be present on the surface of the product. The skirting board is simply mounted, you can cut it with a regular knife.
The disadvantages include the weak mechanical strength of the foam, brittleness. You should not use them if they are near heated pipes: the increased temperature contributes to the deformation of the elements. In addition, the material is whimsical for additional finishing materials. It must not be coated with paint containing aggressive components. Polyfoam is unstable to ignition, produces corrosive smoke when burning.
Gypsum
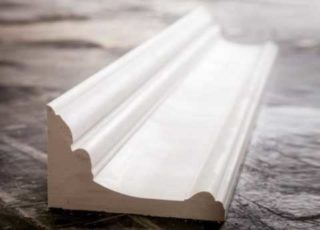
Plaster products are most suitable for aristocratic interiors. It can be used when decorating semi-antique premises. This is a traditional material for the production of moldings, skirting boards. The material has a high level of plasticity, therefore it is often used for the manufacture of decorative elements according to individual sketches. The products are environmentally friendly and highly durable.
Other advantages:
- the ability to quickly mask the junction;
- ease of repair in case of damage to the curb;
- durability.
Gypsum products are:
- smooth-drawn: raw materials are passed through special templates, while the form has no decorative elements;
- cast: the solution is poured into special forms, so the element can be decorated, you can make it yourself;
- stucco: a unique material that allows you to achieve an individual original interior, all elements are handmade.
Plaster skirting boards can be attached to suspended and stretch ceilings. Often used in conventional base designs.
The disadvantages of gypsum are high cost, fragility, instability to mechanical damage. For fastening, only glue is used, since mechanical clamps are capable of splitting the elements.
Polyurethane
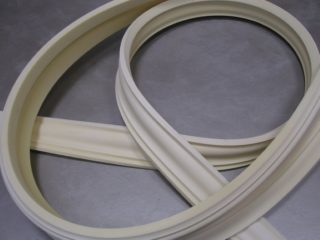
Polyurethane is characterized by high strength, low weight, resistance to temperature extremes and moisture. Such a curb does not lend itself to mechanical damage. Due to the presence of rubber in the composition, the product is quite flexible. This makes it possible to apply the element in interiors that contain curved lines. You can even use such a finishing material in bathrooms and kitchens.Polyurethane is environmentally friendly, hypoallergenic.
The material goes well with other finishing materials. It is often used for cladding ceilings made of plastic panels, stretch ceilings. The skirting board can be used to decorate door and window openings. The surface of the product can be tinted, supplemented with lighting.
Calculating the number of skirting boards
The width of the skirting board depends on the height of the ceiling. If it is 2.5 m, the baguette should not be wider than 9 cm.If the ceiling is at 2.7 m, then the width of the plinth does not exceed 10 cm.In large rooms, this value ranges from 15-21 cm.
To calculate the number of panels, it is necessary to divide the found perimeter of the room by the length of the product. If the indicator is a fractional number, it is rounded up. The standard element length is 2 m.
Since the plinth will have to be cut during operation, it is better to purchase material with a margin. The cost of repairs will not change much from this.
Ceiling markings
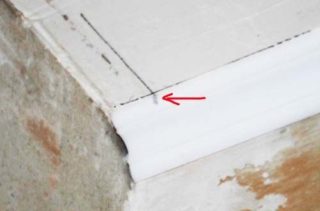
Before installing the ceiling plinth, the base must be prepared. First of all, it is determined how flat the surface is.
The plank is applied to the ceiling and wall, pressed and marked with a pencil on both planes. If there are grooves or irregularities on the base, the product will not fit tightly on it. In this case, the strips are laid so that the joint falls on the problem area. Disadvantages can be eliminated with putty.
Correct installation provides for correct marking in the outer and inner corners.
In the course of the work, the markings will have to be done on decorative elements. The lines are applied to the base so that after fixing the plinth they are not visible.
All fragments must be the same length. The combination of short and long elements looks sloppy.
Required tools and materials
It is necessary to mount the plinth on the base after preparing the appropriate tool:
- miter box for correct formation of inner and outer corners on fillets;
- sharp knife or hacksaw with fine teeth;
- a straight ruler, tape measure and square (sometimes a protractor is required);
- a simple pencil for marking the base and material;
- rubber and metal spatula;
- container for preparing a solution of putty;
- masking tape;
- a gun for supplying glue from tubes.
Glue is used to secure the skirting board. You can fix the product before or after wallpapering. Water-based paint is used to decorate the elements. If it is necessary to change its color, use a color scheme. A white acrylic sealant is required to fill the joints between the skirting boards. If you draw up a stretch ceiling, you should not forget about the polyethylene lining.
Adhesive selection rules
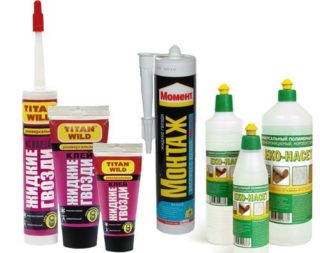
You need to glue the ceiling plinth so that it fits snugly to the surface and holds firmly for a long time. If a polyurethane product is selected, a compound is used for which a special gun is needed. This sealant is an excellent retainer that does not expand when exposed to air.
Styrofoam baguettes can be glued with putty. You can fix the products along the entire length or at the joints. The second method allows you to save money on finishing the seams with a special grouting compound.
For the correct choice of glue, the following points should be taken into account:
- so that there are no visible joints between the elements, the substance must have the same shade as the lining;
- it is better to choose an adhesive with good adhesion properties, regardless of the type of substrate surface;
- the retainer must be resistant to moisture, temperature extremes, exposure to sunlight;
- long warranty period of operation;
- resistance to aggressive substances;
- high speed of solidification.
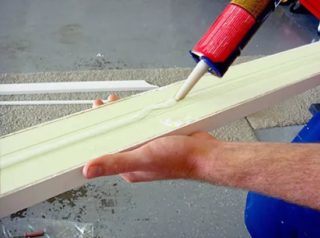
According to the method of fixing, the glue can be instant or contact. In the first case, the product will be attached to the base immediately. The composition is applied to the fillet, applied to the ceiling and pressed a little. If you do not immediately align the plate along the marked line, after a few minutes, this will no longer work. It takes 6-10 minutes to manifest the properties of the contract composition.
Usually, the following means are chosen for work:
- Polyurethane foam. It is used if the base is not finished. The advantage of the substance is fast solidification, but there is enough time to correct fixation inaccuracies. The tool is suitable for products that have free space on the back side, since it tends to expand.
- Liquid Nails. The substance is able to glue the fillet instantly. It is better to use a water-acrylic type of glue containing synthetic resins. The final hardening of the composition occurs in 30 minutes. The product fits well on plastic products, despite the fact that their surface is slipping.
- Acrylic based putty. Its use allows you to fix the decor and level the surface of the wall or ceiling. You cannot use it when installing fillets on wallpaper. Before applying the putty, painted walls should be treated with a primer. Sometimes it is applied in several layers.
To glue ceiling plinths, you need a material that does not contain volatile toxic components. When choosing, it is better to give preference to products from manufacturers with a good reputation. You need to buy them at official retail outlets. If necessary, you can ask the seller for a quality certificate for the product.
DIY ceiling plinth installation
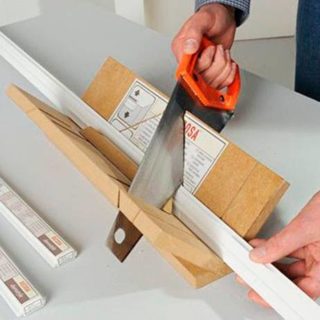
Before you start gluing the ceiling decor, you need to cut the fragments that will be installed in the corner of the room. Cutting is carried out so that the cut is as even and accurate as possible. For work, use a miter box. If the corners in the room have the correct geometry, it will not be difficult to carry out the procedure.
The peculiarity of the skirting boards is that the main part is asymmetrical in length. Most are mounted on the wall, and the short one on the ceiling. This must be taken into account when cutting. When cutting corners, a part is placed on the bottom of the carpentry tool, which is fixed to the ceiling. The product must not move during cutting. Otherwise, there will be an ugly gap between the joints.
If the level of the corners is not brought out ideally, one fillet is applied to the wall, and lines are applied to the base along its sides. The same procedure is carried out with an adjacent baguette. You can now mark the intersection points on the wall surface and on the skirting board itself. A cut is made along these marks. The joints at the outer corners are sealed with sealant.
In order not to calculate the angles, you can use special corner clamps. They are an additional decorative element and hide fillet edges without cutting.
The most common way of gluing skirting boards is glue. To carry out the installation, it is necessary to perform the following manipulations:
- Surface priming. This procedure will improve the adhesion of the decor to the surface of the base.
- Applying glue to the inner coals of the element. In this case, the substance should not come out.
- Attaching the panel to the base. The location of the product exactly matches the markings. Next, the part is taken away and the surface is left for a while so that the glue seizes. The skirting board can now be locked in place. Do not press too hard to avoid breaking it. If you are using instant adhesive, it is enough to lean the panel against the base and hold it for a few seconds.
- Bonding the rest of the elements. Glue is applied to those surfaces that are in contact with the ceiling, wall and neighboring baguette.
- Finishing the seams. This procedure is carried out after the decor has been installed around the entire perimeter of the room.
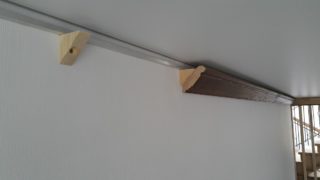
If the mechanical method of fixing the plinth is chosen, the corner pieces are screwed on first. Using self-tapping screws, install the mounting plate. The distance between the fasteners is 25-50 cm. After that, a fillet is screwed to the bar.
If necessary, the plinth is additionally decorated. For this, water-based paint is used. It must be applied carefully so as not to stain the wall and ceiling. It is better to use a narrow brush for application.
Before proceeding with the independent installation of ceiling moldings, you need to familiarize yourself with their characteristics, varieties, as well as mounting features. Subject to the technology, the base will look neat, the finish will last for more than one year.


