The Armstrong system was developed for the arrangement of false ceilings in offices and other commercial premises. The simplicity of the device and fastening, attractive appearance and low price made it popular. Nowadays, Armstrong ceiling installation is practiced in a wide variety of premises, including residential buildings.
Armstrong ceiling device

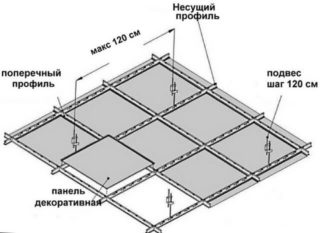
The modular system includes a frame part and lamellas for cladding. By means of suspensions, the profile frame is mounted on the rough surface. Facing slabs are mounted in the resulting frames, which are in the form of squares or rectangles. You can also place lighting fixtures in these cells.
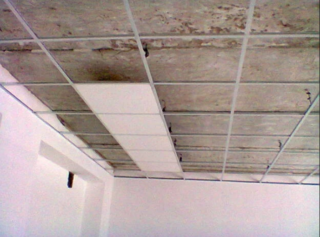
Installation of the Armstrong suspended ceiling allows you to hide the laid communications and mask the damage on the rough surface. Since the components of the system are made of lightweight materials (mostly aluminum-based alloys), it is easy to assemble and does not impose significant stress on the plane.
The perforated surface promotes air circulation in the overlying areas.
In addition to the simple installation technology, the system is attractive for its maintainability: if the facing tile deteriorates, it is dismantled and replaced with another. As a result, it is often recommended to purchase parts with a small margin.
The downside is that suspended structures lower the ceiling level, which is why they are not very suitable for low rooms.
Varieties of Armstrong ceilings
There are many variations of systems that differ in price category, duration of operation, demands on external conditions. A variety of colors allows you to choose an option that fits into the design of the room.
Economy-line
The tile forming the surface is made of mineral fiber material. The products attract consumers at an affordable price. But for rooms with humid air, they are not suitable due to the insufficient degree of water resistance.
Prima series

Such ceilings are distinguished by excellent performance characteristics: the plates do not deteriorate when exposed to water, they are resistant to fire. The facing of products of this group is thicker than that of the economical one. They can serve up to 10 years. The series includes 6 product options, differing in color and relief features.
Acoustic ceilings
This category is distinguished by improved sound insulation qualities. The sound absorption coefficient of such products can reach 0.5. The ceiling construction suppresses noise phenomena up to 35 dB. This is achieved through the use of 2.2 cm thick slabs. This is more than both of the previous categories. Also, the plates are moisture resistant.
Designer
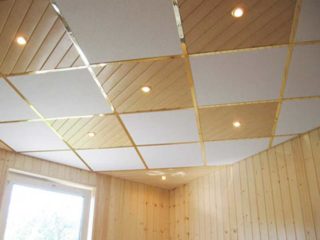
Products of this class make it possible to create surfaces that meet certain design tasks. The cladding can be made of wood, metal, polycarbonate, glass, and include fragments with stained glass. If the material is heavy, the slabs are installed using high strength fasteners that can withstand such loads. Products are produced in a wide range of colors, can be monochromatic or patterned, matte and shiny. Tiles can have different types of textures, including embossing.This group also includes options with a mirror surface.
Armstrong products do not have the option of installing a curved canopy.
Ceiling calculations
Before installing the Armstrong ceiling, you need to purchase the required number of parts. It can be calculated knowing the area and perimeter of the room to be finished, as well as the dimensions of the tile products selected for decoration.
The packages contain an assembly diagram and the rules for calculating the required number of parts. It is recommended to buy a quantity that is 5-10% higher than the consumption, so that in case of an unsuccessful operation, the system element can be replaced with another one.
Necessary equipment and tools

Before assembling the Armstrong ceiling, it is important to prepare the required tools. A device is needed for cutting the metal profile, from which the frame of the suspension system is formed. It can be a grinder equipped with a cutting disc, steel shears or a hacksaw.
It is advisable to use a laser level. If it is absent, you can take another device for marking.
An electric drill and fasteners are required. The latter are selected in accordance with the material of the floor. Usually self-tapping screws or dowels are used.
Preparatory work and installation
It is better to carry out the installation of the suspended ceiling after the completion of the finishing work on the floor. This layout contributes to greater confidence when marking the horizontal frame along which the wall profile is placed.
- The gap is measured from the rough plane to the suspension system. As a rule, its value is at least 0.15 m. If the homeowner plans to mask with communication panels, the segment is measured out from the lower border of the latter.
- The horizontal contour is marked. For work, you must use a level. To keep the line perfectly straight, use a paint cord.
- The ceiling is marked for the installation of system elements. Several zones need to be marked. First, diagonals are drawn on the surface with an "envelope" and thus its center is found. A line is drawn through it across the plane. In parallel, straight lines are laid with a step of 1.2 m, along which profiles will be placed in the future.
- Points are also put along these lines (with a meter distance between them), which will serve as reference points when it is necessary to install suspensions. Markings are made starting from the center of the ceiling.

Work begins by placing the wall profiles along the boundaries of the frame drawn on the walls. In the role of fasteners, self-tapping screws are used, attached to the wall surface through pre-installed plastic dowels. The step between the elements of the fittings will be 0.5 m. After that, suspensions are mounted to the marked sections of the ceiling in a similar way. The hooks at the ends of these elements should be turned in one direction - then the installation work will be done faster. The hook is inserted into one of the holes provided with the perforated profiles and pressed for a better connection.
A frame is assembled from the profile. Usually its elements are made of aluminum. First, 4 guide components are placed, transverse ones are mounted between them. To fasten them together, a lock connection is used. The distance between the transverse elements is made equal to 60 cm. If necessary, the profiles are trimmed.
For the installation of each lighting device, an additional crossbar and suspension are placed. When fastening, the lock is inserted into the left slot - it is successfully fixed in it. The finished frame will look like a mesh lattice.
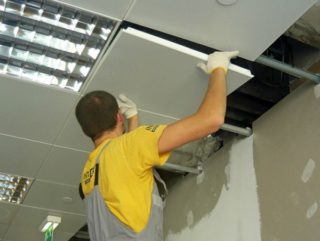
Cladding material is mounted. It is better to do this work with gloves, since panel products usually have a certain mark. The air in the room should not be too humid (less than 70%). Start work from the middle of the plane. The panel is inserted diagonally into the niche, edge up, then turned horizontally and lowered onto the grate.When working with patterned products, it is necessary to monitor the arrangement of the pattern elements. If it turns out that the panels on the sides of the frame do not fit into niche cells, they will need to be trimmed. Lighting devices are mounted in a similar way. It is recommended to install these devices at such a frequency that there is one lamp for every 6 square meters of ceiling area.


