The wear-resistant laminate works flawlessly if the installation technology and operating conditions are followed. In other cases, the boards swell, diverge or crack. Do-it-yourself laminate restoration helps to correct defects.
- Violations of the integrity of the surface of the laminate
- Changing panel geometry
- The appearance of gaps between the boards
- Surface damage
- Causes of damage
- Necessary materials and tools for restoration
- Do-it-yourself damage repair
- Scratches
- Chips and cracks
- Swelling
- Slots
- Removing one panel
- Laminate operating rules
Violations of the integrity of the surface of the laminate
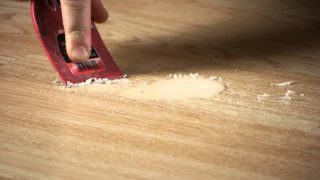
There are many reasons for trouble with laminate flooring, but they all relate to violations of installation or maintenance technology. If you make the coating using standard technology, the laminate will last a long time without loss of quality. Purchase material of the appropriate class for a specific room. Sometimes they put a coating with a low resistance to wear in the corridor, in the kitchen, where there is a lot of traffic, so the top layer quickly becomes unusable.
Problems arise due to the ingress of water to the surface and untimely cleaning. This happens, for example, when flooding or if water gets into an open window during a rainstorm. Violation of integrity is noticeable with the naked eye, spoils the appearance of the room, so it must be eliminated.
Changing panel geometry
Boards swell if adjacent panels push against each other. This happens if, during installation, a small installation gap was left between the end of the laminate and the walls. The covering does not adhere rigidly to the floor surface and needs a distance for slight displacement.
Curvature of the panels is obtained when the material is laid on an unaligned base. It is best to make a perfect screed, but plank flooring, parquet flooring is often used. Even scraping parquet or planks will not help create a perfect surface, so problems can arise.
The laminate starts to creak at the fracture points, cracks in the middle of the board. Before starting installation, check the horizontalness of the base using a long rule with a level.
The appearance of gaps between the boards
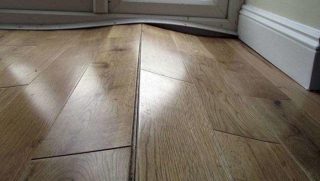
The strips of material are displaced relative to the initial position, gaps appear between the panels, while the connecting locks diverge (the spike is removed from the groove). This happens if the volume of the elements becomes smaller due to a decrease in humidity (shrinkage). Slots worsen the appearance of the floor, in the future, the stripes can crack or bend under the load from walking.
The laminate is brought into the room where it will be laid two days before the start of work. In this case, the boards get used to the climate of the room, the humidity of the laminate is equalized with its indicators. After that, the laid material will not give off moisture, its parameters will remain constant.
Surface damage
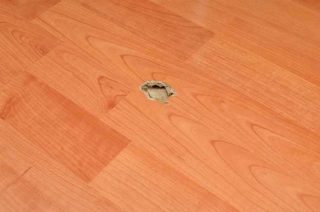
Laminate must be protected from impacts, dragging weights over the surface. There is often fine sand and other abrasive particles on the soles of shoes, therefore, the load on the coating is the highest in the corridor. In rooms, you can drop a heavy object, or move furniture along the floor layer without pads under the legs - all this will ruin the surface, the coating in problem areas will become thinner and wear off, holes may appear.
For a low-class laminate, heels with metal heels, the legs of a chair standing in one place are dangerous, and the claws of dogs or cats leave scratches, dents or chips on the boards.
If a room has poor quality flooring, parties and dancing should not be allowed to prevent the floor from collapsing.
Causes of damage
Sometimes a substrate is not placed under the coating, which solves many styling problems.
Lining functions:
- eliminates minor irregularities;
- protects from moisture from below;
- absorbs at light loads.
Substrates are made of polypropylene, expanded polystyrene or natural cork, wood fiber. If such a gasket is not used, the rigidity of the installation will affect and the laminate will bend, crack, and the cracks will disperse.
The room humidity plays a role. If the apartment is on the ground floor and there is water in the basement, moisture from the stove is transferred to the coating and the panels swell. This happens if the integrity of the waterproofing is broken or not at all.
Necessary materials and tools for restoration
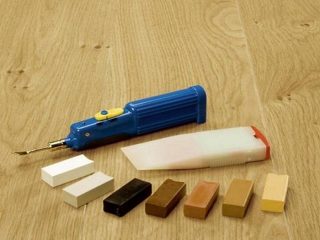
Materials are sold in various forms for repairing and masking defects. They have many shades, so you need to take a piece of laminate with you so as not to be mistaken. The base is wax with the addition of polymers to increase adhesion.
Varieties of funds:
- hard wax bars are convenient in that they are used in solid and liquid form;
- mastic is used to eliminate scuffs;
- the paste in tubes is ready for use;
- the polish is used as a finishing restoration after the application of other materials.
Restoration tools are required depending on the type of work. You will need a brush for application, a brush for cleaning, a spatula, soft wipes, rags. Sometimes a wax melter is used; a circular saw is required to replace the board.
Do-it-yourself damage repair
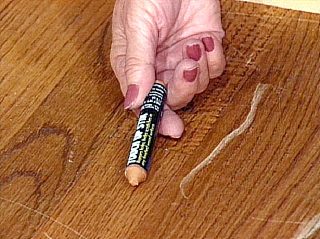
The method of restoration depends on the severity of the damage, for example, the depth of the dent, the size of the chip, or the crack. You can renovate your laminate without disassembling the floor, or change the planks if cosmetic procedures don't help. Defects are repaired as soon as they appear in order to reduce the size of further destruction, costs and workload.
General repair rules for all cases:
- the place of repair is cleaned of dust, dried in natural conditions;
- change boards of the same brand so that there are no differences in shade.
After restoration, you need to give the coating a rest - do not walk on the area repaired after restoration for about a day.
Scratches
For minor damage, wax-based crayons are used, and large scratches are sealed with putty.
Step-by-step instruction:
- purchase a pencil in the store in accordance with the color;
- outline scratches on the floor and vacuum these places;
- apply wax to a scratch, first melting it with a wax melter or a construction hairdryer;
- remove excess wax with a cloth, polish the surface to a shine.
Re-processing is carried out after 3 hours if the defect could not be eliminated. The mouth and nose are protected with a respirator, since the crayons, when melted, release a small amount of harmful substances. After drying, the layer becomes safe for health. You can melt the crayons to a soft state in a water bath.
Chips and cracks
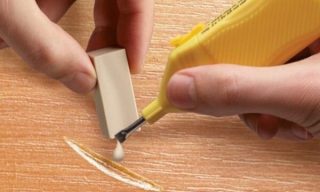
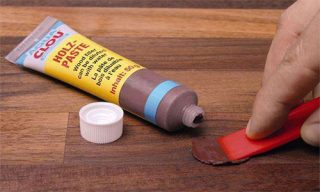
Stores sell repair kits that include putty. It is better to apply such a product to a piece of unnecessary laminate to see the color of the dried layer.
Operating procedure:
- clean the place of application with a vacuum cleaner;
- put putty on with a spatula, run along the scratch to equalize the filling;
- leave to dry after removing excess volume around the chip.
Use self-made compounds to repair the laminate. Small sawdust is mixed with PVA glue. After the solution has dried in the crack, a finishing putty is applied, painted in the desired color.
Epoxy or polyester resin is used, and a dye and sealant option is also taken. Pigment is added to the white sealant until the desired shade is formed. A rubber spatula is used for application. The composition is applied 2 times, since it shrinks when it dries.
Swelling
This happens when the plane of the laminate increases the linear dimension due to moisture or for other reasons, and there is not enough space for expansion around the perimeter. A gap of 1.5 cm is allowed, but with an increase in the area of the room, this size is made larger.
Work order:
- remove the plinth at the location of the adjacent board to the wall;
- dismantling the laminate panel;
- cut it along the length, cutting off 1 - 4 cm (depending on the degree of swelling);
- clean the installation site;
- mount the lamella in place, snapping the locks, put the baseboards.
Laminate swells if the skirting boards are not attached to the wall, but to the floor along with the covering. In this case, remove the skirting boards and fix them correctly.
Slots
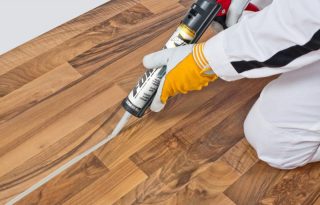
The gaps between the strips are filled with a special paste or the coating is removed. Mechanical filling with paste involves the use of sawdust with glue and painting after drying. In this case, the composition is applied so that it does not stick to the base under the laminate through the gap.
The second option involves removing the skirting boards, slats and moving them so that the gaps disappear. After that, an additional strip of the required width will be required to install it at the point of abutment to the wall. It is mounted where there is a whole strip, since it is impossible to dock to the cut one due to the lack of a lock.
This method is suitable if the gap between the panels is the same length and there is no curvature. If the stripes are deformed, you will not be able to slide them together.
Removing one panel
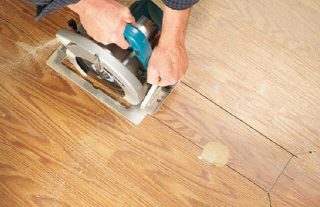
If the problem is not solved by patching the defects in place, remove and replace the damaged board with a new one. They begin to disassemble from the edge to which this lamella is closer. Remove the skirting boards and dismantle the panels to the problem area.
After replacement, the coating is completely restored and the skirting boards are fixed. You can replace the board in the center of the room without disassembling the entire layer. Such work is difficult and requires referral to specialists.
Laminate operating rules
It is necessary to properly care for the laminate so as not to repair the flooring. It is not recommended to clean the floor with abrasive powders or to use hard and metal scouring pads. In the area of the passage of people, rugs or mats are laid, and when rearranging in the room, the legs of the furniture are protected with linings.
After installation, the laminate is treated with a special mastic of the entire surface in order to fix the layer and increase the resistance. When joining the seams, a sealant is used, but such joints cannot be disassembled. Apply a clear varnish for shine and protection.


