When carrying out repairs in an apartment, it may be necessary to replace the old flooring with a new one. This is a simple event - even a novice builder can do it yourself to change the floor in an apartment.
- Features of the work
- Reasons for replacing the floor
- The choice of technology for the device of a new screed
- Pouring wet (concrete) screed
- Laying sheet materials on logs
- Floating screed device
- Dismantling the old coating
- Pouring wet screed
- Installation of logs and laying of sheet materials
- Floating screed device
Features of the work
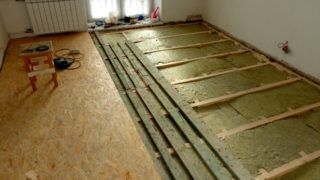
In apartments of mass development, there are two types of floors - with a wooden or concrete base.
Some people prefer to install new flooring on old decking. However, this is fraught with consequences - a quick formation of defects, extraneous noise is possible. Professional renovation is required so that after installation the floors will provide comfort and serve as long as possible.
For self-replacement of the floor in an apartment, you must follow the operating procedure and follow a number of rules.
Reasons for replacing the floor
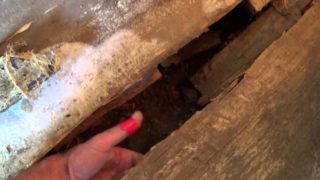
The most common problems due to which there is a need to replace the floor in the apartment:
- Mechanical damage to the surface. Any floor covering - boards, parquet, linoleum - eventually loses its appearance, scratches, cracks, peeling paint and varnish appear on it.
- The wooden floor is wet. Wood coverings are susceptible to moisture. When water or high humidity enters the room, the floor deforms, swells, the process of decay of the material may begin. This applies to plank flooring and log subfloors.
- Failures, creaking. Such defects are the result of a violation of the base on which the floor covering is laid.
- Infestation by insects, mold, fungus is the most dangerous situation for human health. Mold and mildew spores can significantly affect lung health, especially in children. If signs of damage are found, complete dismantling of the floor with antiseptic treatment of the room is required.
- The need to replace the type of screed. There is a wide selection of floor coverings on the market: laminate, linoleum, ceramic tiles, vinyl floors, carpet, etc. Each of these materials has specific requirements for the preparation of the substrate. Replacing a wooden floor with a concrete one in an apartment may be required in places where tiles are supposed to be laid.
The complexity of the upcoming work depends on the reason for replacing the floor. It is enough to replace only the topcoat. In case of serious damage, the entire screed structure will need to be corrected. To determine the scope of work and the amount of building materials, you must select the type of base for the floor.
The choice of technology for the device of a new screed
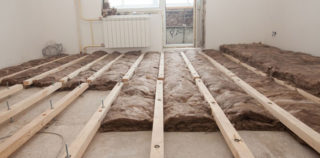
The basic requirements for a screed for all floor coverings are evenness, reliability and durability. There may also be additional requirements for moisture resistance, insulation, the possibility of laying communications in the underground space. There are several options. Each of the methods has its own pros and cons, which must be taken into account when determining the technology for preparing the base.
Pouring wet (concrete) screed
Benefits:
- strength;
- durability;
- versatility.
Disadvantages:
- labor intensity of the process;
- heavy weight;
- severe indoor pollution;
- it takes time for the solution to solidify.
Laying sheet materials on logs
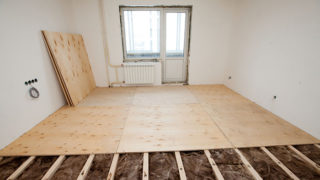
Benefits:
- easy leveling and leveling of the floor;
- availability of space for laying communications;
- the possibility of additional insulation and sound insulation.
Disadvantages:
- the height of the room decreases;
- reliable waterproofing is required to prevent log rotting.
Floating screed device
Benefits:
- ease of installation;
- no deformation during shrinkage of the building structure;
- additional shock-absorbing effect for increased walking comfort;
- high-quality insulation and sound insulation.
Disadvantages:
- low floor strength;
- significant change in the height of the room.
It is recommended to install the new ceramic tile floor in the bathroom on a concrete screed. For laminate or linoleum, it is enough to level the flooring with plywood or OSB boards. The carpet laid on a "floating" screed will be the most comfortable and warm floor for a child's room.
Dismantling the old coating
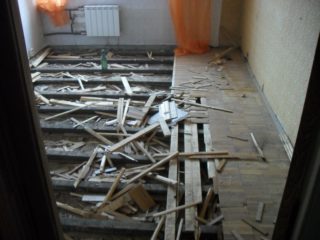
Replacing the floor in the apartment begins with the dismantling procedure. For this you will need:
- nail puller;
- a hammer;
- chisel;
- screwdriver;
- jigsaw;
- Circular Saw.
The first step is to remove the skirting boards around the entire perimeter of the room. If self-tapping screws were used as fasteners, they are simply unscrewed and the strips are removed. If they are nailed, start from the corner of the room and follow the instructions:
- hammer the nail puller between the floor and the plinth at the point of attachment of the extreme nail;
- raise the plinth by 10-15 mm;
- go to the next nail and repeat the procedure;
- after loosening all the nails, return to the beginning of the plinth and finally remove the nail with a nail puller;
- remove all nails and remove the baseboard.
Along one of the boards adjacent to the wall, a cut is made with a circular saw. A nail puller is inserted into the place of the cut, the board is pushed on and detached from the log. Subsequent boards are sawn with a jigsaw in the transverse direction. The distance between the cuts is 30-60 cm. This will greatly facilitate further dismantling. Sawed boards can be easily removed with a nail puller. If a choice was made in favor of a concrete screed or a "floating" method, the joists are also dismantled.
When it is planned to lay the flooring on the joists, the boards remaining after dismantling are inspected. If they are in satisfactory condition, without defects and visible lesions, you can lay the plywood sheets directly on them. This will be the cheapest and easiest option. However, for a guaranteed quality result, it is recommended to completely dismantle the wooden floor.
Pouring wet screed
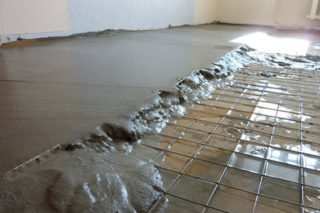
After dismantling the wooden floor, it is necessary to thoroughly clean the entire surface of debris and fill up all the cracks in the floor slab using polyurethane foam. Further work is performed in the following sequence:
- Floor waterproofing. The procedure is performed using roll materials based on bitumen or high-strength polyethylene. The material is spread over the floor surface with an overlap of at least 15 cm and gluing the joints.
- A damping tape is glued around the perimeter of the room.
- With a screed thickness of more than 3 cm, reinforcement is performed. The reinforcement mesh is laid on the waterproofing using special props at a height of 2-3 cm.
- Beacons are set up, with the help of which the level of the future floor is determined. The distance between the beacons is about 50 cm.
- Guides from a metal profile are laid on the beacons, along which the rule will move when leveling the solution.
- The space between the lighthouses is gradually filled with a solution, which is evenly distributed over the entire area of the room.
You can start laying the floor covering 28 days after the concrete is completely dry.Because of this, the repair time is significantly increased. However, in conditions of high humidity or under significant loads, replacing the wooden floor in the apartment with a concrete one is the most suitable option.
Installation of logs and laying of sheet materials
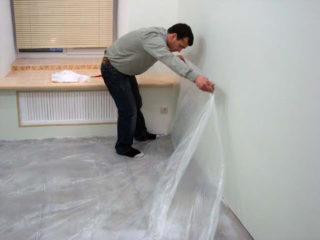
Floor works on logs include the following operations:
- a layer of vapor barrier is laid on the concrete floor, which will prevent the negative effect of condensation on the wood;
- the logs are laid on the level with a pitch of 350-400 mm and are fastened with anchors;
- insulation is placed in the space between the lags - mineral wool, foam or expanded clay;
- lags are treated with antiseptic agents;
- a plastic film for waterproofing is fixed on top of the lag.
The most common material for installing a floor on logs is plywood. Fastening must be done in compliance with the rules:
- the gap between the wall and the flooring is 10-15 mm;
- plywood joints are displaced relative to each other by 1/3 of the sheet length;
- the gap between the sheets is 2-3 mm;
- the edge of the sheet must be located on the lag;
- the step of installing self-tapping screws is 15-20 cm;
- the length of the self-tapping screw is three times the thickness of the plywood;
- it is recommended to pre-drill the places for self-tapping screws in order to drown the cap without forming defects;
- self-tapping screws are screwed first along the perimeter of the sheet, then to the center.
After fixing all sheets, plywood is treated with antiseptic compounds for 2 layers. The flooring is completely ready for the installation of the floor covering.
Floating screed device
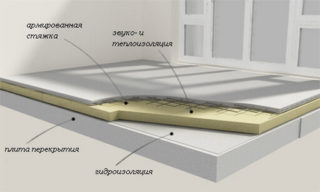
The method is called "floating", since sheet materials are used to create the leveling layer, which do not have mechanical attachment to the floor.
First of all, waterproofing is performed using a technology similar to preparation for a wet screed. Then an expanded clay pillow is poured over the waterproofing and carefully leveled. Plates (DSP, gypsum board or OSB) are spread over the pillow in two layers. Layers of slabs are located relative to each other with an offset of the joints and tightened with self-tapping screws. This is necessary to create a screed that is a coherent whole.
If the preparation of the base is carried out properly, installation of the floor covering on a leveled and reliable screed will not be difficult. Carpet, linoleum, cork or vinyl floors can be simply spread over the entire area of the room and secured with baseboards. An underlay is additionally placed under the parquet board or laminate. The main thing is to follow the recommendations of the material manufacturers.


