In addition to linoleum, carpet and tile, laminate is a popular material for flooring. It has high performance and is easy to install. Laying laminate flooring requires the correct choice of material, layout scheme. Fixing the panels also has its own nuances.
Features of the laminate
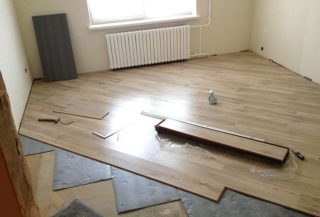
The material consists of several layers: base, decorative and protective. The first is resin-impregnated paper. Thanks to it, the residual stress arising after connection with the decorative element is balanced. The base prevents the laminate from deforming and makes it more resistant to moisture.
The second layer is high density fiberboard. It is 2-3 times stronger than natural wood. The thickness of this layer is 0.6-1.2 cm, which makes the flooring resistant to mechanical influences. Grooves and spikes are made in it. The protective layer is made of acrylate or melamine resin. It makes the material resistant to direct sunlight, moisture, chemicals. The product has the following features:
- high strength - laminate of class 31 and higher is able to withstand serious mechanical loads for a long time without losing its technical properties;
- durability - it is very difficult to damage the panels;
- a large selection of products;
- fire safety: the raw materials from which the material is made are resistant to ignition;
- ease of use and maintenance;
- high resistance to moisture.
Laying laminate flooring with your own hands is popular, since installation does not require construction skills. In most cases, the elements are connected without the use of glue, due to the locking latches.
The cost is considered the main advantage of the material. With excellent technical parameters, laminate is considered one of the most affordable products for flooring.
Calculation of the amount of material

Before laying laminate boards, you need to determine how much material is required for the job. There are 2 ways to make payments:
- By the number of elements. To determine the material consumption, the length of the room is measured and the resulting indicator is divided by the length of the lamella. The result is rounded up. The same manipulations are carried out with the width of the room and the element. The obtained parameters are multiplied. This calculation method is used if the laying of the laminate is straight.
- By the area of the base. This method is straightforward, regardless of which installation scheme is used. First, the length and width of the room are multiplied. The resulting area should be divided by the area of the laminate plank. 10% of the amount of material is added to the resulting value, since it is better to buy it with a stock and from one batch.
The calculations take into account the shape of the room. Even modern buildings cannot boast of perfect proportions, so you need to buy more laminate flooring. Do not forget about the expansion gap between the flooring and the walls.
Surface preparation for work
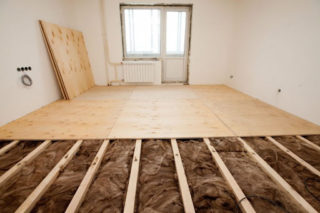
First you need to remove the old coating: linoleum, carpet. It is not necessary to remove the tiles.It is only necessary to repair the parts that have fallen off. It is also necessary to remove the rotten parts and treat the base with a primer.
The screed is sanded to eliminate irregularities. To ensure a good adhesion of the slats and to prevent squeaking of the floor covering, it is necessary to collect all debris and dust from the surface of the base. Before installing the laminate, a substrate is laid on the concrete, which acts as a sound and thermal insulator. It is mounted end-to-end. It is necessary to fix the substrate on double-sided tape.
Old flooring can be leveled with plywood or chipboard sheets. Since the lamellas are based on raw materials from natural wood, the use of a waterproofing film is mandatory.
Required tools
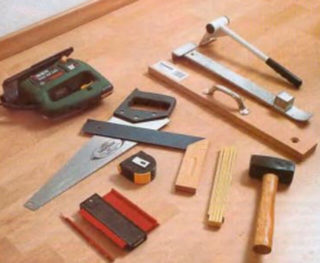
Before laying the laminate, you need to prepare the necessary tools. For work you will need:
- a pencil for marking;
- corner, tape measure, building level;
- jigsaw or hacksaw with fine teeth for cutting elements;
- a wooden hammer and a bar for fixing the lamellas.
In addition to the finishing material, skirting boards, a waterproofing film, a substrate, and sills are needed.
Laying methods for laminate
The laying of the laminate in the apartment is carried out in the direction of the sun's rays, however, the design features of the room make their own adjustments. Whatever scheme is used, the main installation condition: the lamellas must be laid apart from each other.
Straight
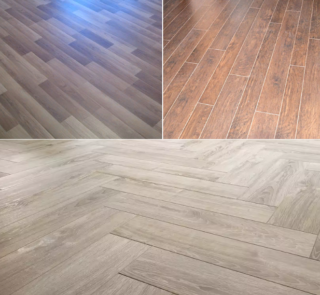
The direct version is suitable for residential buildings and offices. The panels are installed parallel to the direction of the sun's rays. The next row begins with the cut off part of the lamella of the previous one. The sections can be mounted at doors, heaters, in niches. For work, use elements longer than 30 cm.
Diagonal
This type of installation assumes laminate flooring at an angle of 45 degrees. The diagonal assembly of the cover is used to visually expand the space in small rooms. The scheme is suitable for rooms with a corner door. With this method of laying the material, its overrun is no more than 15%. The maximum percentage of waste is possible in long rectangular boxes.
Perpendicular
When using such a mounting scheme, the strips are mounted in an exact checkerboard pattern. Also, the drawing can imitate brickwork. When choosing such a style, the consumption of the material used increases. Its advantage is the high mechanical strength of such a coating. The chess layout is suitable if the material is monochromatic.
Base types
You can lay your laminate tiles on a concrete or wooden sub-floor. Their preparation is somewhat different.
Concrete floor

A concrete base for laying laminate flooring is the best. If the house is just being built, the filling of the subfloor must be done immediately in compliance with all the nuances of the technology. If the surface is old, you need to fix cracks, potholes, humps. Correct pouring of a concrete base provides for the following work:
- cleaning the subfloor with a construction vacuum cleaner;
- applying a primer to the base;
- preparation of the solution (it is kneaded according to the manufacturer's instructions);
- pouring the mixture and distributing it evenly with a spatula;
- treatment of the layer with a needle roller for compaction.
The horizontal level is checked in the course of work. If the substrate is uneven, use a thin layer of self-leveling compound. After 2-3 days, the flooring can be assembled.
Differences in the subfloor in height should not be more than 2 mm per linear meter. The concrete base requires prior waterproofing or underlayment.
Wooden floor
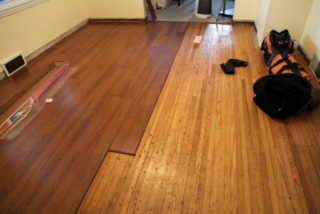
When using a plank base, attention is also paid to its height differences. Floor preparation provides for the following procedure for performing work:
- replacement of elements that are broken, worn out or rotted;
- elimination of protruding fasteners;
- additional fixation of boards that squeak.
If the differences in height are negligible, the base can be sanded. In other cases, it is required to install plywood or cement particle boards. They are laid across the boards. Between themselves, the sheets are laid with bandaging the seams. Before fixing the canvases, measure the horizontal level.
On a warm floor
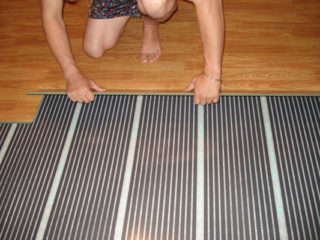
To prevent the coating from deteriorating during operation, it is necessary to observe the subtleties of installation:
- lamella laying can be started only after they get used to the conditions in the room: this takes 2-3 days;
- before installation, the floor heating is turned off, but the surface temperature is 15 degrees;
- to avoid overheating of the floor covering, you should not lay carpets on it;
- it is necessary to lay out the lamellas so that they do not touch the walls: a deformation gap is formed.
The disadvantage of this installation is the need to keep the humidity in the room at a constant level - at least 50%. Sometimes it requires the use of a humidifier to provide it.
It is possible to lay the laminate on linoleum if the base does not have mechanical damage or abrasions. It is best to remove the old coating if it has tears or is too soft.
DIY step-by-step instructions for laying laminate flooring
Installation of laminate flooring is within the power of any person, even a novice master. It is important to follow the sequence of work and installation technology.
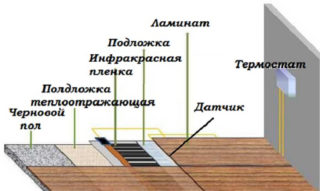
Step-by-step instructions:
- The first rule of laying linoleum on a concrete base is its waterproofing. For work, use plastic wrap. They lay it with an overlap, and the joints are glued with construction tape.
- Installation of wedges to form a deformation gap. The elements must be the same. They are dismantled after laying the coating.
- Laying the substrate. This step involves the use of natural or artificial materials that hide minor irregularities, and also act as a sound insulator. They are laid perpendicular to the laminate slabs.
- Installation of the first row of flooring. Here you need to strictly follow the step-by-step instructions. Laying should start from the left corner of the room. The panels are connected to each other using the “thorn-groove” system. For tight fixation, they are knocked out with a rubber hammer. The last element will have to be filed.
- Installation of the second row. Collect it separately. When it is ready, it is attached to the first row. The spikes are inserted into the longitudinal grooves at an angle of 40 degrees. If the rows are long, the master will need helpers.
- Laying the last row. Here the slats will have to be adjusted not only in length, but also in width. In addition, you need to arrange a doorway, a threshold.
In the last turn, the skirting boards and sills are fixed.


