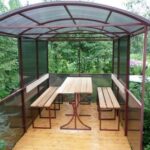
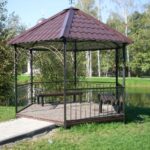
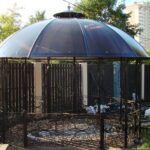
Protruba is most often used for the construction of a metal gazebo. A sturdy frame serves as the basis for any wall and roofing material. A solid gazebo made of a profile pipe looks beautiful and original, the material is combined with corrugated board, polycarbonate, wood, brick and stone. An iron pergola made of a professional pipe is decorated with forged details, sculptures, and plants.
- Description, pros and cons of the material
- Types and designs of arbors
- Buildings with foundations
- Gazebos without a foundation
- Structures from a professional pipe and polycarbonate
- Materials used
- Step-by-step construction of a gazebo from a profile pipe
- Profile pipe selection
- Preparation of dimensional drawings
- Foundation device
- Assembling the bottom and center piping
- Installation of uprights and painting of the frame
- Installation of roof and roofing material
- Side walls and floor finishing
- Recommendations for working with polycarbonate
Description, pros and cons of the material
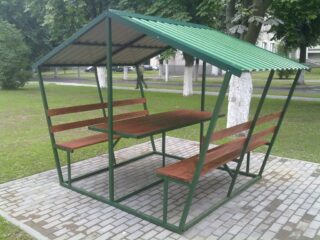
Pipes made of low-alloy, carbon, stainless steel, as well as aluminum have a cross-section that is different from a circle, for example, they are in the form of a square, oval, rectangle. Produced by cold or hot stamping of a welded round pipe on rolling equipment.
Positive aspects of using a professional pipe:
- lightness allows you to put the gazebo on dense and solid ground without the usual buried foundation;
- fire safety of the material favorably distinguishes it from wooden structures;
- straight walls facilitate easy cutting and docking.
The gazebo looks neat thanks to the precisely fitted connections. It is possible to weld joints and use bolts and nuts for collapsible options.
The disadvantages include moisture corrosion. The problem is solved by timely treatment with protective agents, painting and varnishing.
Types and designs of arbors
A simple form is represented by uprights in the corners, a roof with a slope on several purlins. Such buildings are made without a monolithic foundation, the underground part of the columns is concreted.
Common types of gazebos:
- A circular rotunda with circumferential columns that support the beams of the roof structure. The roof is a dome.
- The pavilion comes in different shapes and sizes. The building is used for entertainment, and the structure of walls and roofs can be different.
- The belvedere is built on a high place, for example, on a steep, steep bank. From such a gazebo they observe the surroundings; there is always a bench in it.
At the base there can be a rectangle, square, polygon. Collapsible structures are made in the form of a tent canopy, which is quickly assembled, rearranged to another place. Stationary gazebos are made in the form of a kind of house in the country or in a private courtyard with a mandatory foundation.
Buildings with foundations
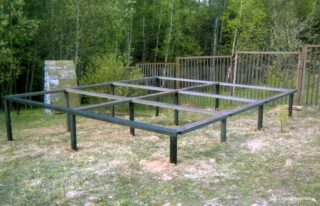
Arbors made of metal profiles with a large mass of walls, rafters and roofing material are placed on the foundation. After installing the profile frame, the parapets can be made of bricks, stones, metal.
Use types of foundation:
- columnar;
- pile;
- tape;
- monolithic concrete slab.
The pillars are made of brick or reinforced concrete. They are mounted under the main frame pillars. The supporting elements are connected together with a wooden or iron beam. When the soil heaves, such connections will keep the pillars from diverging in different directions.
Piles use twisting piles, they are set using a screwing device. Recessed elements are also combined with a grillage.
The concrete tape can withstand heavy loads, it is deepened into the soil by 0.7 - 0.9 m, the base is reinforced. The slab foundation is installed in areas with floating and unstable soils. The slab also serves as the floor of the structure.
Gazebos without a foundation
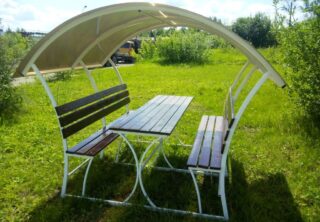
Portable, collapsible and folding products are placed without a base. They try to build gazebos according to the simplest scheme so that there are fewer complex nodes and parts. When installing, bricks are placed under the racks, flat stones, the strength of which allows the canopy to withstand.
Portable versions are equipped with a frame in the lower part, on which the structural profiles are supported. Such a frame evenly distributes efforts on the soil, prevents the soil from being pushed through. They choose a rental of a small section so that the gazebo can be moved.
Structures from a professional pipe and polycarbonate
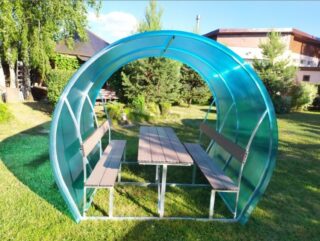
A translucent material is considered as wall cladding and a gazebo roof. The combination of pipe and polycarbonate allows for many interesting variations. The material easily covers arched and other curved surfaces, so a profile gazebo can be with straight or semicircular walls.
Polycarbonate is used:
- solid transparent or tinted;
- lightweight honeycomb version with translucent voids.
An arch can be made from a profile pipe on a bending machine with three rollers, between which a long element is passed. Sand is poured inside the pipe, then the ends are muffled with plugs so that when passing along the rollers the section is not crumpled due to the internal void.
Polycarbonate expands and contracts with changing temperatures, therefore, during installation, technological gaps are left for displacement.
Materials used
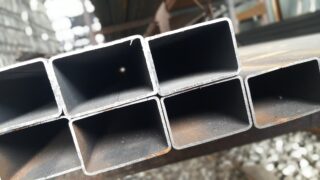
The shape of the section does not play a special role, therefore, a square and rectangular profile is suitable for a gazebo from a professional pipe. It is important to choose the parameters of the rental so that it can withstand the effect of strong winds and does not bend when a person is leaning on it.
For a standard garden gazebo, a profile with a wall thickness of 2 mm is used:
- base at the bottom - take a pipe 60 x 60 mm;
- frame posts - 40 x 60 mm, 50 x 50 mm;
- upper and central strapping belt - 40 x 40 mm;
- roof structure - 40 x 60 mm;
- struts, interchanges, railings - 20 x 40 mm.
To install the pillars in the ground, you need concrete. The roof is covered with polycarbonate, for arched they use a thickness of 4 - 8 mm (it bends more easily), for straight slopes they take a thickness of 8 - 12 mm.
Step-by-step construction of a gazebo from a profile pipe
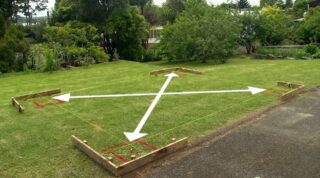
Construction begins with the preparation and marking of the site. Determine the places of storage of building materials, the location of welding equipment, concrete mixer. If an excavator or crane is going to work, it is necessary to provide for the possibility of passage.
Markup order:
- garbage is removed from the site, the fertile layer is removed by 10 - 15 cm;
- the marking begins from one corner of the building, a stake is driven in, two adjacent sides of the gazebo are marked from it (length and width);
- a right angle is marked with a theodolite (they call a surveyor), but it is easier to determine an angle of 90 ° according to the principle of interaction of the hypotenuse and legs in a right-angled triangle;
- after marking the base, check the length of the diagonals, their sizes should ideally match.
For the long side, mark the installation sites for additional frame supports, if provided for by the project. Determine the position of the entrance, which is also limited by the racks.
Profile pipe selection
A rectangular profile pipe is more suitable than a round or oval one. The last 2 types are more difficult to weld together. It is not easy to drill the elements of the wall and roof cladding on them, the joints turn out to be sloppy. For convenience, the oval profile is combined with a corner, which has a straight surface of the shelves. Round and oval profiles are cheaper.
Pipes with a wall thickness of more than 2 mm should not be used in standard arbors, because this will lead to an unjustified rise in the cost of construction. There are aluminum profiles and stainless steel products. Their cost is much higher than a professional pipe made of iron.
Preparation of dimensional drawings
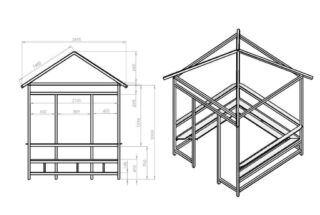
The owner of the site can make a project of a gazebo from metal pipes with his own hand or take a typical one from the Internet, which presents the main drawings.
The set of drawings includes:
- layout of the location of the gazebo in the courtyard with the binding of the axes to existing objects (fence, path, residential building);
- foundation plan with a dimension line and reference to the axes of the building;
- installation plan for harness elements;
- installation diagram of support racks;
- roof structure plan, layout of polycarbonate sheets;
- a vertical section of the gazebo with an indication of the marks of the top of the entrance opening, the bottom and top of the windows, all elements of the roofing structure, the depth of the foundations, the thickness of the pillow.
Drawings help calculate the required amount of materials, change the design of the gazebo on paper, and not the finished product.
Foundation device
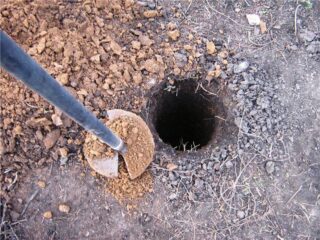
Pits are dug under the metal support posts with a garden drill. They are deepened by 0.7 m, taking into account 20 - 25 cm of filling from sand and crushed stone of the middle fraction. The pillow is tamped after spilling with water.
Sealing the underground part:
- the racks in the lower part are wrapped in two layers of roofing material to exclude the influence of soil moisture;
- in another embodiment, they are coated with molten resin (bitumen) 3 times, waiting for each layer to dry before applying the next.
For concreting, a mixture is prepared in a concentration of 1: 3: 5 (cement M400, river or quarry sand, crushed stone or gravel, respectively). Foundations are made for all vertical supporting elements of the frame.
Assembling the bottom and center piping
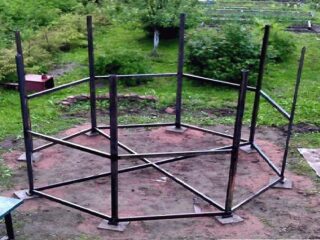
... It is fixed by welding or bolts at a level of 5 - 7 cm from the ground surface. The location mark is first placed on one column, then transferred to other supports using a water level or level. To strengthen the frame, small corner braces are welded, the pipe section is taken smaller.
For the middle strapping, a 40 x 40 mm profile is used. The work is carried out in the same way as the installation of the lower belt, only the elements are fixed at 80 - 90 cm from the ground surface, corner spacers are placed. Together, the middle and bottom chords serve as the basis for the arbor sheathing.
Installation of uprights and painting of the frame
The frame includes corner posts, intermediate posts and sheer elements of the entrance group. Above the entrance, a transverse jumper is made 20 cm higher than the average height of a person. Racks are mounted with a level check. They are placed in the pits, set in the desired position, then fixed with wooden struts. This is necessary so as not to disturb the verticality during concreting.
Immediately after pouring, the concrete is bayonetted with a shovel, a piece of reinforcement or a construction electric vibrator to expel air bubbles. Concrete gains 100% strength by 28 days, but further assembly of the frame can be done on the tenth day.
The metal of the frame is treated with a rust remover, then painted with oil, pentaphthalic or latex compounds.
Installation of roof and roofing material
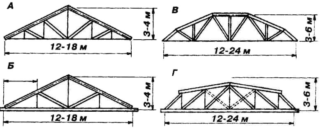
In a single-pitched design, the frame racks on one side are made higher in order to install inclined rafters on them. The upper strapping belt is made horizontally, a professional pipe is welded onto it for the device of the ramp.
For a gable roof, trusses are made from a professional pipe. They are welded on the ground or collected at the top. The joints are cleaned of scale, cleaned with a grinder. A crate is welded onto the rafters or side surfaces of the truss.
The step between the elements is calculated taking into account the weight of the roofing material, wind and snow load. When installing corrugated board, the height of the protrusion on the profile is taken into account.The material is laid with an overlap of one wave, roofing hardware with a sealing gasket is used.
Side walls and floor finishing
For cladding, clapboard, ship board, siding, profiled sheet, polycarbonate are used. If necessary by technology, an additional crate is made of pipes measuring 20 x 20 mm or wooden slats with a section of 15 x 40 mm are used.
Floor options:
- An edged or grooved board is used, the ends of which are attached to the profiles of the lower strapping. If the boards are long, additional beams are welded in to give rigidity.
- The soil is chosen to a depth of 20 cm, sand and cement are poured, and rammed. Paving slabs are laid on it.
Sometimes the base is concreted with a layer of at least 10 cm, then they are finished with ceramic tiles with mortar.
Recommendations for working with polycarbonate
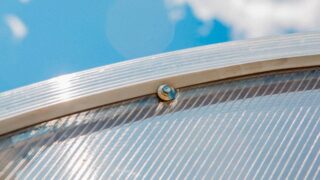
Cellular polycarbonate is sold in a protective film, which is removed immediately before attaching the sheets to walls or roofs. The ends of the polycarbonate are covered with an aluminum strip or a special profile so that dust does not get inside.
If condensate collects in the honeycomb, it is disposed of by blowing air. It is impossible to step on the material, under the weight of a person it can crack. Cut polycarbonate with a hacksaw or electric jigsaw. The sheets are fixed to the profile with self-tapping screws with a rubber gasket.

