On the territory of many summer cottages and country houses, one can see light architectural structures with a table and benches - gazebos. They are intended for rest and protection from the sun or rain. They are also used for cooking. For this, kitchen tables and furniture are installed. A gazebo with a stove will make your stay as comfortable as possible. Many construction organizations offer summer residents simplified designs for gazebos with a fireplace, barbecue oven and barbecue.
Types of gazebos and varieties of stoves.
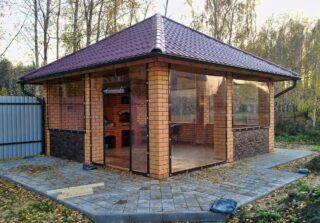
Gazebos can be open or closed. Outdoor garden buildings are usually equipped with mobile barbecues and barbecue grills. When erecting closed gazebos, bricks, stones or wood are used, they are equipped with stationary hearths:
- barbecue oven with fireplace, barbecue or cauldron;
- brazier and barbecue oven;
- Russian stoves with an oven, barbecue and smokehouse;
- oven complex: barbecue, brazier, cauldron and spit).
The stove complex is a small kitchen where you can prepare food, wash and store dishes. Projects of gazebos with a barbecue and a barbecue stove are a construction option in which, in addition to an iron grate and a charcoal tray, there is a firebox and a chimney. A barbecue oven with a fireplace, barbecue or cauldron differs from the previous version by the presence of a wide furnace portal, which allows you to cook food and, if necessary, heat the gazebo. More presentable gazebos with a stove and barbecue, additionally equipped with an oven and / or a smokehouse, have the same functions.
There are stationary prefabricated barbecue ovens made of cast iron, steel or concrete with the addition of stone chips. They have a stable base, table top and storage space for firewood. Such stoves are kindled on a metal plate, and the smoke is removed through a special hood that goes outside. However, such ovens cannot be installed in gazebos with tarpaulin and polycarbonate structures.
Features of the construction of stoves in gazebos
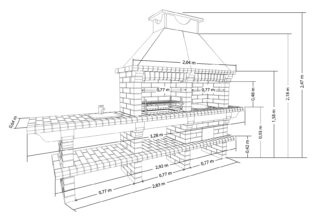
When starting to equip a resting place in the garden, you must first draw up a simple project of a gazebo with a stove and barbecue. You need to consider:
- estimated temperature in the firebox;
- stove dimensions;
- strength of materials;
- ease of use;
- compliance of the external design of the stove with the design of the gazebo.
If there is not enough space in the gazebo or the idea of arranging the stove came after the end of construction, it is best to build it under a canopy at a short distance from the building. You can also use a mobile oven.
Construction of a furnace in a previously built gazebo
Arrangement of a stove in a finished gazebo is associated with a number of difficulties, which will be quite difficult to overcome. For this you will need:
- disassemble the existing floor in the place where it is supposed to install the hearth;
- lay the foundation on which the future furnace will be installed.
The implementation of these works is associated with a large number of nuances, which only a qualified master can figure out.
Construction of the furnace simultaneously with the construction of the gazebo
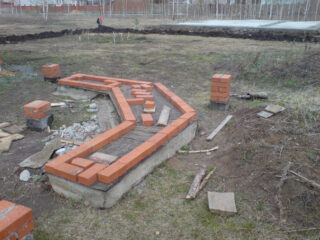
Arrangement of the furnace simultaneously with the construction of the gazebo is the best option. They start it with laying the foundation, performing the following operations in sequence:
- digging a pit;
- filling the pit with gravel;
- leveling and compaction of the gravel pad;
- laying the reinforcement cage;
- assembly and installation of formwork;
- filling the foundation pit with concrete.
The base for the hearth should be 5 cm below the floor level.
After the concrete has completely solidified, the foundation surface is lined with a double layer of waterproofing and covered with a fire-prevention blind area made of steel sheet on an asbestos pillow 6 mm thick. In this case, the removal of the blind area in front of the firebox is 60 cm, and 30 cm from the other sides.
For further work, you need to prepare:
- masonry mortar;
- countertop;
- refractory brick.
The oven support is laid out based on the standard order in 6 rows.
- The laying of the first row is carried out, carefully checking the horizontal and controlling the corners.
- The laying of the second row is carried out, constantly monitoring the correctness of the binding of the bricks.
- The 6th row of bricks completes the formation of the base for the oven - the hearth, with a place for storing firewood.
- The first overlap is laid in the 7th row.
- After the 8th row of bricks, they start lining - laying out the firebox and installing the door.
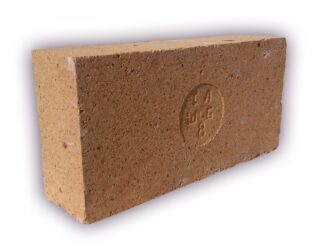
Fireclay bricks are used to lay out the firebox. The seams between them should not be thicker than 3 mm, otherwise the masonry may collapse.
Fireclay brick is a material not intended for outdoor use. It is practically eternal in a hot, dry atmosphere, but in the open air it gradually deteriorates. This is especially critical for a stove installed in an unheated gazebo in winter. To increase the durability of chamotte, it is necessary to pre-treat the bricks with moisture-repellent impregnation, and plaster the oven itself with waterproof plaster of increased plasticity.
Lay out the firebox starting from the 9th row of brickwork. A prerequisite for its high-quality masonry is careful control of the horizontal arrangement of bricks. A pre-prepared countertop, which serves for the preparation of food, is placed on top of the 10th row bricks, to the right of the firebox. Bricklaying continues on the left edge of the firebox. The firebox 11 is closed with a row of bricks, and a removable iron barbecue grate is placed on top.
In places where the firebox door is connected to the masonry, the bricks must be bound.
After completing the arrangement of the firebox, they proceed to laying the oven. In front, it is laid out with one row of bricks, which will allow you to freely place skewers there. Not forgetting about the binding of bricks, the walls of the brazier are formed by laying out 17 rows of bricks. To form a visor (brick arch) over the oven, its arch is extended by 50 mm.
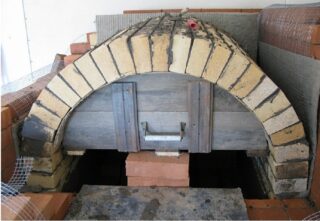
To make the roof of the oven smooth, a wooden frame is made on which bricks are laid. When the mortar in the joints is dry, the frame is removed.
The overlap of the frying chamber begins to spread around the entire perimeter of the stove, starting from row 19, and ending at 22. At the same time, the extreme row is pushed forward a little to make a visor.
When connecting the sidewalls to the back wall, you need to pay attention to the correct binding of the bricks.
On the 23rd row, they begin to form a chimney, after which the oven is closed. In this case, the cover is performed on the 15th row.
They begin to narrow the chimney on the 26th row. In this case, the dressing of the first row is carried out on row 27. Narrow the chimney gradually until a small opening remains.
The chimney is erected to a given height, and the cross-section of the chimney along its entire height should be the same. In the overlap of the gazebo, a special hole is made through which the chimney goes out.
It is allowed to use a metal pipe as a chimney, which is then covered with bricks. It is necessary to control the masonry parameters of the chimney regularly. In this case, a building level, a plumb line and a goniometer are used. When laying a chimney through the ceiling and roof of a gazebo with a stove, fire safety rules and the requirements of the current SNiP must be observed.


