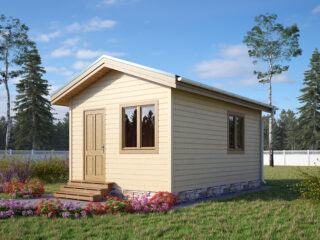
A change house 3 by 6 at a summer cottage can serve as a utility room or a room for inventory, as well as serve as a permanent or temporary dwelling. Any master with the skills of construction using frame technology can make it. To live in such a building all year round, it must be insulated with high quality and the installation of communications must be thought out.
Pros and cons of a frame change house

The construction of a 6x3 change house with a pitched roof is the simplest way to use frame technology. Works can be performed by 1-2 masters with a minimum of tools. The building is lightweight and does not require a massive foundation. He does not need to be given time to shrink, as is done in the construction of log cabins. Outbuildings are usually made with a pitched roof. If the building is intended for living, the roof can be made with a gable. From change houses, you can also assemble a permanent dwelling, equipping it with a veranda or terrace.
If the structure is made of metal, it is easy to transport it to the installation site fully assembled. The wooden frame change house 6x3 will have to be disassembled before transportation. If it is being built for temporary residence for the period while the house is being built, at the end of the work it can be equipped as a barn or other room for household needs.
The main disadvantage is the need for high-quality insulation, if the structure is equipped for permanent residence. This is especially true for buildings sheathed with corrugated board: the metal does not have thermal insulation properties.
Types of frame cabins
Change houses are stationary and portable, made of wood or metal. The option is selected depending on the purpose for which the house will be used.

The main types of cabins:
- Wooden - suitable for both a country house and a temporary dwelling or utility room. Their frame is made of a bar with a square or rectangular cross-section with a side of at least 10 cm. The advantages of cabins made of wood are thermal insulation qualities, environmental friendliness, compatibility with the surrounding landscape. A house used as a dwelling can be sheathed with sandwich panels to make it warmer.
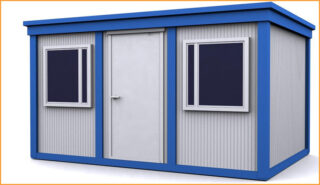
- Structures with a metal frame. It is often made from shaped pipes. You can sheathe the frame with a profiled sheet: this is an inexpensive and reliable material that does not tend to deform in the cold. Vinyl siding is also suitable for outbuildings. But if they are going to live in such a shed during the cool season, it must be thoroughly insulated. In addition to the version of simple pipes, you can also find a combined one: a wooden base is built into a frame welded from corner posts and channels.
- Portable cabins. They can be made of wood or metal. In the first version, the difference from the stationary version consists in a thick frame and a minimum of finishing. The beam for the base is taken with a cross section of at least 10x15 cm. Metal trailers are reliable and can serve for more than 15 years. For the frame, a professional pipe with a rectangular section of 4x6 cm is used, and for a log - with a square one, with a side of 4 cm. When arranging such a trailer, it is important to take care of the thermal and waterproofing of the walls. For the outer sheathing of the latter, a profiled sheet is used, for the inner sheathing - chipboard plates. If necessary, heating can be arranged in the shed, water and electricity supply can be supplied.
For the construction of metal structures (both portable and stationary), you must have the skills to work with a welding machine. If desired, the sheathing can be painted or the damaged sheet can be replaced.
Drawings of change houses 6x3

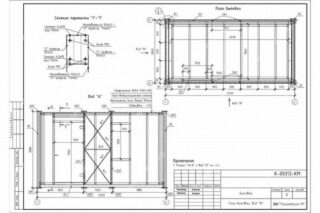
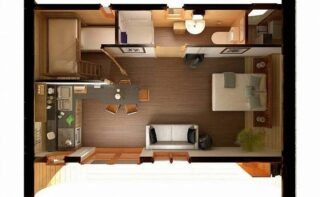
Before starting work, it is necessary to prepare a drawing of the change house. It shows the relative position of the premises included in it (if there is a desire to make several rooms), their relative position and size. The typical layout of a change house 6x3 m for housing includes 3 rooms, two of which have dimensions of 1.5x1.5 m. One of these rooms serves as a corridor, the other can function as a pantry or a bathroom. A large room measuring 3x4.5 m is equipped with heating and is intended for living. The project of the change house 6x3 should also reflect the places of laying the communications with which the building is supposed to be supplied. You also need to calculate the construction estimate in advance.
The project can include openings and partitions or do without them. They are made in the event that it is necessary to separate one room from another (for example, a living room from a warehouse).
If the change house will not be heated, it is better to do without wall partitions and zone the room with curtains: they take up less space.
Necessary materials
To install a 3 by 6 change house with your own hands, you will need 6 m long beams with a square and rectangular cross-section. The lower crown is created from a beam of 10x15 cm, the main frame is made of elements with a side of 10 cm. You will also need boards for flooring and lining for external cladding. OSB boards are suitable for the interior.
It is necessary to prepare mineral wool for insulation, steam and waterproofing. The roof can be made of slate. For the foundation, you can use expanded clay concrete blocks and bricks. Fasteners are also needed - staples and screws.
All wooden elements are necessarily treated with antiseptic and flame retardant compounds before starting the assembly of the frame.
Do-it-yourself frame construction

If it is decided to build a change house that will serve as a living quarters, the upper 0.3 m of soil is removed from the site where the building will be located, leaving the perimeter by half a meter. In this place, a sand pillow is organized and tamped. Better to sprinkle sand on pre-laid geotextiles. The foundation is organized from expanded clay concrete blocks. They are laid in the corners of the building and internal premises, as well as along the perimeter of the walls in one meter increments. Later, in the intervals between them, it will be possible to lay out bricks. If the concrete foundation in the form of pillars is poured in place, it will be possible to proceed to the next stages only after the mixture has solidified in about a month. In this case, it is better to carry out construction in the warm season.
Step-by-step instructions for further work:
- 2 layers of waterproofing are laid on the foundation and then 15x10 cm beams are fixed: 2 transverse and 3 longitudinal. Anchors or reinforcement are used for fastening.
- Mount the lower strapping from a square bar (you do not need to touch the middle beam).
- Logs of 10x5 cm bars are mounted on the longitudinal beams with the edge down. The distance between them is 6 cm.
- Vertical frame elements are installed from a 10x10 cm bar. Then the upper strapping is organized.
- Window and door openings are delimited by transverse square beams with a side of 5 cm.
- Rafters, lathing and roofing are mounted.
- A rough floor is created from sheet piling boards. Then waterproofing, a layer of mineral wool and a vapor barrier are laid. An edged board is suitable for fine flooring.
- The frame is sheathed with clapboard or plywood. It is better to take the first one, since it does not deform and does not swell from the action of moisture.
At the end, windows and doors are installed and communications are laid. After that, the walls and ceiling must be insulated and sheathed from the inside with chipboard or plywood.


