The construction of a brick fireplace stove for a country house is a difficult undertaking, but not so much that it could not be dealt with with the right approach. The work of a professional stove-maker will cost more than the material itself. Having shown care and patience, you can independently make a functional brick fireplace stove, which will allow you to heat the room, cook food and decorate even the most sophisticated interior.
Types of fireplace stoves with a chimney
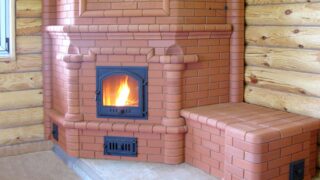
When drafting a stove with a stove or oven, you can take the following options as a basis:
- Wall mounted. The structure is placed in the center of the hall, installed close to the wall, and is immersed in it in whole or in part.
- Angular. This decision is made for small rooms, which saves a lot of useful space.
- Freestanding. They are placed in the center of the room, a free approach is provided from all sides, which is convenient both for warming it up and for cooking various dishes.
The multifunctional heating stove deserves special attention.
- In the kitchen. It is used for heating the building and cooking on the burner. Heating can be water, steam or air. The heating circuit is installed in the hearth or chimney.
- In the living room. It performs a decorative function in terms of burning flames and smoldering logs, as well as heating one room, when there is no need to heat the whole house.
A characteristic feature of such a product is the ability to use the hearths separately and simultaneously. The branch pipes are equipped with valves and are connected in a common chimney. Each firebox has its own ash pan and blower, which provides the ability to service one device while the other is running.
Fireplace stove projects
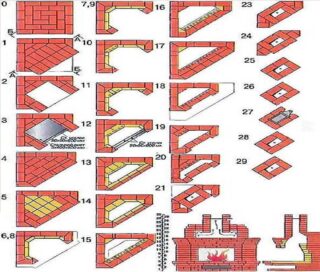
A fireplace stove for a brick house is a simple, reliable and functional source of heat. The firebox is closed with heat-resistant glass, the heat from the burning of wood heats the walls of the structure, the chimney and the hob. The decorative woodshed ensures storage and uninterrupted supply of fuel as it burns out.
The planning of a multifunctional hearth is a step-by-step process that requires attention to each stage.
The following concepts are distinguished here:
- Sketch. This is a drawing where, with reference to the interior of the room, the view of the hearth is shown. The image determines the size, shape, color of the device, as well as the location of the furnaces, ash pan, chimney, dampers, and other technological and decorative elements.
- Drawing. In the document, with a certain accuracy and scale, the dimensions of both the entire device as a whole and its parts separately are indicated. The dimensions are taken without taking into account the seams and are used to calculate the need for materials.
- Furnace ordering. Layout of each brick row of the hearth, indicating the row number, location and type of brick, doors, dampers, supporting elements. When repeating rows, they are combined in sequence.
Having correctly passed all the planning stages and understanding the essence of the work, it will not be difficult to cope with it.
Stages of work
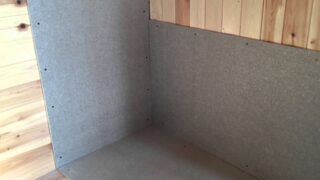
The place of installation of the hearth is chosen so that it meets the following requirements:
- Pre-finishing the walls with a fireproof coating. They will quickly collapse from constant temperature changes. If the house is made of wood, thermal insulation should be installed next to the stove.
- Heavy construction requires a solid, solid and stable foundation. When mounting on boards, props must be placed under them in order to prevent them from bending. And put a steel sheet directly under the hearth.
- The chimney is large enough to provide efficient draft. The height of the pipe is at least 400 cm from the branch pipe. It is not allowed that the length of the horizontal section of the canal is more than 200 cm, and the number of right angles exceeds two.
- The outer part of the chimney is made multi-layered, this will protect it from overcooling of pipes, an air lock and condensation. A cap is installed on the upper cut, which protects the channel from the ingress of precipitation, birds, insects and blowing out in the event of reverse draft.
- The decoration of the hearth can only be carried out with fire-resistant materials. In the future, next to it, you cannot put furniture and household appliances closer than 50 cm.
Having decided on the parameters, configuration, design and installation site of the fireplace, you can start preparing tools and purchasing building materials.
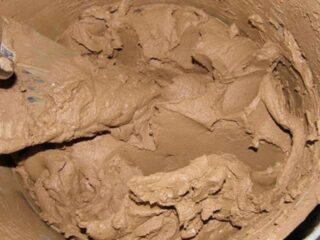
To build a combined stove from scratch you will need:
- refractory ceramic bricks;
- fireclay brick;
- clay-based masonry mortar;
- clay-sand masonry mortar;
- fireplace door with heat-resistant glass;
- cleaning doors;
- blower door;
- dampers;
- wire for door frames;
- fittings;
- mix for concrete (sand, cement, crushed stone);
- formwork boards;
- facing material.
Tool list:
- Bulgarian;
- welding machine;
- roulette;
- square;
- level;
- Master OK;
- grout for joints;
- mallet;
- rubber and steel spatulas.
The work is specific, dangerous at some stages. You cannot do without a stepladder and protective devices - helmets, goggles, gloves and a respirator.
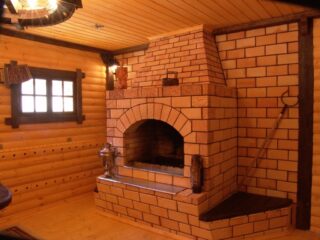
Fireplaces look great in the interior of the cottage, they effectively perform the functions of heating and cooking devices. But these are specific objects, distinguished by their high weight and increased fire hazard. Before installing the fireplace, you need to sheathe the walls and nearby structures with plasterboard and lay out with ceramic tiles.
Then the foundation is made. It must be done separately, without reference to the base of the building, in order to avoid distortions and cracks in case of uneven settlement of structures.
This event is carried out in the following sequence:
- Excerpt from the foundation pit. Its depth should be 30-40 cm below the freezing point of the soil. And the size is 10 cm wider than the boiler.
- Sand and crushed stone are poured into the bottom of the pit, the thickness of each layer is 10 cm. The pillow is leveled and rammed.
- Installation of board formwork. So that the solution does not stick, and the boards can be reused, cellophane is applied to them.
- Installation of the frame. For this, a mesh, lattice or reinforcement rods are used.
- Sequential laying of rubble stone and filling it with cement mortar. The procedure is performed in layers until the foundation is level with the floor.
- Leveling the base. It is carried out 2-3 hours after the last pouring, when the composition has hardened, but remains loose. Water is poured onto the surface and dry cement is poured. After that, circular movements are carried out with a float until the surface is saturated with the solution and becomes perfectly flat.
Gaining strength with concrete is a long process, you need to wait at least two weeks.
The next step is waterproofing and dry laying of the first row. The bricks are laid out according to the scheme, fitting is done taking into account the seams, the excess is immediately cut off and grinded. This technique will allow you not to waste time when it is limited by the setting time of the clay solution.
Laying can be carried out for several days. The ordering is carried out in accordance with the scheme. Particular attention is paid to securing heavy metal parts - shelves for grates, doors for the oven, fireplace and blower. For this, pins and wires are used.A week after the end, the oven is heated and finished.
Difficulties in construction
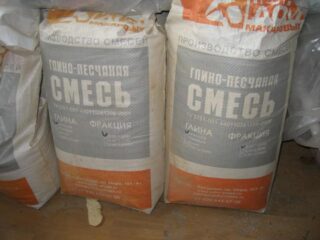
The main difficulty for a novice stove maker is the exact adherence to the sequence and adherence to the deadlines for the work. It is necessary to take into account the seam allowances, which are 3-5 mm for each stone. An equally important event is the choice of clay for the solution and its correct kneading. Therefore, it is advisable to buy ready-to-use mixtures with precisely adjusted proportions.
To improve the furnace, you can make a lower heated bed, install a thermometer, make additional lining, install a condensate sump on the chimney.


