When they decide to equip a place to rest in the country with a stove, first it is worth determining what exactly it is needed for. If the main goal is to grill kebabs or vegetables, build a brazier or barbecue. If they are going to bake bread, pizza, baked goods, more complex structures are required.
What is the Pompeian stove
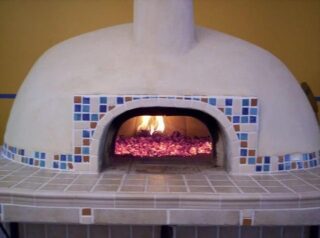
The Pompeian oven is a variant of the domed hearth oven, the main purpose of which is to bake pizza. You can also cook other dishes here: bread, flat cakes, pies. By design, the pompeyka is close to the Russian stove, as it includes an extensive combustion chamber. The opening for loading products can be located on the side or on top. The latter option resembles a tandoor, but the principle of operation of the pompey is somewhat different.
The Pompeian oven is designed for cooking only. It is impossible to heat the house with it.
Design
The whole structure consists of 3 parts: a foundation, a pedestal, 110–120 cm high, a table top and a stove. The latter includes the following components:
- under - the floor, go to the bottom of the stove;
- the dome is of the correct semicircular or oval shape;
- entrance arch - usually from the side;
- chimney - located above the entrance to the furnace.
The dimensions of the structure vary widely, but the proportions must be observed. The ratio is as follows:
- the height of the entrance arch is 60% of the height of the dome;
- the width of the arch is equal to ½ the height of the arch.
By the type of dome, the Tuscan and Neapolitan stoves are distinguished. In the first, the arch is round, in the second it is low, it seems flattened.
Principle of operation
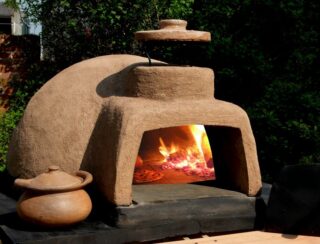
The Pompeian stove warms up much faster: it is formed by only 1 row of bricks laid on the bed. After 45 minutes, the temperature reaches + 250 ° С, and after another 15 + 350 ° С. Bread is baked here in just 15 minutes.
This efficiency is possible due to the unusual heat flow pattern:
- convection flows diverge from the combustion chamber;
- they are reflected from the walls of the vault and form reflected streams.
The bookmark is wood-fired, it slowly flares up until the volume of warm air becomes so large as to block the flow of air through the narrow mouth of the stove. At this moment, the combustion becomes weaker, and the temperature decreases slightly until the moment when oxygen cannot re-enter the furnace. The cycle is closed and repeats until the wood is completely burned out.
Advantages and disadvantages
The Pompeian stove provides many advantages:
- quick heating - within half an hour, after which you can bake pizza;
- high heat accumulation - after a portion of fuel has completely burned out, the temperature is maintained for several more hours;
- compactness - the pompeyka is small and quite beautiful.
Minuses:
- the complexity of the design - experience is needed to build such a model;
- heavy weight - a foundation is required for the pompey;
- high cost - expensive fireclay and clay bricks are needed for construction;
- construction takes a lot of time.
The furnace body is laid out from only 1 row, therefore only high-quality bricks are suitable for such a construction. Saman, poorly burnt clay stone is not suitable.
Materials and tools
You can make a Pompeian stove with your own hands from clay and brick. The latter option is somewhat simpler, and most importantly, more durable. For him you need:
- fireclay brick;
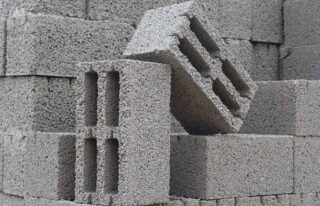
- cinder block or other building brick for the construction of a pedestal;
- refractory composition for masonry;
- insulation for thermal insulation;
- waterproofing material - usually plastic sheeting;
- sand, cement, crushed stone for the foundation.
Of the tools you will need:
- trowel, mallet;
- grinder with a stone disc;
- spatula, chisel, goniometer;
- measuring instruments.
You will also need containers for mixing solutions.
How to fold a Pompeian oven with your own hands
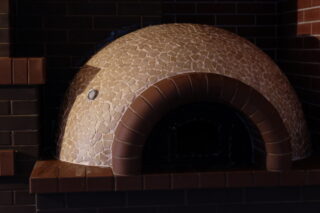
Before you build a stove with your own hands, you need to choose a design. Preference is given to round vaults, because here the wall bends with the same radius.
Step-by-step instructions for the construction of a Neapolitan pompey are more complicated: here the bend radius changes.
Foundation
The weight of the structure is not so great, so a shallow version is made under the pompeyku. A reinforced concrete slab 20 cm thick is quite suitable.
You can make the foundation in the traditional way: dig a trench 20 cm deep, tamp a 10 cm layer of sand on the bottom, lay out the remaining 10 cm with crushed stone and fill it with cement mortar. This option is cheaper, but you will need to wait until the solution sets.
After hardening, the foundation is waterproofed with 2 layers of roofing material.
Pedestal and countertop
A pedestal or table is made of any brick. It is more profitable to take large, cheap material: cinder blocks, for example. Only one side is open in the structure. Firewood and wood chips are stored in the resulting niche for kindling.
Cover the pedestal with a concrete slab countertop. Any flat stone like a dolmen will do.
Dome
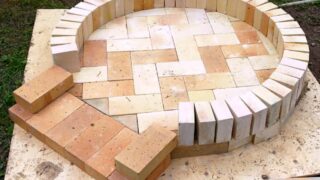
The laying of the vault seems simple, but in reality it requires accuracy. Brick consumption is large, it will not be possible to reduce it.
- Draw the outline of the vault on the countertop. Lay out the bottom of fireclay bricks. The stone is cut along the contour of the circle with a grinder.
- At the same stage, the side of the stove and a pedestal under the arched entrance are laid out. The sides are made by placing a brick on an edge so that the edges of the stones touch on the inside and form a solid surface.
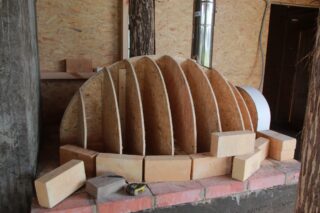
- A template is prepared: a hemisphere of cardboard or boards, a model of plates or clay. The template is placed inside the bumpers.
- The bricks are cut into halves diagonally. The length and angle of the latter is determined by the bending radius of the wall. This value must be calculated in advance.
- Spread in halves - on the bed, each next row, gradually reducing its radius. They try to make the seams as thin as possible.
- In parallel, an arched entrance made of whole bricks is being erected.
A hole is provided for the chimney when laying the arch. After the completion of the dome, a metal chimney is installed or a brick is laid out. The order is standard.
Thermal insulation and cladding made of clay or plaster
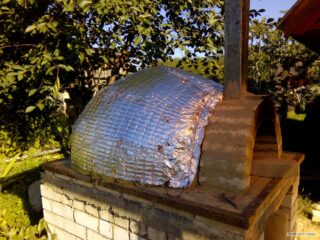
Heat insulate the outside of the oven. For this, the vault is coated with clay, then thermal insulation is laid with a thickness of 5-10 cm. A fire-resistant material is used, like mineral or basalt wool. From above, the structure is sealed with a cement-sand mortar.
After the plaster layer has dried, you can revet the pompeyka with clinker, tiles, stone.
Drying and first kindling
After the oven is erected, it should dry out within 3-4 days. After that, a test kindling is done.
- At the first laying, 3 kg of straw or 2 kg of paper are burned.
- In 2 - 3 kg of straw and 1 kg of wood chips. Chips of fruit trees are preferred. You cannot take coniferous wood: resinous deposits will remain on the walls.
- With 3 fires, 4 kg of chips are burned.
- In 4 - 1 dry log in addition to wood chips.
- Then perform a few more fires, each time adding 1 more log.
This gradualness is necessary for proper drying of the structure. Otherwise, the mortar will dry out too quickly and unevenly and crumble.
Tips & Tricks
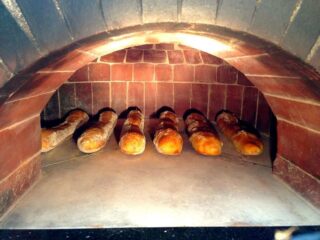
The Pompeian stove is very easy to use, but it is better to follow some rules.
- Here you can cook not only pizza, but also homemade bread, buns, dishes in pots, kebabs, grilled meat, fish, pies. Some of the dishes require additional grills.
- Straw and firewood are used as fuel. Pellets cannot be used.
- It is advisable to heat the pompeyka with the same wood.
- If the stove is installed outdoors, a canopy is placed on top. So the dome is protected from hypothermia during rain or strong wind.
The pompeyka can be equipped with a door if bread is to be baked here.


