The dressing room in modern steam rooms can be used not only for its intended purpose. You can make a dressing room in the bath with your own hands both indoors and in the form of a separate extension.
Purpose and requirements
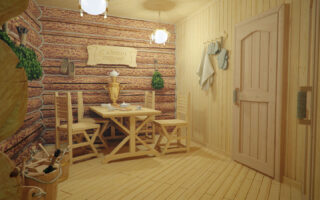
Traditionally, this room was intended for changing clothes for visitors to a bath or sauna. They also rest in it in between visits to the steam room. Those who decide to build a miniature bathhouse on the site, when planning, usually make the dressing room sharpened precisely for these purposes. However, if the size of the building allows, it is often furnished as a relaxation room, where visitors can drink tea, receive massage treatments or relax after work.
It is advisable to provide a comfortable temperature in the room. This is especially important if the steam room is planned to be operated in winter. A do-it-yourself bath with a warm dressing room can be made of different materials - from logs or other raw materials based on wood, from bricks, OSB slabs or aerated concrete blocks.
The premises must be of sufficient size - at least 1.5 m² for each visitor. It is necessary to install furniture in it - at least, a bench for rest and clothes. If the dimensions allow, a table is also placed in the dressing room. Clothes can be hung on hooks nailed to the wall.
Is it possible to attach to the finished building
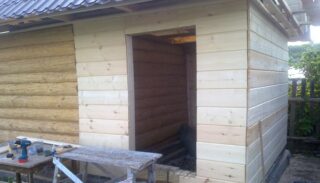
Small baths are usually built in villages and on small plots. Often they only have a steam room and shower room. Sometimes the room where the stove is installed becomes common for these two purposes (visitors wash in the same place), and the layout consists only of it and a small dressing room, which serves only as a dressing room.
It happens that the owners of such steam rooms decide to equip a full-fledged rest room. This problem can be solved by attaching a frame dressing room to a log bath. This solution has no visible drawbacks: it is beneficial for its simplicity and speed, the absence of the need to build a solid foundation.
Preparation for the construction of a dressing room

Before attaching the dressing room to the bathhouse with your own hands, you need to prepare wooden building materials (timber and boards), as well as mineral wool for insulation and a vapor barrier film. It is also necessary to purchase a roof covering. From the toolkit you will need:
- electric drill and screwdriver;
- building level;
- hand drill;
- corners and fasteners;
- saw for trimming;
- hacksaw for wood;
- a hammer;
- marking tools - pencil, tape measure, square.
The concrete mix requires sand, cement, crushed stone and a hand-held concrete mixer. You can also purchase a ready-made mixture in a building store. All wooden parts are pre-treated with protective compounds.
When calculating the size of the room, it is taken into account that 1.5 m² of area must be provided for each visitor. To the value obtained by multiplying the estimated number of people by this number, another 2-4 meters are added.
Construction and cladding
It is possible to attach a dressing room on the basis of a frame both to a steam room made of wood, and to a block building.
Foundation and floor
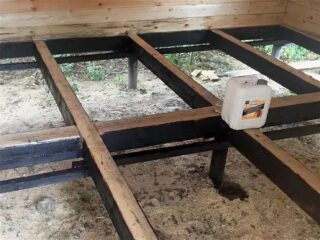
A pile base is suitable for a frame dressing room. The supports are mounted at the corners of the building, as well as along the perimeter of the walls with a distance between adjacent elements of 1-1.5 m.After marking in the places of future piles, holes are dug 0.6-0.8 m deep and a layer of sand with a height of 0 is poured onto their bottom, 2 m. After tamping, gravel is poured on top.
Formwork for pouring concrete is created from galvanized steel sheets and has the form of hollow cylinders. Such structures are mounted above the pits. They must all end at the same height. A frame is placed inside, connected from sawn reinforcement elements. You can cut the latter with a grinder. Then the concrete mixture is poured into the cylinders. When it hardens, the cylinders are dismantled, and the vacant space is covered with sand.
After that, you can equip the floor. The first crown of the strapping is formed from bars attached to the supports using anchors. Logs are mounted inside using corners. Their lower parts are sewn up with a rough boardwalk.
Erection of the frame
Corner posts are installed first. Braces are used as temporary support. Intermediate supports are mounted with a pitch of 0.8 m. After that, the bars for the upper strapping are fixed.
Windows and doors
The openings are formed from longitudinal and transverse lintels. Their dimensions should slightly exceed the dimensions of frames and door frames. This is necessary so that the latter can be adjusted. Polyurethane foam is placed in the voids.
Ceilings and roof
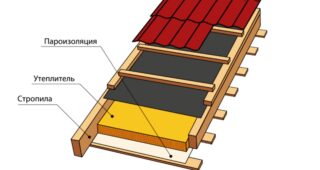
The ceiling structure consists of two plank decks - rough and final. Between them are laid 2 layers of vapor barrier film, separated by a heater.
Communications
If you plan to place a sink in the room, you need to supply water from a well, a well or a main network. The drain is led out into a pipe coming out of the shower room. If it is impossible to organize this, lay a pipe to the drainage well.
When installing the electrical network, the wiring is removed in protective sleeves with a corrugation.
Treatment
Any available wooden building materials are subject to treatment with fire retardant and antiseptic impregnations. This will protect them from fire and decay.
Heat insulation works
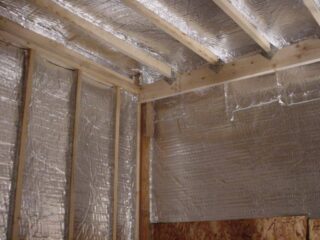
When arranging a room, the correct order of laying the layers of heat and vapor insulation is important. This will protect the walls and floor from the accumulation of condensation, which will destroy the wood.
A vapor barrier layer is mounted on the rough flooring, and mineral wool is placed in the empty spaces. Waterproofing strips are overlapped on top (you can connect them with a stapler) and finishing boards are nailed.
On the ceiling, mineral wool insulation is covered with foil film. A decorative covering can be arranged on top of the finishing boards.
The walls are sheathed with wood shields and foil film is attached to them. Bars with a square section (side - 5 cm) are nailed from above, forming a cellular structure. Mineral wool fits into the gaps. Another foil layer is mounted on top and a crate is stuffed, to which the finishing coating is attached.
Interior and exterior decoration
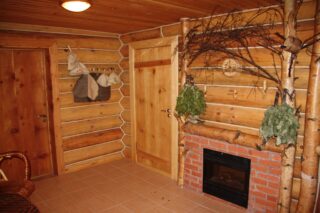
The design of the finished room can be made antique or more modern using siding or tiles. The area around the stove is covered with non-combustible materials.
You can lay lining on the floor, use ceramics or decorative stone. The material for decoration is selected so that it is combined with the design of the room itself. A metal sheet is laid in front of the firebox to protect the wooden covering from coal.
The walls can be decorated with a slab - this will allow you to create an imitation of a log house. Lining flooring is also suitable, as well as materials that tolerate moisture and temperature jumps well.It can be a block house, decorative brick, plastic or metal siding.
To organize ventilation, a hole with dimensions of 15x20 cm is made at 0.55 m from the door of the firebox. The damper for it is made of wood and equipped with a handle. A similar hole is made on the opposite wall at a height of 2 m from the floor.

