Facing the floor with ceramic tiles is a common way to decorate rooms with high humidity. It prevents the formation and development of fungus and reliably protects the floor from moisture accumulation. Ceramic flooring can improve the appearance of a room by decorating it with a variety of patterns. This process is carried out in various ways. The most effective and at the same time difficult is laying the tiles diagonally on the floor.
Advantages and disadvantages of diagonal styling
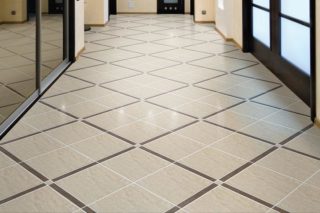
The technology for laying ceramic tiles diagonally differs from the standard one. The process is more complicated and requires more consumables, since the tiles must be cut in order to lay out the final row of masonry along the walls. The leftover cuttings are usually not suitable for use elsewhere. It is even more difficult to cut out fragments of complex configuration in places where walls have ledges or niches.
The advantages of diagonally laying tiles on the floor include:
- visual expansion of space, which is especially important for small spaces;
- spectacular appearance;
- the ability to mask uneven walls (there are no lines parallel to the walls);
- diagonally trimmed elements look more neat than straight masonry.
Cutting fragments neatly requires a more precise and therefore more expensive tool.
Calculation of the required number of tiles
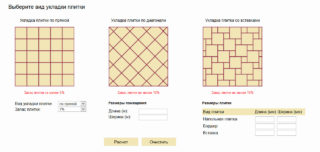
Calculation of the required amount of starting material is one of the most crucial moments when laying diagonally. The thoroughness and accuracy of the calculation will ultimately eliminate the need for additional visits to stores to make up for the lack of tiles. In addition, the color and format of products from different batches may vary significantly. Therefore, all the material must be purchased at once, not forgetting about the necessary stock to replace the tiles damaged during cutting.
In addition to using special online calculators and professional programs, the number of tiles can be calculated manually. This process is carried out in two ways:
- Calculate the surface area to be laid and divide this value by the area of one tile.
- Determine the number of tiles in one row and multiply by the number of rows.
The number obtained as a result of these calculations is rounded up and then a margin is added, which, when laid diagonally, is at least 15%.
Of no small importance is the consumption of glue, with which the tile is attached to the floor. Its average value per 1 m² of area is given on the package, but the actual consumption of the adhesive mixture depends on the condition of the floor.
Preparatory work and marking the base
Before you start laying the tiles, you need to carry out a number of preparatory work:
- prepare the surface;
- ensure the availability of the necessary tools and consumables;
- mark the floor.
Surface preparation
The quality of the floor cladding largely depends on the condition of its surface.According to the requirements of the manufacturers, the sub-floor intended for cladding must provide an adhesive layer with a thickness of 2 to 20 mm. The subfloor is equipped with a self-leveling mixture (flooded floor), which is diluted with water to the desired consistency and, after removing the remnants of building materials, debris and dust, is evenly applied to the surface. In this case, the existing skirting boards and door frames must be dismantled, and cracks, bumps and other defects that prevent the adhesion of the base and tile adhesive must be eliminated.
After solidification, the self-leveling floor is primed with special impregnations that improve the adhesion of ceramics to the base. It is also recommended to apply a thin layer (no thicker than 1 mm) of special tile adhesive.
Tools and supplies

In addition to ceramic tiles, you will need:
- special tile adhesive (cement or polymer);
- container for the preparation of the adhesive mixture;
- grout for tile gaps (cement or polymer);
- silicone sealant required for the treatment of corner joints and joints.
- wedges and crosses.
Instruments:
- notched trowel;
- a set of ordinary spatulas;
- roulette;
- building level;
- steel ruler;
- wooden square;
- rubber mallet;
- marking device (coated cord, laser level, etc.)
- tool for cutting ceramics.
Given the large number and rather high accuracy of cutting fragments, it is advisable to use an electric tile cutter.
Surface marking
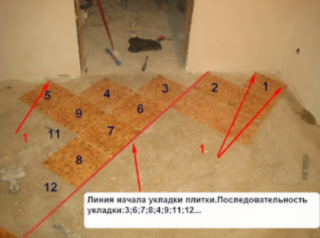
If the room has the shape of a perfect square, diagonals drawn from corner to corner are taken as a reference point for marking. Beat them off, for example, with a coated cord.
When diagonal orientation is not applicable, the isosceles triangle method is used. From the corner from which the laying will begin, identical segments are laid on the walls adjacent to it and connected to each other by a line. This line will be the side of the first tile to be laid.
After completing the markup, a preliminary layout of the dry tiles is carried out along the lines. Its positioning will immediately show where you need to trim individual elements, and exclude them from double cropping.
Laying technology
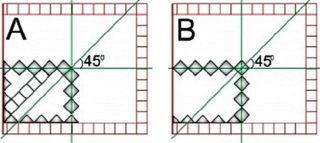
Laying tiles diagonally from the center of the room is carried out when the open part of the floor is located in the central part of the room. In this case, laying is carried out in sectors, which are obtained by drawing diagonal lines from the corners of the room. The lines will divide the surface into four triangular sectors, and the point of intersection of these lines will be the place where the first tile will be laid. The tiles are placed diagonally within the same sector and then merged.
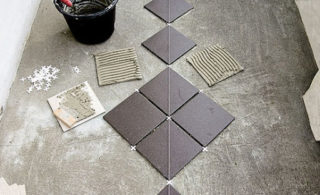
Laying from the far corner requires pre-cut triangular pieces. In this case, the tile is cut diagonally into two isosceles triangles.
Ceramic tile manufacturers recommend starting from the center. In small rooms (bath, hallway, etc.), it can be mounted from the far corner.
Diagonal laying of tiles on the floor is carried out in the following order:
- an adhesive mixture is applied to the base and back of the ceramic tile;
- the tiles are laid according to the preliminary markings;
- the tile is placed on the surface, pressed into the adhesive mixture and lightly tapped with a mallet until excess glue appears, which must be wiped off immediately;
- the rest of the tiles are laid in the same way, periodically checking the level of evenness and horizontal laying.
The same dimensions of the tile joints are provided with plastic crosses. Insert them into the crosshairs of the seams and two per seam.
The width of the tile joint depends on the overall dimensions of the ceramic tile - the larger its area, the wider the joint:
- up to 30x30 cm - 1-1.5 mm;
- up to 60x60 cm - 2-2.5 mm;
- over 60x60 cm - 5-10 mm.
The seamless installation method is used only when using rectified tiles with factory-processed edges.
First of all, whole tiles are laid. Installation of triangular fragments is carried out after the previously laid tiles have acquired the necessary strength. First, the laying is carried out in the direction of the "blank" wall and only then they move on to the other part, completing the process at the exit.
Grouting
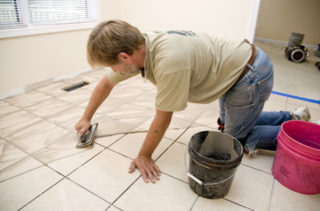
The process of facing the floor with ceramic tiles ends with the procedure of jointing (grouting) the tile gaps. It is carried out after the final drying of the adhesive mass. In accordance with the attached instructions, the composition of the mixture is diluted and applied to all tile gaps. After half an hour, the remnants of the trowel mixture are collected and the entire tiled surface is washed. After that, all that remains is to seal the floor-to-wall joints and corner joints with sealant.
After 120 hours, the tiled surface is completely ready for intensive use.


