Thermal insulation of housing contributes to the creation of a healthy and comfortable indoor climate and a significant reduction in heating costs. Laying foam on the floor is an excellent solution applicable to buildings and surfaces of any type. The installation of the material is simple enough so that it can be done easily and correctly with your own hands.
Material description
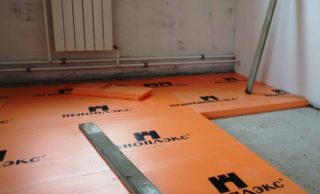
Penoplex is a board material based on expanded polystyrene. The products have a closed cellular structure, are distinguished by their density, elasticity and slight flexibility. Manufacturers produce slabs 60 cm wide, 120, 240 and 360 cm long with a thickness of 2-40 cm. Depending on the purpose, the products differ in the degree of rigidity. When choosing foam under the floor screed, you should stop at grade 35 "Foundation", which has all the technical characteristics necessary for this.
Thermal insulation is quite versatile. You can put penoplex on a wooden floor, a concrete slab and even directly on compacted sand and gravel. The tightness of the joints is ensured by the presence of stepped grooves along the edges of the products.
Advantages and disadvantages of penoplex
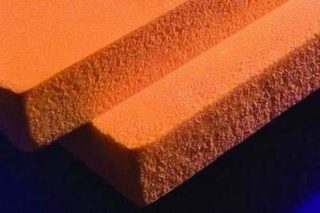
The choice in favor of laying penoplex on the floor under the screed has a number of significant advantages that have not gone unnoticed by professionals and private developers.
- Low thermal conductivity. This indicator is several times higher than that of analogues, which allows laying slabs of minimum thickness on the floor and installing a warm water or electric floor on them.
- Long service life. Various manufacturers give a guarantee for a period of 40-60 years.
- Acceptable cost. By-products of the petrochemical industry are used as raw materials.
- Sufficient strength. The coating can withstand strong mechanical stress. You can put a laminate or parquet board directly on it.
- Waterproof. The boards do not absorb and do not allow moisture to pass through, creating a high-quality hydro-barrier.
- Resistant to mold and mildew. Insects and rodents are not interested in the polymer.
- Environmental Safety. The composition of the insulation does not include formaldehydes and other substances harmful to health.
- Excellent sound insulation properties. A layer of material of only 5 cm completely cuts off all noise generated at the lower level of the building.
- Low specific gravity. There is no additional pressure on the foundation, and the installation of the foam on the floor is carried out without much effort alone.
Among the disadvantages is exposure to ultraviolet radiation, which must be taken into account when organizing the storage of plates. Some brands do not have fire protection, they catch fire at high temperatures.
Preparation of the concrete base
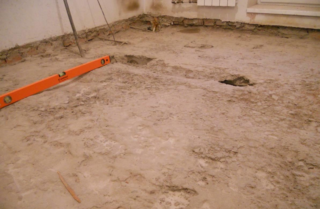
Before fixing the penoplex to concrete on the floor, a number of measures should be taken related to the preparation of the base. Ignoring this stage is fraught with rather unpleasant consequences.
- Dismantling the old coating. Cleaning the surface from debris and dust.
- Removing nails, screws, protruding fittings and other foreign objects.
- Measurement and inspection of the activity area. Determination of the level of the subfloor, the presence of open seams, cracks and holes.
- Leveling the slab, sealing all openings with cement mortar or sealant.
- Grinding the floor. Removing all protrusions and bumps. The difference in height should not be more than 1% per linear meter.
- Concrete priming. This procedure must be carried out at least twice to ensure deep penetration of the liquid.
Finally, a damper tape is installed around the perimeter of the room. It will provide space for thermal expansion of the insulation when heated. If there is no door, a board, plywood or steel profile is inserted into the opening, the height calculated for raising the floor level after laying the foam and pouring the screed.
Required tools and materials
To insulate the floor in the country house with penoplex followed by pouring the screed, you will need the following set of tools:
- level, tape measure, square;
- puncher;
- hacksaw;
- rule;
- spatulas;
- stationery knife;
- needle roller;
- hammer, mallet;
- construction mixer or drill with a nozzle;
- container for mixing the solution.
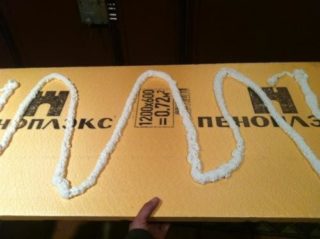
Materials:
- synthetic glue to fix the penoplex to the floor in front of the screed;
- aluminum tape;
- dowels and screws;
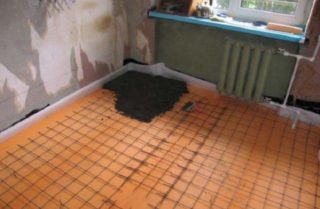
- steel mesh or lattice;
- mixture for screed based on gypsum or cement;
- beacons for leveling the screed.
Consideration should be given to the convenience and safety of work. It is recommended to prepare rubber boots, goggles and gloves.
DIY styling features
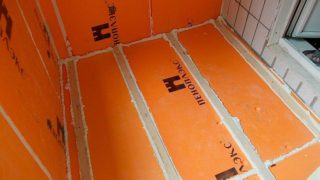
The technology of laying EPSP on a concrete floor involves the installation of slabs followed by pouring a screed up to 5 cm thick. An exception to this rule is made for apartments in multi-storey buildings, where the supporting structures are designed for a certain load.
Laying foam on a concrete floor is done in the following order:
- Checking the condition of the plate. Remove debris and dust from its surface, wipe with a damp cloth.
- Kneading the adhesive. A volume is being prepared, which can be consumed until the mixture begins to thicken.
- Installing the first snippet. This is done in one of the corners opposite to the entrance opening. The panel is lubricated, brought to the base and firmly pressed against it. Alignment is carried out with hands and a mallet.
- Lubrication and attachment of the second fragment, and then subsequent ones. Sealant is applied to the locks before joining. This will ensure a tight fit of the plates and guarantee against cracking.
- The last panel in the row is trimmed to fit against the damper tape. Cutting is carried out with a clerical knife or a hacksaw with fine teeth. As a rule, pipes run in corners. Plastic rings are installed around them. The material cut out for the groove is attached to it with glue.
- In the same way, the next rows should be laid, each time offsetting by half of the figure. The last row is adjusted separately for each piece, as the floor may have an irregular geometry. In order not to damage the insulation, a sheet of plywood or chipboard should be laid on the floor and already worked on it.
- Sealing cracks with polyurethane foam. After it hardens, the protruding places are cut off with a clerical knife flush with the surface.
- Attaching the cover to the base. This is done with dish-shaped dowels in the center and corners of the foam boards.
- Bonding seams with aluminum tape. This technique provides additional insurance against leaks.
The coating is monolithic and waterproof. If this is provided for by the project, you should proceed to the arrangement of the screed.
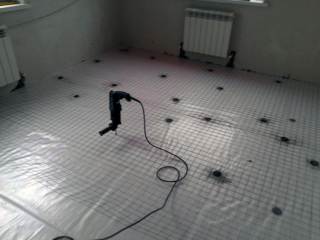
This event is held in the following sequence:
- Carrying out a primer, laying a vapor barrier film.Bonding of strip pads. Removing the edges of the canvas on the wall to a height of 20 cm.
- Installation of beacons. For this, tripods or profile pipes glued with mortar are used, laid at an interval of 100-120 cm.
- Laying steel reinforcement. It is placed with a clearance of 15-20 mm from the base on plastic supports.
- Preparation of concrete mortar. The recommended proportion of water, sand, cement and fine gravel is 1: 3: 1: 3.
- Pouring the solution over the beacons from one of the far corners. Leveling the surface with a rule and a wide trowel. Finished strips are rolled with a needle roller.
- After a day, the guides are removed, the remaining openings are sealed with cement mortar.
It takes 3-5 days for a gypsum screed to completely harden, and 14-28 days for concrete, depending on the room temperature.


After 5 years, you will have to break the floor to replace the sewer pipe - it will clog.
Do not use this material to insulate walls or ceilings, unlike polystyrene, which simply melts when fire hits it, this material burns and burns very well!
It will not be hammered if slopes are correctly made and a place for revision or cleaning.
What does “JUST MELT” mean ?!
It does not have sound insulation properties, so mineral wool is used instead.