The details for the flooring are made of solid wood, so the products can withstand more scrapes than parquet. Laying the floorboard is carried out on a prepared base and is a proven way of decorating the interior of an apartment or house. Oak and walnut are used in production. Linden and poplar will not work. Medium and soft species (fir, pine, larch) are protected from abrasion with a layer of paint or varnish.
- Types of substrates for laying floorboards
- Concrete base
- Supporting wooden structures
- Wooden floor
- Choosing a floorboard
- Floor insulation and waterproofing
- Methods for fixing the floorboard
- Countersunk method using self-tapping screws or nails
- With glue
- Clamping
- Laying technology
- Grooved boards installation technology
Types of substrates for laying floorboards
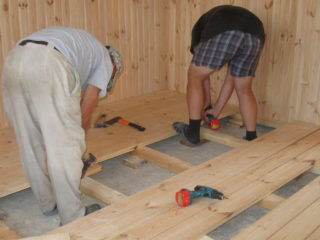
Installing a finishing layer on the floor completes the home improvement work. An appropriate level of humidity must be maintained in the room, therefore, the installation of the floorboard is carried out after the installation of window and door fillings. Lumber reacts to moisture, so the moisture content of the walls and base should not exceed 12%.
The plank layer can be fixed on any type of floor, the boards can be placed on the base:
- concrete screed and reinforced concrete slabs;
- supporting structures of the floor made of wood;
- wood flooring.
The boards will also swell if the humidity in the room exceeds 60%, the wood will dry out and crack at a rate below 40%.
The boards must be kept indoors for three days before installing the wood flooring. This will allow the lumber to gain the appropriate humidity and temperature, so that after installation, the elements are less deformed.
Concrete base
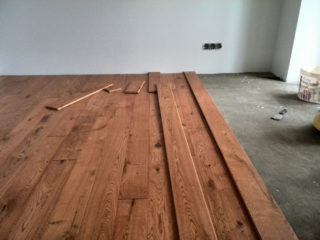
A fresh sand-cement screed or concrete layer must be completely dry before the boardwalk is laid.
The old concrete pavement is being repaired:
- knock down a fragile screed and change it with a new layer;
- leveled, for this use a cement-sand mortar, a mixture for repairs based on polymers or use self-leveling mixtures;
- all cracks are embroidered, primed and sealed with mortar;
- the surface is dust-free with a vacuum cleaner;
- the area is impregnated with compounds of deep penetration.
At the stage of preparation, they provide for the layout of communications in the floor, make recesses and outlets for them, isolate the pipelines so that no leaks occur. Before concreting, a layer of insulation is laid out, waterproof membranes are placed before concreting. For thin boards, a solid base is made of two plywood layers with a total thickness of 16 - 20 mm, the fastening of which is made using dowels.
Supporting wooden structures
For such structures, boards of at least 20 mm thickness are used, otherwise they will bend between the logs or will creak when walking. In the girder, it is easy to arrange a sewage system, conduct an electrician, and also carry out bulk insulation. The disadvantage is the height of the structure, which takes at least 10 cm.
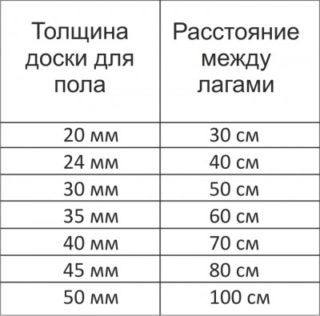
Lags are placed with a certain step, which depends on the thickness of the lumber:
- 20 - 25 mm - 50 cm gap;
- 30 - 35 mm - step 60 cm;
- 35 - 40 mm - 80 cm;
- more than 40 mm - distance from 1 m.
The lags are installed perpendicular to the light flux from the windows so that the flooring from the board is laid in the light, and the seams are less visible.
According to the technology, the timber can be fixed in concrete with plastic dowels with self-tapping screws, while the caps will be melted into the wood. Lags are set according to the level, a deviation of 2 mm is allowed for every 2 m of length.
For the lag, an unedged timber of soft rocks is taken, small areas of wane along the edges are allowed, but they are cleaned of bark and treated with an antiseptic over the entire surface.
Wooden floor
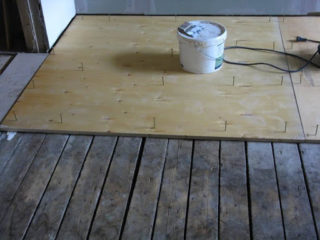
If the existing wooden floor is strong, without rot and destruction, a new plank covering can be built on its basis. Initial preparation includes rough sanding. If the surface is free from defects, it is cleaned of dust and a new layer of waterproofing is applied.
Renovation of the old floor:
- The cracks in the old plank floor are due to drying out and need to be repaired. Use wood putty, which is sanded after drying.
- Damaged boards are removed with a nail puller, trying not to touch the logs. In their place, new ones are installed, while the surface is leveled with a plane to the general level;
- The creaking elements are screwed to the logs with self-tapping screws in order to further strengthen.
If the entire surface springs and the beams are damaged, you need to remove the old plank covering and make a new flooring in its place. If necessary, put additional logs, taking into account the thickness of the lumber. At the same time, the deteriorated insulation is changed.
Choosing a floorboard
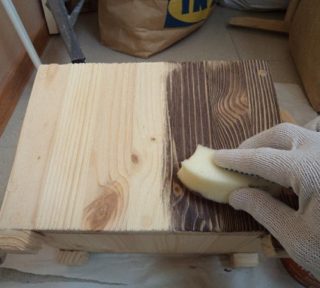
The board is unplaned and planed. The first type is used for rough flooring for further installation of the finished floor. Distinguish between grooved planed board and simple. The plank floor is reliable, durable, retains internal heat well, if the right choice of sawn timber has been made.
Main settings:
- humidity 6 - 12%, obtained in the drying chamber;
- even shape and smooth surface;
- absence of visible defects, fallen out knots, putrefactive spots;
- boards from the same batch of issue with a similar texture and color.
After calculating the square of the room, the value is multiplied by a factor of 1.1 in order to take into account the trimming when buying. Elements are harvested at least 2 m in length, the popular ones include a range from 2 to 6 m. Wide canvases shrink more, which will affect the quality of the coating. More often choose a width of 105 - 150 mm.
The peculiarity of wood is that it burns, rots from moisture and is affected by microorganisms, therefore, protective impregnations are used before fixing the floorboard.
Floor insulation and waterproofing
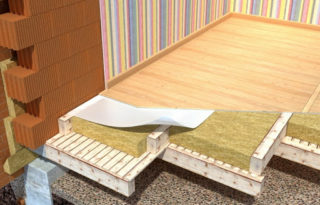
For a wooden floor, film insulators are used, which qualitatively protect the elements of the coating from soil moisture. Waterproofing also provides a comfortable environment for people so that respiratory diseases do not develop due to mold and mildew. The film must be attached in accordance with the technology.
Warming is done in several stages before fixing the floorboard to the joists:
- an insulating membrane from the wind is installed on top of the subfloor, the edges of which are put on logs and fastened with a stapler;
- insulation is placed between the beams on top of the film;
- a vapor barrier film is placed on the insulation, the edges are glued to the mounting tape.
Attention is paid to the joints of the membranes in order to obtain a complete coating. For insulation, polystyrene and expanded polystyrene are used, which have zero moisture saturation and do not violate the protection. A ventilated gap is required for mineral wool. Expanded clay gravel is placed in niches between logs and beams.
Methods for fixing the floorboard
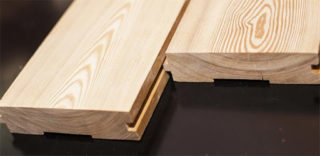
Board decks are available in single-layer and multi-layer construction. In the first case, a layer of boards with a thickness of 25 - 35 mm is laid on the logs, resting on the beams. There are elements with grooves and ridges (grooved), others differ in vertical side surfaces. Laying a floor from a grooved board is different from fixing planed rectangular elements.
The two-layer finish includes a top coat that is placed over the subfloor details. The first layer is made with a simple slit or a substandard board installed on the logs, while the width of the elements is 75 - 145 mm.
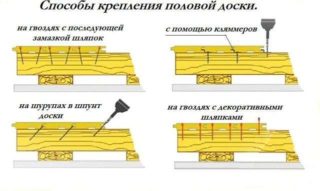
Finishing boards are connected in the following ways:
- secret method;
- on glue;
- with clamps.
The flooring is fixed to the plywood with self-tapping screws treated with wax, while the hardware is placed at an angle, obliquely. This method extends the life of the flooring. Bituminous mastics are used for fastening in places where electrical lines pass.
Countersunk method using self-tapping screws or nails
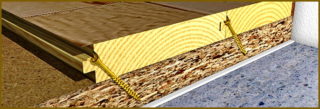
Nails are cheaper, so their use is justified on large areas. The hardware forms a one-piece joint, which, when disassembled, leads to cracks and destruction of the board. Under load, the nail loosens, the floor creaks and bounces. With a decrease in humidity, the lumber dries up, the hats of the hardware become bare.
Self-tapping screws have the best application characteristics:
- it is possible to disassemble the coating, while boards and hardware are reused;
- provide a snug fit of the boards to the base.
The cost of self-tapping screws is higher, fixing will require work with a screwdriver, and not just a hammer. The hardware is twisted at a distance of 25 - 30 mm. The boards are ideally docked with a secret method, but you need to remember that 8-10 mm of free space is left along the entire perimeter to the walls. The head of the self-tapping screws is sunk into the body of the board, and a piece of wood is inserted into the hole on top and sanded. Floor manufacturers sell these plugs with their products.
With glue
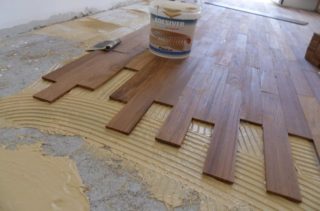
The technology is used when installing a boardwalk on concrete without cushioning material. They do not allow cracks, height differences on the surface of the screed, while it should not flake off or move under pressure. To eliminate defects, cracks are repaired, and the base is primed.
One- and two-component adhesives are used. The first type of polyurethane composition is used when installing wide lumber, and the second type is intended for narrow boards.
Sequence of actions when gluing:
- cut the blanks of the boards;
- an adhesive composition is applied to the concrete base with a spatula;
- put 2 - 3 longitudinal elements, they are pressed against each other and to the floor;
- work continues after the glue has set;
- the last part is cut to the required width.
The adhesive connection is of non-separable type, it is impossible to correct installation errors in it. In a room with a floor on an adhesive mixture, an optimal microclimate for temperature and humidity is maintained all the time.
Clamping
Merging is done in different squeezes:
- Smolyakov's bracket;
- construction compression;
- lever-toothed;
- movable and wedge bracket.
The work is carried out with wooden wedges along the thickness of the board with a 15 - 20 ° cone. The gasket counter wedge is pressed against the end side, and the working part is inserted between it and the bracket itself. The first type is made from any wood, and for the worker they take hard rocks, since they are beaten on it for compaction.
The lumber is laid out with a groove so that when squeezed, the ridge of the board does not deform. The Smolyakov brace is distinguished by three sharp ends, two of them serve as stops. The first board is placed against the wall and fixed to the logs, then several panels are rallied nearby, connecting the grooves and protrusions. Brackets are attached to the logs so that the wedges are inserted with a narrow end. They knock on the wedges until the boards are tightly connected, then screws are screwed in at an angle or nails are hammered in.
Laying technology
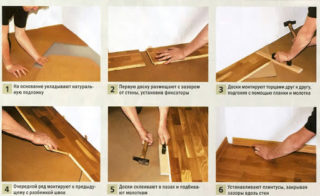
The classic version involves fixing the boards along the logs. You need to fix it on a beam with a section of 50 x 70 mm, while the supporting elements are placed in increments of 70 cm.
Installation instructions:
- lay the boards forward with a ledge, and with a comb towards themselves;
- the first is fixed with self-tapping screws so that the attachment point is hidden behind the plinth;
- other elements are fastened with hardware at an angle to the ridge, the joining of short boards is done on a log;
- the surfaces of the fixed strips are sanded and varnished several times.
The area is sanded lengthwise, across and diagonally. There are wax-based varnishes to reduce hygroscopicity. Skirting boards are stuffed around the perimeter, wooden or plastic products are used.
Grooved boards installation technology
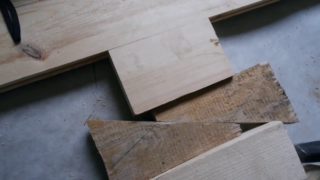
Such a board is structured to improve the characteristics of the finished flooring. There are locks on the sides, including a tongue on one and a groove on the other side. The design contributes to a tight connection without gaps. There are boards with locks on the longitudinal sides, another type provides for organized docking at the ends. The boards are ready for use and do not require additional processing before fixing the sheet pile floor.
Work order:
- the first panel is placed with a spike against the wall for ease of rallying;
- the second is placed, combining the protrusion and the groove;
- fasten with self-tapping screws or directly through the body of the board;
- the holes of the caps are sealed with putty or suitable wood.
The surface is sanded with 160 - 180 grit sandpaper. If there are irregularities, then they are cycled, the surface is painted.

