More than half of land owners prefer frame technology for building houses. This is justified by its versatility, affordable cost, practicality, the ability to erect buildings at any time of the year and in a short time. The strength and durability of buildings directly depend on the correctness of each stage of the work. The structures that determine the stability of the structure are the lower and upper strapping.
The device of the upper and lower strapping of a frame house
The foundation of any structure is the foundation. In the private sector, strip bases or piles connected by a grillage (prefabricated, screw, rammed) are most often used. For technical reasons, the frame racks cannot rest directly on the foundation, since this does not provide reliable fastening, and the uneven load is fraught with the destruction of the load-bearing elements of the building.
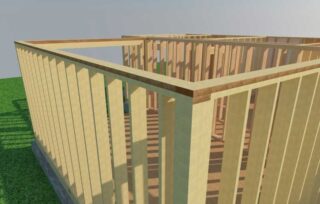
The upper and lower strapping of a frame house are the details that unite the vertical posts into a single structure, ensuring its solidity and completeness. They represent a bar, rigidly connected in a closed loop, located in the lower and upper parts of the vertical struts.
The supporting elements perform the following functions:
- creating a solid foundation for the frame;
- achieving a reliable connection between all bearing fragments - walls, logs, foundation;
- hydro and thermal insulation between stone and wood elements;
- imparting immobility and stable position to supporting structures in space.
Both structures must be of sufficient strength and reliability, as they perform load-bearing tasks. The lower one holds the frame, and the upper one serves as the basis for the overlap, shed or gable roof.
Top harness connection rules
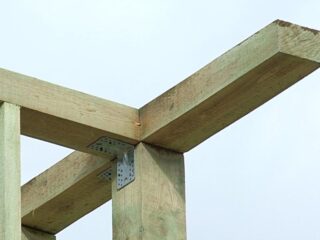
One of the issues that developers have to solve is the choice of a method for connecting horizontal frame parts.
There are the following methods for joining racks and strapping:
- Butt. The supports are connected by their ends and made their way to them with long nails. The option is simple, quick, but designed only for vertical stresses.
- 45 degree joint. The edges of the boards are cut at an angle and joined. Then, through both fragments, through passages are made with self-tapping screws or nails. The use of four or more hardware allows you to achieve an almost monolithic pairing.
- Half a tree. In the bar, horizontal cuts are made to half of its thickness and a depth of 40-50 cm. Then the excess is removed from the upper and lower fragments, an overlay is made and fixation with hardware.
- Thorn groove. The method is similar to that described above. The difference is that several cuts are made, resulting in a comb on each side. The fixation is reliable, tight, but takes time and effort.
The choice of the connection method is made based on its location. The more it carries pressure, the more firmly the joint is chosen.
Bottom harness connection rules
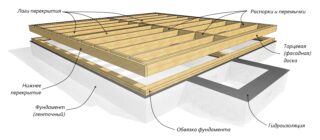
The lower harness of the house experiences vertical and horizontal loads, based on which, it is necessary to take a particularly responsible approach to the issue of choosing the material for this structure. It is advisable to dwell on grade 1 and 2 wood with a moisture level of no more than 12%.Since the most important functions fall on the strapping, it is better to use glued beams made of cedar or larch boards. Such products are resistant to moisture, insects and high pressure.
A reliable connection is obtained when the following conditions are met:
- Pretreatment of wood with an antiseptic and fire retardant.
- Compliance with the dimensions of the base, vertical fragments and design loads.
- High-quality fastening with a foundation. Anchor bolts or embedded fittings are used.
- Application of waterproofing between concrete and wood.
The following options for connecting the bottom piping are used:
- End, when a bar is nailed on each side.
- Cutting-in. A hole is made in the lower part, and a protrusion of the corresponding configuration is made on the rack.
- To the corners. After leveling, the supports and strapping are rigidly fastened with steel parts.
The most reliable option is the combined use of a cut and corners. It will take accurate calculations and time, but the end result will meet all quality criteria.
Required tools and building materials

The construction of the frame, and especially its strapping, is a process that is both laborious and accurate, where there is no room for deviations of more than 1-2 mm.
To make a high-quality strapping, you need the following tools:
- level, tape measure;
- ax;
- a hammer;
- drill, screwdriver;
- hacksaw;
- chisels;
- plane;
- lifting block;
- scissors;
- paint brush;
- marker;
- nail puller.

The following materials are needed:
- timber 100x100, 150x50 and 150x150 mm;
- roll waterproofing;
- antiseptic;
- hydrophobic drug;
- fire retardant;
- hardware (bolts, nails, strips, corners, screws).
For work, you need to prepare a high ladder, safety devices, goggles and gloves, thick and sturdy clothing.
Do-it-yourself installation of the upper and lower strapping of a frame house
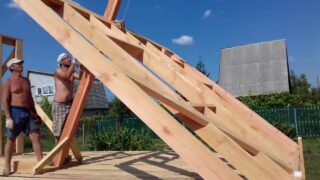
Making straps involves manipulating long and heavy objects. It is rather difficult to execute them yourself without loss of quality. Therefore, it is advisable to invite at least one assistant with good physical fitness.
The work itself is carried out in the following sequence:
- Leveling the base. When pouring concrete, there are always significant differences in the height of the hardened mortar. This is unacceptable for wood with flexibility and softness.
- Marking. Sawing sawn timber into blanks when there is no possibility of laying in one piece on the wall.
- Installation of fasteners, if this was not done in advance. Holes are made for anchor bolts or reinforcement pins.
- Layout of the timber at the place of installation of the lower strapping. Outline of attachment points. Sawing out the connections of the selected configuration.
- Removing boards. Manufacturing of docking assemblies, their adjustment until a tight contact is achieved.
- Treatment of wood with preparations against wetting, combustion, infection with microorganisms and insects.
- Waterproofing application. The best option is to glue several strips of roofing material onto the molten bitumen.
- Layout of prepared timber blanks in places. Docking and fixing the structure to the foundation. Horizontal check, reinforcement of corners with nails and corners.
- Installation of vertical supports. At first they are not attached tightly, then they are leveled and fixed completely. To fix their position, temporary supports are used.
- Carrying out measurements, cutting out parts of the upper contour. It is necessary to ensure that the joints are at the ends of the vertical posts. Manufacturing of lock connections. Sanitary and fire-fighting wood processing.
- Laying timber on racks. The connection of parts to each other, and then on vertical structures. Control measurements.
- Removing the supports, checking the frame for strength.When you try to shake it with your hands, there should be no movement and no squeaks.
The next stage of construction is the installation of logs for the subfloor. As a rule, for this, boards of 50x200 mm are used, installed on the edge. Here the developer can choose one of the installation options. The lags are installed with partial or full support on a bar, a raspor on steel corners. The choice is made individually with reference to the construction conditions.


