The service life of the laminate is 15 years. Materials of wear resistance class 31, 32 and higher are used for 20-25 years. However, unexpected situations may occur. The floor covering fails for various reasons - chips, swelling, peeling. Small defects are eliminated by restoration, but sometimes it is necessary to replace the lamellas. Learn how to dismantle your laminate flooring to reuse your boards.
Reasons for disassembling the laminate
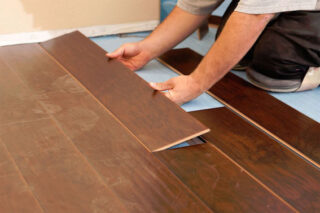
The reason for dismantling the laminate is most often the damaged surface. Defects occur as a result of mechanical stress or high humidity in the room. The following factors also affect complete or partial disassembly:
- flooding of the premises;
- chips, deep scratches, break;
- scuffs;
- moving.
The substrate wears out and loses its properties over time. For this reason, the floor creaks or deforms, gaps appear between the lamellas.
Minor damage can be repaired. Seal scratches and chips with wood sealant or wax crayon. In case of significant defects, it will be necessary to completely disassemble the laminate or replace the dies on the damaged area of the floor.
When choosing a remedy for the restoration of the floor covering, it must be borne in mind that after drying it may darken. It is recommended to test the composition before use.
Preparing for self-coating replacement
Before dismantling the laminate with your own hands, study the features of disassembly. Familiarize yourself with the types of lamella joints laid in the room. Gather materials and tools for work and proceed to dismantling.
Types of laminate joints
- Products with an adhesive base do not have an additional system. The lamellas are glued together. Disassembling the slabs without damage is almost impossible. It is a disposable laminate with a short lifespan.
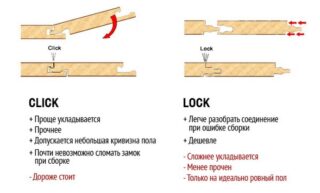
- Lock is a system with double-sided grooves into which the tenons of another panel are inserted. When laying the boards, the lock clicks into place with a characteristic sound indicating that the lamellas are locked.
- Click is a popular type of connection. It is easiest to disassemble and assemble such panels. The boards are joined at an angle of 45 °, where one part of the lock is inserted into the other on an adjacent board. There are no problems when dismantling the boards.
A high-quality locking system is a guarantor of a long service life of the floor covering. When choosing a coating, study the operating conditions in advance. Manufacturers indicate on the packaging technical characteristics, instructions for assembling and disassembling lamellas.
When dismantling a laminate with the Lock system, slight damage is allowed. However, new dies will be required to re-lay.
Tools and materials
If you do not plan to reuse the floor covering, dismantling the lamellas, you can not worry about damage. The work does not require care and accuracy. If it is necessary to remove the laminate and put it again in another room, the dismantling is carried out according to the technology.
Before disassembling the floor, prepare the tools:
- pencil or marker for numbering the lamellas;
- screwdriver, Phillips and flat screwdrivers for neat dismantling;
- the chisel will make it easier to lift the panels;
- vacuum holder for cutting strips;
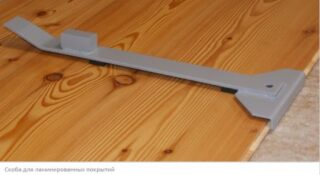
- mounting brackets are designed to conveniently grip the boards;
- a hammer;
- jigsaw.
Some tools may not be needed depending on the purpose of the dismantling.
Number the panels to disassemble the laminate for re-installation and avoid confusing the lamellas. Otherwise, installation will be difficult.
Disassembly instructions for laminate flooring
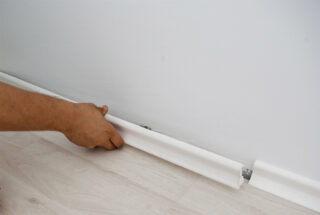
Complete dismantling of the damaged laminate begins with cleaning the surface from dust and removing the skirting board. The purpose of the work is to facilitate the disassembly procedure and open access to the expansion gaps between the panels and the wall. The easiest way to remove is the plastic skirting board, which is most often used for repairs.
Step-by-step instruction:
- Remove the outer corners securing the joints of adjacent skirting boards. To do this, use a screwdriver. Insert the thin end of the tool at an angle, lift and remove the element from the groove.
- Remove the protective film from the cover channel.
- Unscrew the screws and remove the skirting board. It is recommended to use a screwdriver, as this makes the process easier.
Laminate dismantling technology:
- Start working from the wall opposite the doors. In this part of the room, the lamellas are less clamped and easier to disassemble. Depending on the locking system, the laminate is laid from the wall with a gap of 1.5-2 cm. If, after removing the plinth, you do not find such a gap, trim the edge of the board with a jigsaw.
- Pry off the panel without jerking. Be careful not to damage the locks.
- Number the slats on the back with a marker or pencil.
- Lay the disassembled cover and wrap in plastic wrap.
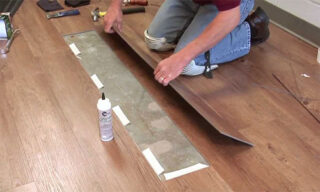
For partial dismantling of the damaged laminate, select the material in the store in advance by color and size. Then follow the instructions:
- Cut the new board 4 mm shorter than the old board.
- Sand the ends with sandpaper to improve adhesion. Apply woodworking sealant.
- Place the panel on the prepared spot. Remove excess product with a rubber spatula. Wipe the lamellae with a soft cloth.
- After repairing the floor covering, it is forbidden to move on the floor until the sealant has completely cured. The exact dates are indicated by the manufacturer in the instructions.
The manufacturer prescribes the permissible number of disassembly and assembly of the laminate on the package. On average, this indicator does not exceed four cycles. After 4-5 times, the deformation of the locking system begins.
Dismantle the laminate with your own hands and collect it in its original place carefully. After disassembling, lay the panels in even piles and pack in stretch film. Slightly compressing the slabs will maintain the geometry of the flooring without deflection. Transport and store the dismantled lamellas without fear of damage, moisture and sun exposure.

