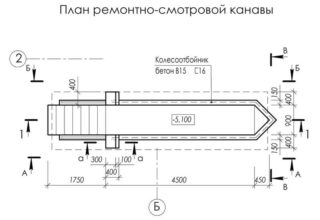
Any equipment wears out during operation, individual parts break down, and consumables need to be replaced after the resource is used up. If you build a garage with a pit, you can do most of the car maintenance procedures yourself. The initial investment in the arrangement of the viewing niche will pay off many times over time. It is quite possible to replace filters, technical fluids, and undercarriage elements on your own. In addition, regular inspection of your car will help the owner to timely identify signs of malfunctions, take measures to eliminate them and avoid costly repairs.
- Why do you need an inspection pit and what should it be
- Dimensions and position of the inspection pit in the garage
- Required materials and tools
- What materials are they made of
- Building recommendations
- Planning and layout
- Floor and walls
- Waterproofing
- Global insulation
- Underground ventilation
- Pit ladder
- Lighting
Why do you need an inspection pit and what should it be
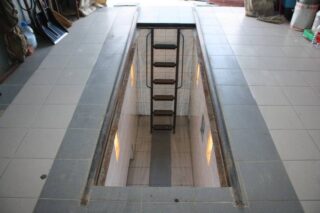
The clearance of most passenger car models is small so that a person can freely climb under the bottom, inspect the mechanisms and carry out any work. It is too expensive to have your own lift, and it takes too much space. Also, it is not advisable to build a reinforced concrete overpass or a pit under a separate shed in the courtyard. Such structures will not fit into any landscape design. If they are done in the back of the yard, you will have to lay an access road, which is expensive and not aesthetically pleasing. The only way out is to build a garage with a viewing well.
This structure is designed to perform the following tasks:
- scheduled preventive inspection of equipment;
- cleaning the bottom and undercarriage from dirt;
- replacement of technical fluids;
- minor repairs.
The garage block is built for decades and each part of it must serve the entire life of the building.

Based on this, the following requirements are imposed on the inspection pit:
- tightness, even if the bottom is below or at the level of the groundwater depth;
- the strength of the walls and floor, which must withstand the pressure of the soil, including when heaving;
- sufficient height to ensure the free movement of a person at full height;
- acceptable width required for safety and ease of work;
- durability of the materials used.
The main criterion is safety. The recess must be strong enough to exclude the slightest likelihood of collapse and injury to a person.
Dimensions and position of the inspection pit in the garage
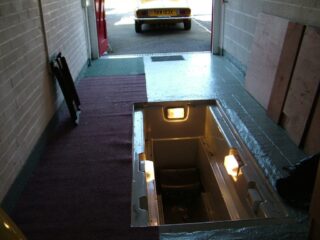
There are no clear recommendations and GOST standards regarding the parameters and standards of the garage pit. Each property owner can dig it up at any time, setting the size that he sees fit.
The best option is to position the structure along the centerline of the building floor. Thanks to this layout, the vehicle will be able to enter the premises without risk, and its owner can safely move along its walls. To eliminate the possibility of a fall when the car is outside the garage, the recess can simply be covered with a deck.
Sizing guidelines are as follows:
- Height. It is recommended to take a person's height and add 15-25 cm to it.
- Length. Recommended within 450-550 cm in order to be able to inspect and repair the entire lower part of the equipment.Often a 200 cm vase is enough, the car is simply rearranged from place to place as needed.
- Width. It is also determined by the complexion of the driver, but with the expectation that a person of a larger physique can be attracted to help. The distance of 80-90 cm between the side walls is considered universal.
A garage owner can dig and reinforce a small pit, saving good money and without compromising on quality.
Required materials and tools
The garage pit has a fairly simple device. It consists of a bottom, walls and stairs. In some cases, the structure is equipped with a drainage system if there is a leak or a permeable material was used during the laying.
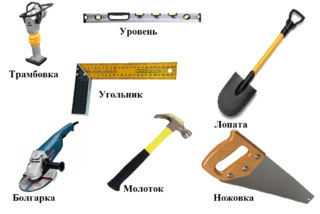
To make this design, you will need the following tools:
- level;
- shovel;
- roulette;
- rammer;
- Bulgarian;
- a hammer;
- crochet hook;
- hacksaw;
- nippers;
- square;
- a hammer;
- marker.
Materials should be prepared:
- formwork panels;
- fittings;
- sand;
- crushed stone;
- cement;
- brick, boards or sheet metal;
- knitting wire;
- drainage pipes.
You should also purchase protective goggles, gloves, a respirator and welder's equipment.
What materials are they made of
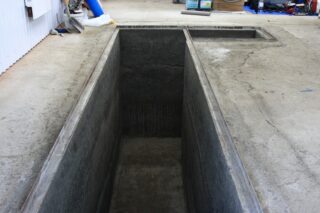
The choice of material is mainly determined by the size of the depression, its configuration and soil properties. If the groundwater level is deeper than 250 cm without a tendency to rise, savings can be made by using inexpensive raw materials and relatively simple technology. If the ground is damp, it is necessary to make a waterproof structure with a sufficient margin of safety.
For the manufacture of an inspection pit, the following materials can be used:
- Concrete. It is the most robust and durable option that suits any operating conditions. The finished bowl is highly durable, strong and airtight. The structure is cast in a monolithic design, it can be supplemented with shelves and niches. The method of creation is similar to the manufacture of a recessed strip foundation with a basement.
- Steel sheets (caisson). The tank of the required configuration is welded from metal with a thickness of 10 mm. The structure is absolutely waterproof, to give stability in the ground it is supplied with concrete anchors, with which it is fixed with embedded parts. The thicker the iron, the better it will withstand external pressure. Corrosion protection is provided by the use of primers, roll and coating insulation.
- Wooden boards. As a rule, it is made on a decking made of a similar coating. Boards are inserted behind vertical supports, which are fastened with metal wire braces. Given the hygroscopicity and decay property of wood, such niches can only be installed in dry sandy soil or sandy loam.
- Bricks. To create a strong, stable and even base, a concrete screed is preliminarily made, reinforced with reinforcement rods. To prevent the walls from being squeezed out inward, every 3-4 rows and always from above, frames welded from a corner of 40x40 mm are installed.
Each technology has its own characteristics, advantages and disadvantages. The type of niche is chosen in relation to the situation, but with one general rule - it is not worth saving. This is fraught with destruction or flooding, which means a loss of time, effort and money.
Building recommendations
Planning and layout
You need to decide on the type of pit and material during the design process. It is better to make a rough bowl even before the foundation, roof and walls of the building are made. Working in open areas is much easier than in cramped conditions without the possibility of using even light earthmoving equipment. It is better to build a pit immediately after marking, and only then carry out the rest of the work.
Floor and walls
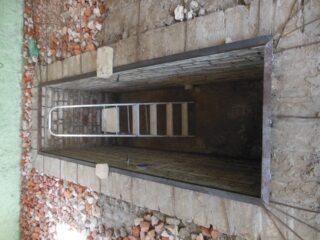
When making a floor in a pit, you need to pay attention to its evenness and density. The driver must walk or ride on the roller seat without the risk of tripping or falling. The best solution is a concrete slab. If the soil is dry, and the groundwater is deep, it is allowed to lay piece products on a well-tamped base. To prevent grass from sprouting through it, you need to lay dense cellophane, roofing felt or geotextile below.
If a decision is made to lay out the walls of bricks, they should be rigidly reinforced with the fixing of the frames at the corners with vertical bridges. The masonry can be finished with plaster or ceramic tiles.
Waterproofing
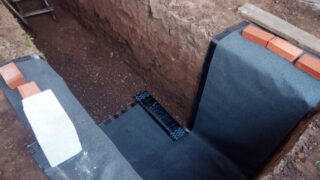
The ditch must be effectively waterproofed. Depending on the material for making the niche, the following materials are used:
- Coating. They are made on a bituminous basis, applied to surfaces in a molten form. Modern mixtures are resistant to frost, retain their integrity for 25-30 years, then require replacement.
- Rolled or glued. These are modifications of roofing material, membrane films and polyurethane self-adhesive. They are distinguished by a long service life and a high price.
- Penetrating. Penetrating into the pores and crevices of the material, liquids solidify and clog them, forming a monolithic and durable substance.
Waterproofing is carried out in two stages, first a layer of liquid clay is applied on the outside, and a technological coating from the inside.
Global insulation
Since the niche is submerged in the ground, cold will emanate from its walls, provoking dampness and condensation. This phenomenon can be prevented by laying insulation under the floor and behind the walls. For this, you can use foam, mineral wool or polyurethane foam. As an alternative - expanded clay concrete, the thermal conductivity of which is much lower than standard solutions. An even greater effect is provided by laying a warm floor or heating cable.
Underground ventilation
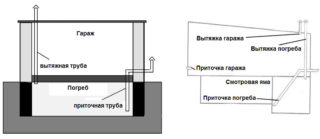
Even high-quality waterproofing and insulation will not protect the pit from dampness and the formation of an unpleasant odor. It is necessary to build an air conditioning system at the construction stage. The ventilation system can be common for the niche and the building, or it can be performed individually for each of these rooms. Air enters the inspection ditch and the garage room through one inlet pipe, which branches into two nozzles - straight for the room and downward - for the inspection pit. The air outlet is also carried out through one exhaust pipe that goes through the roof to the street and is raised at least 50 cm above the roof.
Pit ladder
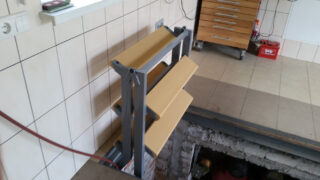
For descent and ascent, stationary, removable or folding ladders can be made. Depending on the size of the structure, they are made of reinforced concrete, metal or wood.
Lighting
In accordance with the provisions of SNiP, a voltage of 12-36 volts can be used inside the inspection pit. The 220 volt supply is prohibited, as it is life-threatening. In addition, all switches and sockets should be located only outside the pit, for example, in a panel on the wall of the garage. The cable must be double insulated, in a metal grounded corrugated pipe. For lighting, modern and safe LED luminaires are the right solution.
In case of carrying out any activities in the garage in the absence of a car, it must be covered. To do this, use an overhead shield, a folding or sliding canvas. The coating can be made from metal, boards or OSB.

