The fencing of the site is primarily erected to hide the inhabitants of the house from outside observation. However, a blank fence prevents the free passage of air and light. In most regions, it is prohibited to build solid fencing. A wooden blinds fence is an unusual and beautiful solution to this contradiction.
Features of the fence-blinds
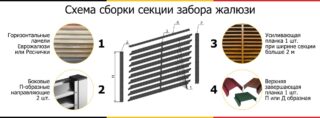
The fence has an unusual structure:
- The sections are fixed in the usual way - on the support posts. Racks can be wooden, iron, brick.
- The filling of the fence is represented by horizontally arranged lamellas. They are attached at a certain angle to ensure the passage of air.
- The dimensions of the sections are determined by the customer. However, the maximum length of the lamellas is limited to 3 m, since with a longer length the material sags under its own weight.
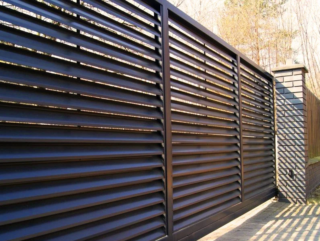
This option completely hides what is happening behind the fence, ensuring privacy. At the same time, air passes freely through the gaps between the lamellas, since the lamella is turned up. The wind pressure is weakened, thereby reducing the windage.
Types of lamellas
Distinguish between single and double-sided elements. The first option is more popular as it costs less. The front side is decorative, facing outward. With double-sided material, both sides look the same.
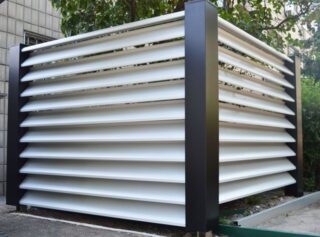
Slats are made from different materials. On this basis, they are distinguished:
- Wooden ones are the cheapest option. Planks, planed and sanded, are used as lamellas. The latter retain less water, which significantly increases the shelf life. The fence is primed with antiseptic impregnations, painted. The service life of wooden lamellas is short, but there is no need to disassemble the entire section to repair or replace a pair of elements.
- Steel - lamellas are very durable, lightweight, not afraid of temperature changes. Steel is prone to corrosion, so the fence must be painted with polymer or powder compounds. Such a fence lasts much longer.
- Aluminum - lighter than steel and not as strong. But aluminum is completely insensitive to the action of water and never rusts. The intrinsic color and luster of the metal is very attractive, so the fence can be left unpainted This option does not need care.
- Zinc aluminums are a novelty in the construction market. They are stronger than aluminum ones with the same corrosion resistance. The downside is the high cost.
Longer serving lamellas made of galvanized steel. A layer of metal that is not sensitive to corrosion protects the iron alloy.
Design advantages and disadvantages
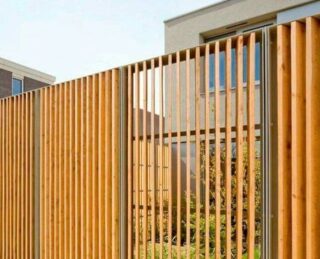
The blinds fence provides many advantages:
- The lamellar fence provides complete privacy, but at the same time allows air to pass through. This is the main advantage of such a fence.
- Steel and zinc-alumina lamellas are very durable and serve for a long time. Wooden ones are less resistant to weather factors, so their service life is shorter.
- Lamellas create an unusual structure, which looks more interesting than a standard picket fence, profiled sheet or slate.
- Installation is very simple. You can build a fence with your own hands.
- The material is lightweight. The simplest racks are required for the fence.
- Wooden and metal lamellas can be painted in any shade, to give a greater gloss or dullness to the surface.
- Wooden lamellas are usually smooth.Metallic ones can be embossed by creating a characteristic texture of stone, wood, leather, or even reproducing a convex pattern.
- The price of a fence-blinds is significantly less than that of a brick or stone structure.
The disadvantages are as follows:
- The mechanical strength of the fence is relatively low. It serves as a serious obstacle only for animals.
- Steel and wood slats need to be looked after: primed, treated with impregnations, painted.
Slats can be used for the fence itself and for gates and wickets.
Which board to use for the sections
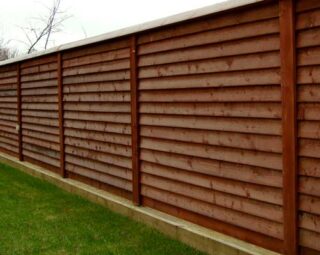
When building on their own, they often deal with wood. This material is much easier to process and much more affordable than expensive aluminum or zinc-aluminum lamellas.
Can be used:
- An unedged board is the most unsightly option and will not last long. Uneven unprotected surfaces absorb water better.
- A planed board - it is much easier to work with it, since it has clear geometric dimensions.
- Wooden slats - it is best to choose elements with rounded edges, as water can drain easily from them.
- Picket fence - has the optimal thickness and width for installation.
Any wood is used. Coniferous wood is preferable, as it contains more resin and is more resistant to decay.
Blinds fence installation technology
It is not difficult to make a fence-blinds made of wood or metal with your own hands. Like any fence, it consists of 3 elements:
- foundation - strip or point;
- support posts - wooden;
- slats.
The type of foundation does not depend on the weight of the structure, but on the nature of the soil.
Materials and tools
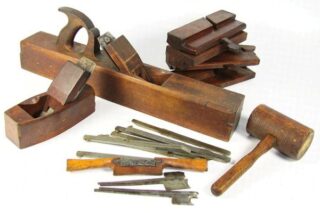
The simplest materials will be needed for the fence:
- board or picket fence for lamellas - recommended length - 2 m, width - 10–20 cm, thickness - up to 20 mm;
- slats with a section of 20 * 20 mm - lamellas are attached to them so that they are placed at an angle;
- timber with a section of 40 * 40 mm, 80 * 80 mm - it is not recommended to take brick or metal supports for a wooden fence;
- grinder with a disc, circular saw;
- screwdriver;
- hammer, screwdriver;
- square, plumb line, tape measure.
The foundation may require concrete, a mixing vessel, and a construction mixer.
Fence construction
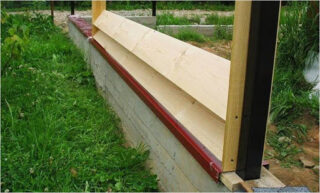
Before building a fence, you need to make sure that it is placed exactly along the boundaries of the site and does not violate the requirements of SNiP or restrictions adopted by the local administration.
Step-by-step instruction:
- Mark out the fence with pegs. First, mark the installation location of the gate and wicket. Then the angles of the fence are determined. A cord is pulled between the pegs and along this line the places of installation of the intermediate racks are marked - with a step of 2 m.
- In dense soils, they equip a point foundation, in heaving soils - a tape foundation. Often they get by with piles driven into the ground. The first option is more popular.
- A hole is dug under the post. Its depth is 1/3 of the height of the fence. A layer of sand and crushed stone 20 cm thick is laid at the bottom of the trench and tamped.
- Wooden beams are cut to size. The lower part of each rack is coated with bituminous mastic and wrapped with roofing felt - waterproofed.
- The supports are installed in the pit, giving it a vertical position. Then the pit is poured with concrete. The verticality is checked using a plumb line.
The assembly of the lamellas on the supports begins after 1, and preferably 2 weeks after pouring. During this time, the concrete has time to grab.
Mounting methods
- Nailed from the end side. The disadvantage of this option is damage to the boards. If this is a temporary fence, which is built from a slab, such fasteners are justified.
- In the groove - for each lamella on the rack, a groove is pre-cut. The lamella is pushed into the grooves. Such fastening is the most reliable and the least damaging to the tree.
- On the slats - an easier method of installation, which is most often resorted to.
Step-by-step assembly scheme:
- Prepare elements with planks.For this, strips are attached to 2 boards with a thickness of no more than 20 mm at the corners. The angle of inclination is calculated taking into account the width of the lamella itself and the size of the gap between them. Between the lower edge of the upper board and the upper lower one, at least 1–3 cm is kept.
- Planks on boards are assembled so that they are mirror images of each other.
- Lay the boards on a flat surface, insert the slats into the grooves. You can additionally fix the lamellas with self-tapping screws. A bounding rail is stuffed on top. Installation drawing is not required.
- The finished sections are installed between the posts and fastened with self-tapping screws.
It is better to paint or varnish the fence-blinds even at the assembly stage. The finished fence is more difficult to paint.
Caring for a wooden fence is reduced to protecting the material from rain and snow. Once every 2 or 3 years, the structure is treated with antiseptics or painted. Light decorative visors are installed on the tops of the pillars and on the top rail. If mold, mildew, or rot spots are found, the damaged lamella is immediately removed and replaced with a new one.

