Self-construction requires knowledge and skills in handling various tools and materials. The master must clearly understand the technology for the construction of the foundation, walls, floor slabs and roofs. Making a window with your own hands is considered the most difficult task in all respects. This is a responsible and time-consuming business, requiring thoughtful planning, care and accuracy at every stage of execution.
Advantages of windows made of wood and plastic

Advantages of wood windows:
- ecological cleanliness;
- excellent ventilation properties;
- ease and simplicity of processing;
- low thermal conductivity;
- resistance to mechanical stress;
- durability;
- presentable appearance
- strength.
Natural material has the ability to absorb moisture in case of its excess and give it away when there is not enough moisture in the room. This ensures the creation and constant maintenance of a comfortable and healthy microclimate.
Modern plastic products also have a solid list of positive qualities:
- shape retention regardless of environmental conditions;
- resistance to dampness and temperature extremes;
- immunity to corrosion, mildew and mildew;
- long service life;
- accuracy of surfaces, tight fit to the frame;
- a wide range of colors.
The fundamental difference between the materials is that wood "breathes" and is afraid of moisture, and the polymer is completely sealed and does not deteriorate from moisture.
Required tools and materials

To make high-quality wooden windows with your own hands, a standard set of a home master will not be enough. Professional equipment is required. During the manufacturing process, grooves and fasteners will be worked out, assuming absolute accuracy in the dimensions and angles of sawing workpieces.
To make a window frame with your own hands from wood, you should prepare the following tools and materials:
- electric planer, circular saw, hand-held wood router, grinder;
- chisel;
- a hammer;
- level, tape measure, square, protractor, marker;
- screwdriver with drilling function, construction gun;
- frame corner;
- self-tapping screws, nails, anchor bolts;
- paint brush;
- impregnation, stain, paint;
- loops.
If you plan to make a window from a PVC profile, you will need welding equipment to join the frame fragments.
Making windows with your own hands

The manufacturing technology of window blocks is approximately the same in nature, it differs only in the method of creating the corners of the structure. First of all, the size of the window is determined and a detailed drawing is made. Then the calculation of the requirements for materials and their purchase is carried out. Before starting work, prepare a wide, stable table with a flat surface that is larger than the frame.
Made of plastic
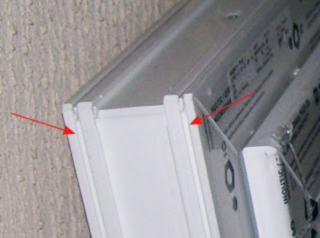
At home, plastic windows are made from a profile, inside which a steel plate is installed to give the structure its rigidity and strength. If you buy material and accessories separately, the cost will be 2-2.5 times lower than a custom-made product.Profiles of different thicknesses and colors are presented in the catalogs of companies, so there will be no difficulties with the choice.

Step-by-step instructions for assembling plastic windows:
- Measurements, marking. Make sure that each corner is prepared for cutting at exactly 45 degrees and that the distances between the control points match each other up to a millimeter.
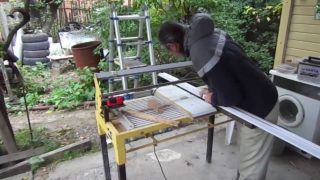
- Sawing purlins into blanks. This should be done at a right angle with a tool with a low speed of movement of the cutting fragment. It is not allowed to use a standard grinder, since the disc melts the polymer.
- Soldering the corner fragments. On the workbench, guide skids are made, where parts of the frame are placed. Then their edges are heated and joined. The result is checked with a square, if necessary, a correction is made.
- After complete cooling, the procedure is repeated until a single monolithic contour in the form of a rectangle is assembled.
- Removal of welding marks. It is carried out with a sharp knife and chisel. If holes are formed through carelessness, they are filled with liquid nails or molten silicone.
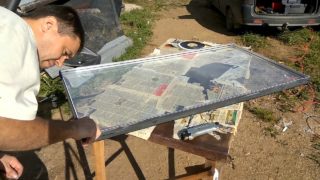
- Manufacturing of a double-glazed window. First you need to cut the required number of glasses of the same size. Then frames are made, which are welded or soldered in the corners. Then the parts are glued in stages. The number of cameras is selected based on the climatic conditions of the region.
- The finished glass unit is inserted into the frame. Adjustment is carried out using plastic spacers. After alignment, the product is fixed with glazing beads with rubber seals.
In conclusion, fittings are installed - handles, vertical and horizontal opening mechanisms, hinges.
Made of wood

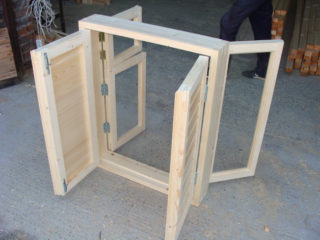
Working with wood is a little easier than working with PVC, but there are many nuances here. By design, a timber window is a glazed frame installed in a rectangular frame on the wall of the building.
A wooden window frame with your own hands is made in the following sequence:
- Carrying out measurements of the opening. The vertical and horizontal lines are checked, deviations are taken into account and applied to the diagram. The result should be a regular rectangular shape. The size of the box is taken 2-3 cm less than the opening.
- Jamb making. A board with a section of 50x150 mm is used. A groove is made in it for the frame and teeth for fasteners. The connection in the corners is carried out using the tenon-groove technology. Before this, the joints are thickly coated with wood glue. After checking the accuracy of the assembly, the frame is fixed with steel corners.
- Frame manufacturing. A timber of 50x50 mm is taken and sawn into blanks corresponding in size to the sides of the frame. The width and height are made 2 mm less than that of the frame. The connection is made on pins filled with glue and then reinforced with corners.
- Installation of fittings. A handle with a lock is cut into the frame, hinges are hung. The wood is treated with an antiseptic and a hydrophobic preparation. After drying, paint, varnish or hydrophobic impregnation is applied.
Finally, the glass part is inserted. The choice is made in favor of single glass or a double-glazed unit by analogy with a PVC product.
Before installing the glazing beads, a transparent silicone track is applied along the edges of the frame.
Features of work

Making windows at home has a number of features that must be taken into account in the work.
- Double-glazed windows must be made completely sealed to avoid fogging. It is preliminarily recommended to pour a sorbent into the connecting profiles, which will absorb moisture.
- The tree is prone to drying out and deformation. To prevent this from happening, you need to regularly treat the frame with protective equipment. Another option is to purchase glued beams or lumber made from valuable types of wood (oak, cedar, larch).
- In any case, there is a gap between the frame and the box for free opening. To avoid drafts, a rubber or foam seal should be installed in such places.
- Don't forget about the windowsill. You can also make it yourself by gluing it from several boards or bars, then processing it to match the window.
- During work, safety measures must be observed. Electrical appliances must be grounded and a rubber mat must be laid when using them. Hands should be protected with gloves and eyes with glasses or visor.
Even in the absence of professional skills, you can make a beautiful and strong window yourself. To do this, you need to scrupulously perform each stage of the work, do not rush, recheck all measurements and calculations.
Final window installation
First, the frame is installed. It is inserted into the opening and aligned with wedges. Then holes in the wall are drilled through the pre-made holes. Anchor bolts are inserted into them and tightened. Here you need not to overdo it so as not to warp the frame. Then 2-3 spacers are inserted into the opening and mounting foam is fed into the slots. This is done alternately on each side in layers no more than 5 cm thick. After a day, the spacers are removed and the frame is hung on the hinges. The final stage is the installation of the window sill, the ebb and the arrangement of the slopes.


