Swinging structures are the simplest version of gates used by owners of residential buildings, garages and summer cottages. They appeared before other types of fences and are easy to install with your own hands. The installation of swing gates often attracts homeowners due to the ease with which it can be repaired.
Swing gate device
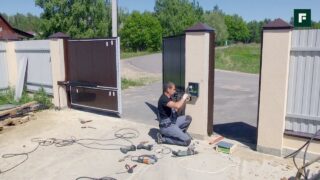
Swing gates consist of a pair of posts and the same number of supporting frames on which the facing material is mounted. The latter can be chosen so that it is in harmony with the design of the fence and the dwelling itself. The easiest way is to install a corrugated board with a polymer coating. You can also use sandwich panels produced in different designs, suitable for brick, wood and other types of fences.
The frame is usually made of a metal profile and a corner. A gate is sometimes installed in the sash.
In the insulated construction for the garage, a pair of supports is replaced with a closing loop, and the gaps are sealed with rubber strips and seals. Such gates are easy to make on your own, but in the absence of skills, you can use the services of companies that supply and install finished products. The design can be equipped with automation.
Advantages and disadvantages
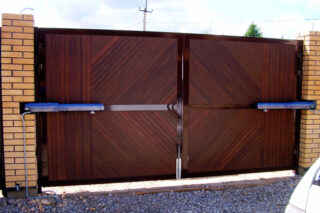
The installation of swing gates attracts many homeowners with its simplicity. To install such a structure, it is not necessary to have complex construction skills. Other pluses include:
- strength and reliability of the structure;
- the possibility of installing a wicket;
- small financial costs;
- high maintainability - if the canvas has sagged or insufficiently strong hinges are selected, the system can be easily brought into proper condition;
- the ability to install in the opening of any size.
In winter, it is necessary to clear the adjacent space of snow masses so that the flaps can move freely. Also, the design can be difficult when driving on a narrow street.
Differences between swing gates and sliding gates
When it is planned to install metal gates, there is often a choice between swing and sliding structures as the most common and easy to install. The second option differs in that it does not consist of a pair of leaves, but of a solid canvas that moves along the fence to the right or left side. It is mounted on the inner side of the yard. The gate is designed in such a way that the door leaf does not come into contact with the soil during movement. The long opening in the beam prevents moisture and snow retention.
If the swing structure usually narrows the opening to one degree or another, then the use of a retractable one does not give such an effect. The homeowner does not need to regularly remove the snow during the winter. But it is more difficult to mount sliding gates.
How to install the gate yourself
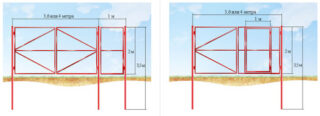
Before installing the gate, it is necessary to prepare a drawing showing the main structural elements (including hinges, lock structure, wicket) with an indication of the dimensions. In addition, you need to draw up a cost estimate for the project.
Installation of support pillars
Steel pipes with a diameter of 10 cm are suitable for the supports.The deepening of the base depends on the characteristics of the soil and the weight of the structure. The minimum indicator is 1.5 m. The heavier the canvases and the more unstable the soil, the deeper the foundation is prepared. It must withstand well the dynamic loads created by the movement of the canvas and wind gusts. It is also important that the substrate can withstand the effects of seasonal processes (frost and thaw) on the characteristics of the soil.
Step-by-step instructions for installing poles:
- Pits of the depth determined during the calculations are being prepared. Moreover, their diameter should be at least 0.1 m larger than that of the pipes used to create the pillars.
- At the bottom, prepare a pillow of gravel or small pebbles.
- Supports are placed in the pits, fixing them in a strictly vertical position with special props.
- Then the pillars are concreted. If you plan to hang heavy canvases, the supports must be reinforced.
Before installing the sashes, you need to withstand a month until the concrete hardens. During this period, it is necessary to protect the structure from exposure to the sun and periodically water it with water.
Assembly of gate leaves
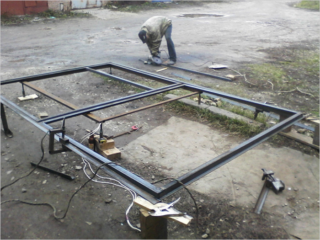
Frames are made from a corner or a rectangular profile. A professional sheet with a minimum thickness of 2 mm or a mesh is suitable for covering. It is best if the flaps can open 180 degrees - then they will not interfere with the entry of the car. In order not to eat up a useful place on the site, it is worth making the canvases opening outward. Their total width should be 3-3.5 cm less than that of the opening, and the distance between the flaps should be about 1 cm. When the canvases are assembled, they are tried on to the installation site and marked where the hinges should be located. The latter will then be welded to the posts. If the flaps are heavy enough, they should be installed on 6 hinges.
Installation of sashes on poles
The lower part of the hinge hinge is inserted into the upper one and the structure is seized to the post. This is done with all leaf hinges. After checking the evenness of the structure, the seam joints are scalded. You can move the canvases when the seams are completely cool. The welded areas are then polished.
Swing gates with electric drive and automation
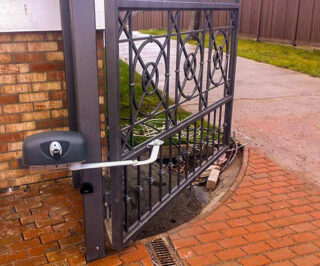
So that the gate can be opened while in the car or in another place at some distance from them, the structure is equipped with automation. When installing the electronic unit, it is necessary to strictly follow the manufacturer's recommendations.
The nuances of connection and settings
During installation, photocells must be clearly opposite each other to prevent interference that prevents the receiver from receiving a signal. The bracket of the electric drive must be at a certain distance from the angle of the support (the indicator is given in the instructions).
The system is connected to the power supply only after all its elements have been installed. The cables are first led to the control unit, and then to the drive motor and other devices. They must be protected with corrugated pipes.
If you plan to run a wire under the roadway, durable plastic water pipes will do.


