The artificial pond in the garden is a small pond. Naturally, it is not cleansed or restored - this has to be done by the owner. One way to keep your pond healthy is with an aerator.
Purpose and characteristics of the aerator
During rain, after the snow melts, the water is saturated with oxygen. It enters a lake, river, sea and enriches a large body of water with oxygen. Gas is retained here for a long time due to the large mass of water. An artificial pond in the country is an isolated reservoir. Water does not get here from the ground, the stream, after the snow melts, therefore the share of dissolved oxygen in it is constantly falling.
Aerator - air compressor. The mechanism mixes air and water and supplies it to the reservoir. The aerator creates steady streams that circulate the pool water. If plants, and even more so fish, live in the summer pond, the device must be installed.
A do-it-yourself pond aerator or purchased in a store has the following advantages:
- restores and maintains oxygen balance in an artificial reservoir;
- prevents stagnation of water and the reproduction of harmful algae and bacteria;
- mixes the upper and lower layers of water and normalizes the temperature;
- in winter, it ensures the appearance of a hole necessary for wintering fish.
Disadvantages:
- the compressor consumes electricity and a lot;
- you will have to lay a cable to the pond.
There are mechanical aerators that do not require electricity to operate.
The need to install an aerator
Do-it-yourself pond aeration is required if the following signs are observed:
- fish grows poorly, moves little, floats;
- ornamental plants develop poorly;
- blue-green algae multiply;
- water stagnates, gives off an unpleasant odor, blooms.
The problem can be solved by changing the water more often if no fish live in the pond. However, it is cheaper to install and use an aerator in most cases.
Device and principle of operation
The aeration system includes:
- compressor;
- air diffuser with a connecting nipple;
- breeder with a fitting;
- silicone hoses for connecting elements;
- check valves to prevent hoses from freezing.
The compressor creates an air flow. Through the atomizer, small gas bubbles under pressure go into the water column and saturate it.
Varieties of aerators
Before you make an air spray for your pond yourself, you need to decide on its type. There are 4 design options.
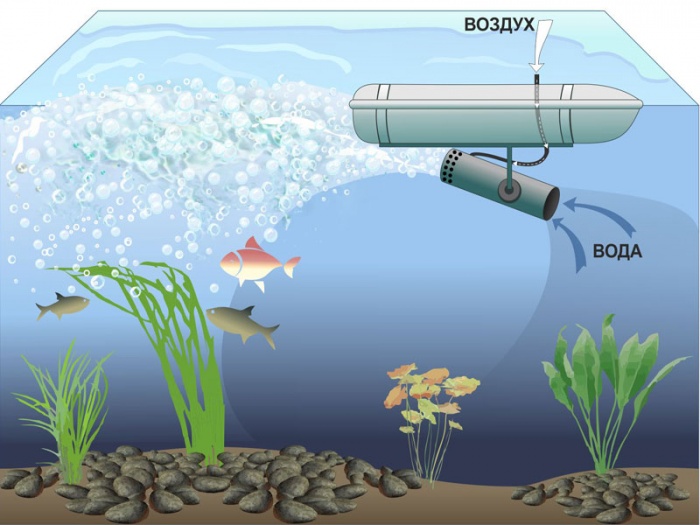
- Surface - used very often in decorative ponds, as they often imitate fountains and waterfalls. The pump draws in water from the pool and forcibly throws it into the air. The water is oxygenated and immediately returned to the pool. It is not recommended to place such a device in a pond with fish, as the installation creates quite a lot of noise.
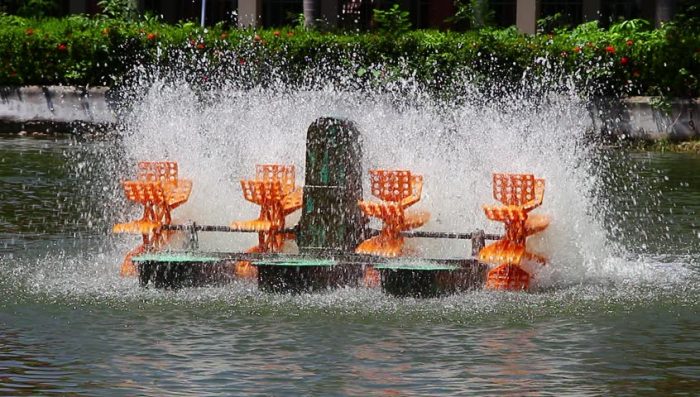
- Ejector - a wheel with blades acts as a working element of the device. Rotating, the blades lift water into the air, it is saturated with oxygen and returns to the reservoir. The device effectively mixes the lower and upper layers of water, has a high power, but makes no less noise.
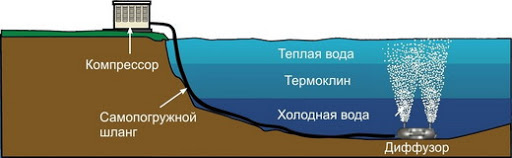
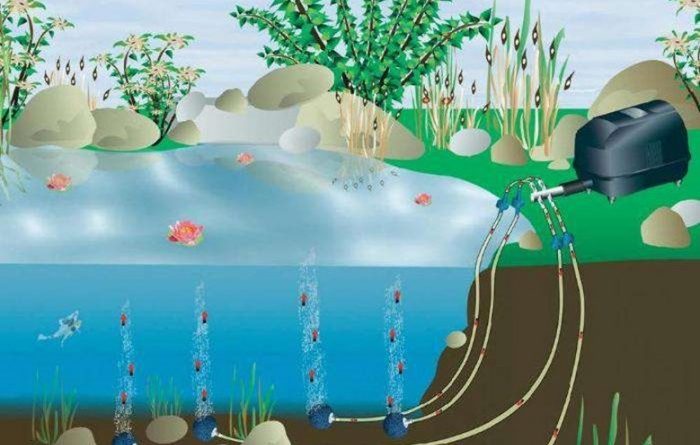
- Bottom - the compressor is located on the shore, and a supply pipe with a diffuser is lowered to the bottom of the pond. The air flows directly into the water column and is evenly distributed. The most effective option for a fish pond, as it does not harm the inhabitants and does not frighten them with noise.
- Combined - the compressor of the device is installed on the shore, the pipe with the spray is placed on the surface. This creates a fountain effect and oxygenation is faster.
All models are powered by electricity.
The wind aerator is an axle. Above the level of the reservoir there are large blades, under water - smaller blades or a propeller. The wind makes the windmill turn, the motion is transmitted along the shaft to the propellers, and they mix the streams of water. This type of aeration works autonomously.
DIY aerator
It is not difficult to independently make not only a wind, but also a bottom aerator, if you follow the step-by-step instructions.
Assembling the ejector aerator
The device will need a drainage pump, a piece of polypropylene pipe for sewage, a 40 cm pipe, a tee and a cable for supplying electricity - preferably in a double braid. The assembly is simple.
- The tee is connected to the drainage pump using a union. It is recommended to seal the seam with silicone sealant.
- On the other hand, a branch pipe is inserted into the element.
- A 45-degree corner is inserted into the upper bend and the pipe is fixed.
- An electric wire is connected to the aerator. The latter should be placed in a corrugated pipe.
- The pump is installed at a depth of 70–100 cm from the surface of the reservoir. The intake pipe is fixed so that it is above the water level - for this, a stand is used. The device itself is fixed to it.
Testing is carried out before installation.
Assembling the bottom aerator
You can make it from an old car compressor with a receiver; a part from a refrigerator, vacuum cleaner is also suitable. Tees, clamps, high pressure hoses and nozzles are needed. The latter are easy to make by making small holes in plastic bottles.
- The compressor is installed in a nearby shed in a protective box.
- Connect a pipe to the compressor.
- Tees are put on at its end to make the required number of bends. Sprayers are placed on the bends and secured with clamps.
- Check the installation.
To prevent the nozzles from floating, they are pressed to the bottom of the reservoir with cobblestones or metal pins.
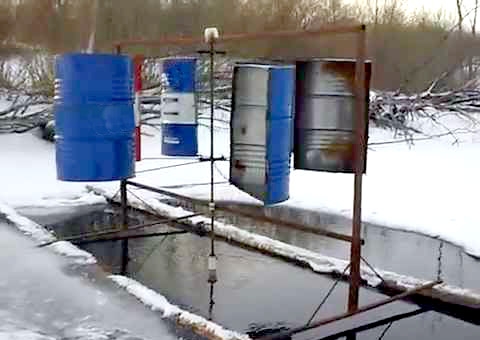
Assembling the wind aerator
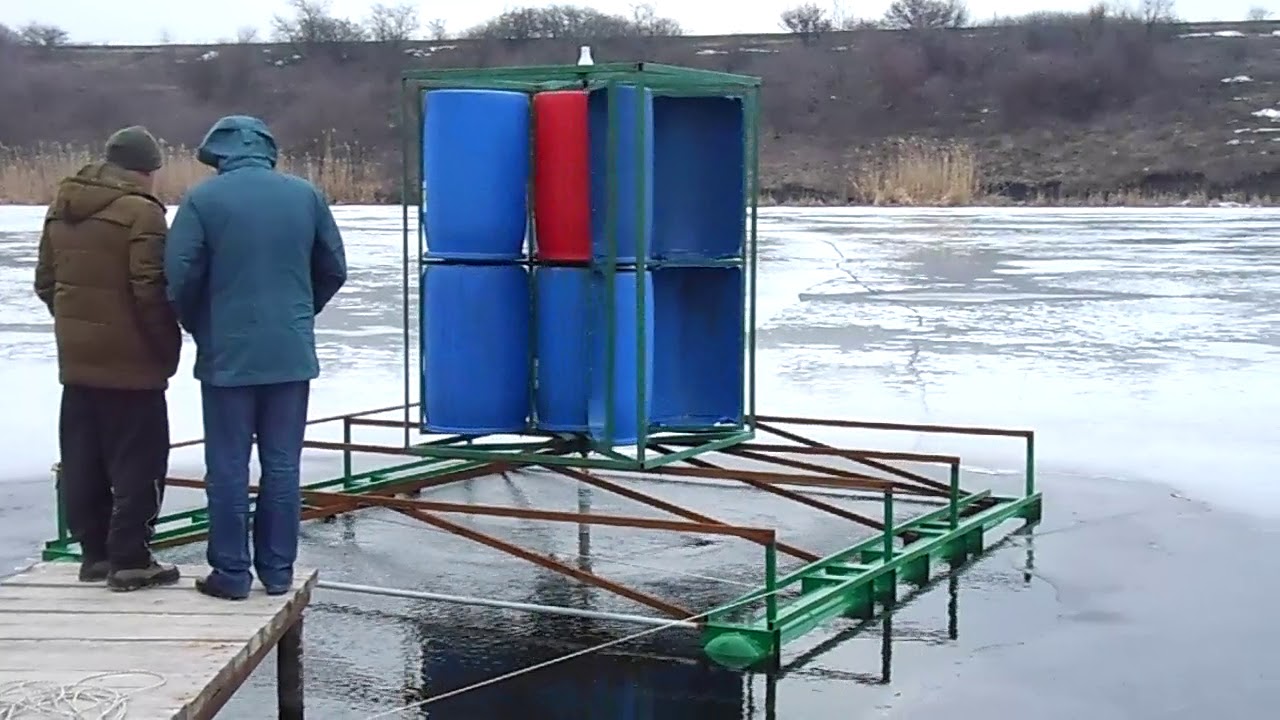
For the winter time, this option is more profitable. It does not consume electricity and does not undergo high wear and tear, unlike a compressor. Making a wind aerator is even easier.
- 8 identical squares are cut out of a sheet of iron, cubes are welded from them.
- A crossbar with a bearing is inserted inside each. The second bearing is attached in front of the hole in the cube. Both elements must be on the same line.
- An iron rod is inserted through the bearings.
- The plastic barrel is cut into 2 halves - they play the role of wind turbine blades.
- The blades are fixed to the top of the rod with metal hinges.
- The blades from a home fan are fixed in the same way on the lower part of the rod.
- Collect the mast for the aerator, set it in the pond. The device is attached to the mast.
The aerator can be made floating by attaching polystyrene and plastic barrels to the bottom of the device.
Operating rules
Recommendations for using aerators are extremely simple.
- You need to choose a device according to its power. If it is insufficient, the water in the pond remains muddy and muddy.
- The cable for the device is wrapped with tape and hidden in a corrugated pipe.
- If the compressor is also used in winter, the supply pipe is laid in the ground below the freezing level. If this option is not suitable, the hose is thermally insulated.
The technical specifications of the device indicate the lowest temperature at which the device can operate.
To measure the level of oxygen in water, special devices are used - oxygen meters. Unlike chemical analysis methods, the device indicates the current oxygen level in the field.