A DIY plasterboard fireplace allows you to create a cozy atmosphere in your living room or study. The corner structure will beat the complex area of the room without hiding the space. It is not difficult to build a false fireplace, so a person with no experience can cope with the work, using step-by-step instructions.
Types of decorative fireplaces
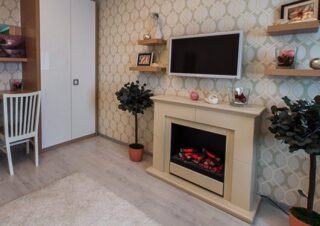
There are several types of fireboxes, which are combined into two categories - closed and open. Design options:
- The symbolic fireplace looks like a painting with an imitation of a portal. In some cases, it can carry the function of decoration.
- The conventional type is an electric fireplace, the design of which is presented in the form of a screen. Combination with a shelf is allowed.
- Bio fireplace or authentic imitation - models made of metal or drywall. Equipped with a shelf, a burner to simulate fire, artificial wood. The presence of a decorative flap complements the "natural" designs.
If the use of candles is planned, fire safety regulations must be observed. The inside of the firebox is lined with heat-resistant materials such as steel or asbestos.
Design solutions
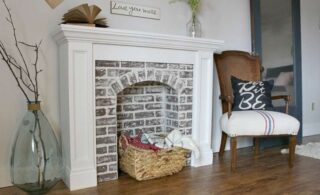
When erecting a false plasterboard fireplace with your own hands, it is necessary to strengthen the base of the structure. For this, a plate is installed at the bottom. The following options can be used as decor:
- ceramic tile;
- natural or artificial stone;
- stucco molding;
- self-adhesive film with textured imitation.
Designers recommend when choosing finishing materials to select them taking into account the existing interior.
To fix the cladding, use a special adhesive-sealant, if it is not about a self-adhesive film.
Step-by-step instructions for creating a drywall fireplace
Any imitation of a heat source, regardless of design characteristics and location, consists of 2 elements - a portal and a burner. The main task of these details is to create the appearance of a fire in the fireplace.
Creation of drawing and layout of the project
When building a small fireplace, it is enough to create a schematic image. To work with a dimensional model, it is necessary to develop a project with dimensions. An accurate drawing allows you to take into account at this stage all the nuances of the future structure.
Ideally, you should create a cardboard layout, in which you need to include the location of the wires to connect the source of "fire". Cutting holes after the construction of the fireplace threatens to violate the integrity and loss of aesthetics. Additionally, it is worth considering the output of hot air, i.e. a ventilation system in miniature. On the drawing, sketch the location of the outlets and electrics.
List of required materials and tools
Creating a drywall fireplace is a simple task that even a beginner can handle. The work uses a screwdriver, perforator, metal shears and a construction knife. The jigsaw will greatly facilitate the process. It is not necessary to buy new equipment, it can be rented.
Auxiliary inventory:
- pliers;
- a hammer;
- Screwdriver Set;
- roulette;
- ruler 30 cm;
- pencil;
- building level and plumb line.
For the construction of the structure, you will need the following materials:
- drywall;
- screws and dowels;
- Decoration Materials;
- metal profiles.
If it is planned to manufacture only a box on which candles and decorative elements will be installed, drywall is enough.
Layout and preparation for arrangement
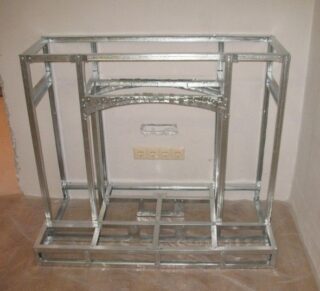
The creation of the fireplace frame begins with the preparation of guides and post profiles, which are made of galvanized steel. The first type of elements is delivered in the shape of the letter "P" and have corrugated walls for increased rigidity. The second type is distinguished by the presence of a strip in the central part for marking and centering the dowels.
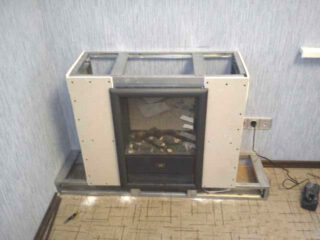
The work is carried out according to the following algorithm:
- On the floor and walls, check the accuracy of the markings using a plumb line and a building level.
- Take metal scissors and cut pieces of the desired length from the profiles. To create semi-circular parts on the part, make cuts every 1-2 cm, then gently bend it.
- Unfold the profiles and fix them to the floor with self-tapping screws. Use wall plugs to secure the rack elements to the wall. Stick to the same step, the gap of which should not exceed 1 meter.
- Use wooden slats to reinforce the structure - experts recommend conifers. This stage is relevant for rooms with low humidity levels. Jumpers made of rack-mount profiles and fastened with self-tapping screws will help to increase the strength of the structure.
- Before assembling the frame, pour a concrete cushion 20-30 cm high. The length and width are calculated based on the dimensions of the fireplace foundation, adding 20-30 cm to the resulting figures on each side. Thus, a flat surface and fire safety are created.
Use standard guide profiles to fit the camera vaults. On the created fireplace frame, make several cuts to bend the arch. Additionally, you can use factory blanks or order in the workshop.
Portal skin
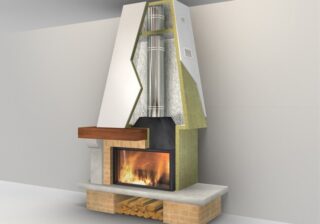
Cover the firebox with heat-resistant materials using mineral wool. Apply the layer to the surface and fix it with self-tapping screws. Pre-apply heat-resistant varnish or paint to the walls. If according to the project it is planned to place the mirror on the rear wall, then it should be protected with heat-resistant glass. Experts recommend using an element from an old oven door for large fireplaces.
Fix the prepared plasterboard parts with a screwdriver to the plaster-metal screws with a pitch of 20-25 cm. Sink the fasteners into the surface to a depth of 1 mm - this approach will facilitate puttying at the finishing stage. Each self-tapping screw, fastening drywall and profile, should go at least 10 mm.
Facing works
Puttying involves bringing the surface to a smooth state. The mixture also provides adhesion to the materials. Apply 1-2 coats of primer with a soft roller and leave to dry completely. Dilute the filler according to the instructions on the package. First of all, process the caps of the self-tapping screws recessed into the drywall. Level the composition. After the mixture has dried, sand the surface with a fine sandpaper.
Fasten the vertical seams with fiberglass tape. This should be done as follows:
- put putty on the joints;
- attach the tape;
- cover with another layer of the mixture on top;
- process the seams in the same way as for the main surface.
Before working with the serpentine, remove the drywall layer with a construction knife. If you intend to fill the fireplace completely, trimming can be skipped.
Expert recommendations
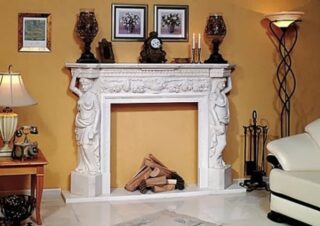
The parameters of the falshkamin are easy to bring closer to the real design. It is important for the master to adhere to the given characteristics. When calculating, take into account the thickness of the drywall sheets - the average proportions are 12.5 mm.
Optionally, the fireplace can be pasted over with wallpaper, which conceals irregularities well. In this case, one layer of putty is sufficient. Select materials to match the walls.Use a curb to decorate the facade as an additional ornament.
Modern technologies allow you to create an imitation of a fire source in an apartment, close to reality. For example, you can buy an electric or bio fireplace. Products require additional financial investments from 25,000 rubles and more.


