A sandbox is an integral attribute of a summer house or a country cottage if there are small children in the family. Most often it is a wooden box (frame) filled with sand. Anyone who can saw off several boards of the same length and drive in a few nails can make a simple open sandbox. However, more and more often you can see wooden sandboxes with a roof, equipped with benches. Such options are more child-friendly and protect the sand from debris and visits from neighbors' cats and dogs. The sandbox with a roof, which transforms into benches, and sometimes into a small table, is even more functional. Their independent production is not a big deal, however, it requires the preparation of the necessary materials and the availability of tools for performing simple carpentry work.
Materials and tools
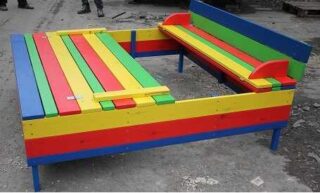
A do-it-yourself sandbox with a lid is made of wood. The durability of the structure largely depends on the type of wood. Most often, the main parts are made of pine, linden or larch - they are least susceptible to rotting.
The sandbox frame and lid are made of well-sanded and sanded boards with a thickness of at least 3 cm.
The sand itself is also important when arranging the sandbox, which is poured into the fabricated frame.
Sand
Children can spend a lot of time in the sandbox. Therefore it is recommended
- Take sand from an environmentally friendly place, which will protect children from possible allergic reactions and poisoning with harmful substances.
- Ignite and then sift it through a fine sieve. At the same time, the sand will be cleared of small insects and their larvae, as well as pebbles, roots and other debris.
Usually sand is brought to the site wet. This can lead to colds in children. Therefore, it is advisable to fill the sandbox with well-dried sand, which, moreover, should mold well.
Base
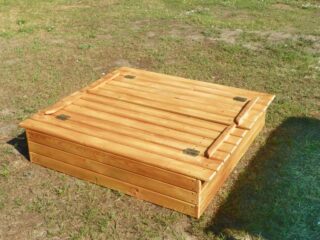
When starting to build a sandbox made of wood with a lid with your own hands, it is important to prepare the base base. You will need:
- expanded clay or river pebbles;
- agrofibre or dense plastic film.
To prevent water from accumulating in the sandbox, it is necessary to equip a drainage cushion on which the base itself is laid.
Frame
When starting to assemble a closed sandbox box, in addition to boards measuring 30x150 mm, you also need to prepare:
- timber 50x50 mm, which will be needed to strengthen the corners;
- sealant;
- self-tapping screws.
In the future, a transformer cover will be attached to the frame.
Cap
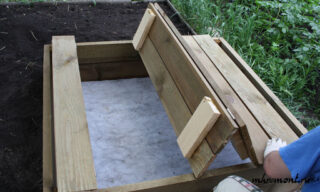
To make a sandbox cover you will need:
- boards 20x125 mm;
- bar 30x30, which will be needed to fasten the seat;
- loops;
- self-tapping screws 25 and 45 mm long.
All wooden parts of a closed sandbox must be carefully treated with an antiseptic before assembly, and then primed together with metal parts.
Tool
To make and install a children's sandbox, you will need:
- shovels (shovel and bayonet);
- roulette;
- pegs with a tied rope;
- pencil or marker;
- jigsaw or hacksaw for wood;
- electric drill with a set of drills;
- grinder with sanding discs or sandpaper;
- screwdriver or screwdriver set.
Having prepared everything you need, you can start building the sandbox.
Making a sandbox with a lid
A sandbox with a lid, which can be transformed into seats if necessary, should be sized to allow several kids to play in it.
As a rule, the height of the beads for such structures does not exceed 25-30 cm, and the dimensions of each side range from 1.2-3.0 m.
Seat selection
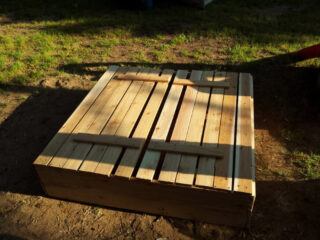
When choosing a place to install a sandbox, it is important to consider the following points:
- Children need constant supervision, so the play area is set up so that it can be seen from everywhere.
- Both bright sun and constant shade are not the best place for a child. The sandbox is placed in such a way that one part of it is in the shade, and the other is in an open place. In this case, the sand will dry out more quickly after rain.
- It is undesirable to place a sandbox near a body of water or in the open wind. Moisture and drafts will not add health to the child.
- Before installing the sandbox, it is recommended to carefully examine the nearby trees and bushes. After all, dust and dry leaves often fall from the trees. Many plants can cause allergies or attract stinging insects.
Hard objects (stones, boards, metal parts) scattered around the sandbox can cause injury. It is also necessary to remove nails, cords, etc.
Assembling the frame
The construction of the sandbox begins with the assembly of a wooden box.
- Using bars with a height of at least 28 cm, connect 2 tiers of boards to each other. To prevent sand from spilling into the cracks between the boards, you need to glue a layer of insulation to the ends. If you need to install the sandbox more thoroughly, use beams of greater length, the lower part of which, at the end of installation, is buried in the ground.
- When assembling the frame, check the evenness of the corners and fasten the boards with screws in the corners of the box to the corner beams. Each end of the board is screwed on with two screws. To give the box more strength, it is recommended to reinforce the corners with additional bars.
Preparation of the base and installation of the frame
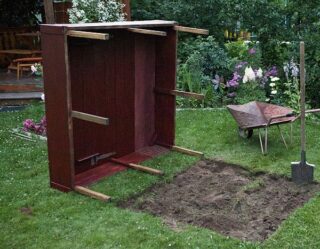
Having assembled the box, they begin to prepare the base. To do this, the allocated plot of land is leveled and cleaned of debris. Mark out the area, adding 20 cm to the dimensions on each side. Pegs with a rope are driven into the corners of the site, checking the correctness of the corners.
Further:
- Remove the top layer of soil to a depth of at least 20 cm. In this case, the surface of a small pit should have a slight slope towards the center.
- In the center of the pit, a hole is dug 50 cm deep and 50 cm in diameter, which is filled with material prepared for drainage.
- The surface is filled with a 5 cm layer of sand and carefully tamped.
- Agrofibre or its substitute is laid on the resulting pillow. Holes are made in it to prevent moisture accumulation. The hole pitch is 10 cm.
- The mounted frame is installed on the prepared base. The lower part of the legs, if necessary, is buried in the ground.
The lower part of the beams, intended for digging into the soil, is covered with linseed oil, used engine oil or bitumen.
Cover assembly
Having installed the box, proceed to the installation of the cover, which will transform into seats.
- Two boards are rigidly screwed to the opposite sides of the box.
- With the help of bars, the backs and seats are assembled from the remaining boards according to the selected scheme.
- With loops located at the same distance from each other, the resulting seats are attached to the backs.
- Putting the assembled seats with backs on the box, they attach them with hinges to the rigidly attached boards.
Upon completion of the installation work, all parts of the cover should be easy to open and close.
Finishing
Finishing operations are carried out in the following order:
- Using a grinder or sandpaper, smooth the existing corners.
- All parts of the sandbox are treated with an antiseptic.
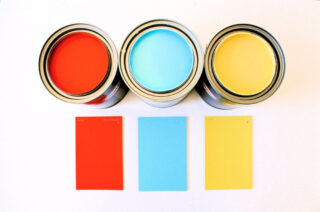
They paint the details of the sandbox in different, preferably bright colors.Various pictures can be drawn using stencils, and figures of fairy-tale characters can be cut out of plywood, painted and fixed on the side walls of the box.
The applied paints and varnishes must be non-toxic. Also, they should not snap off when exposed to sunlight.


