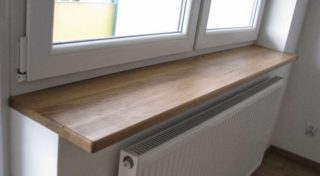
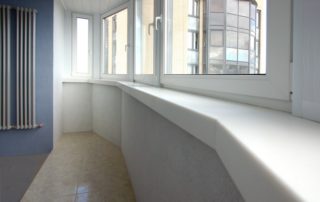
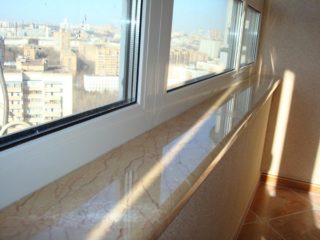
The window sill belongs to the structural details of the window, its horizontal platform is placed at the level of the bottom of the frame or under it. The element gives a finished look to the window opening. Installation of a window sill on the balcony is recommended to protect the wall from rain that falls into an open window. As a result, the usable area for installing flowers and storing things increases.
Dimensions of the balcony window sill
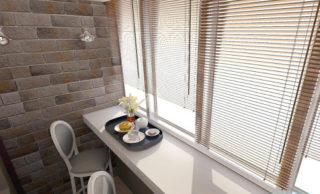
The width of the window sill depends on the thickness of the wall, but sometimes the size is increased to get a functional shelf, table top. Modern repairs on the loggia are combined with the dismantling of wall structures, the laying of new ones, insulation and the installation of radiators. A window sill of increased width is mounted so that its plane overlaps the top of the wall and covers the niche above the radiator, if any.
The size and shape of the outrigger plate depends on the size of the loggia and its functional purpose:
- if the balcony is used for relaxation, the width is made 25 - 30 cm in order to put a cup, place a book;
- an office is arranged on the loggia - 30 - 45 cm for a laptop, other gadgets;
- a narrow element flush with the wall is mounted, if the balcony is rarely used, single glazing is installed, insulation is not satisfied.
The length of the horizontal surface is often taken according to the size of the window frame, but sometimes it is extended onto the wall, creating a special shelf for decorative items or flower pots.
Varieties of window sills on the balcony
Building materials have disadvantages and advantages for specific applications. Before making a window sill on the loggia, determine the material that meets all the requirements.
Factors are taken into account:
- the functionality of the window add-on;
- combination with other materials and compliance with the design solution;
- personal preferences of the owner.
The modern loggia is not used as a winter storage room, therefore, they are suitable for its design, as in a full room in an apartment. Innovative methods of insulation, filling openings have appeared, new types of window sills appear.
More often they make installation from wood, plastic, artificial stone.
The product can bend, have a rounded shape, so the material should allow any shape to be made. Sometimes non-standard solutions are used in the form of ceramics, porcelain stoneware, thick glass, and monolithic concrete boards are made.
Wood
For the window sill slabs use hard types of wood: beech, oak.
The texture is isolated with wax impregnation, oil compositions will protect the surface from the development of microorganisms, fungus. Maple, larch, pine are used for glued arrays of individual lamellas. The parts are connected with thorns, special compounds are used. It is possible to make structures of different window sills from glued panels without restrictions, since the strength of panel materials is almost twice as high as those of natural materials.
The wooden surface requires special care and respect.The surface should not be washed with heavily damp sponges, cleaned with abrasive powders, or use solvents to remove stains. Dents appear on the surface from heavy objects. Every 3 years a wooden window sill is painted or varnished.
Plastic
Features of PVC window sills:
- retain their original appearance for a long time;
- do not rot and firmly resist the action of UV rays;
- tolerate frost and extreme heat without problems;
- do not require repair and regular painting;
- stiffening ribs inside provide strength;
- do not absorb moisture.
The disadvantages include the possibility of scratches and dents on the surface from mechanical stress. PVC products can be fixed with your own hands, without the use of special devices and tools. If the plastic product has become unusable, it cannot be repaired; it will have to be replaced with a new one.
Artificial stone
Properties of artificial stone window sills:
- resistance to mechanical shock and chemical agents;
- low cost;
- beautiful appearance.
Products are produced from quartz or acrylic stone. The first option has increased hardness and allows you to move heavy objects on the surface. Acrylic is more sensitive to scratches and dents, but its advantage is that it is warmer to the touch.
From an artificial array, you can make a window sill on the balcony of various shapes and sizes, while the site will look completely monolithic, without joints.
Stone surfaces are washed with soapy water, but abrasives, to which the surface is very sensitive, should not be used. If scratches appear, they are removed with a polish.
Marking and trimming workpieces
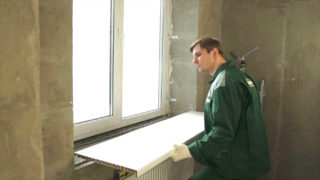
Sizing and shaping the workpiece is the first step in the main job. The length is chosen along the bottom of the window opening, the slab is cut at 90 °. Sometimes the structure has a broken structure, since it goes around the contour of the installed frame on the corner balcony. In this case, the size of the two connecting planes is determined, the length of the protrusions or internal corners is taken into account.
Sometimes the window sill is carried out beyond the contours of the opening, for example, a cabinet or open shelves will be located under it. Then add the length of the required area to the size of the window.
Wooden slabs are cut with a hacksaw on wood or use an electric jigsaw. For PVC, use a saw with fine teeth (for metal). After cutting, the edges of the part are cleaned with sandpaper. An artificial stone is cut with a grinder with a circle on the stone or a diamond disc is placed. It is better to order such window sills for making to size in a store or workshop.
Self-installation methods
You can mount the bottom frame of the window yourself. Additional accessories are required to attach the window sill to a plastic window on the balcony or install it on the base of a wall. Plugs are used to cover the raw end cuts. For PVC, plastic parts are used, and the wooden ends are closed with self-adhesive film edges, which are glued with an iron.
Required tools and additional materials:
- sealant, foam, finishing accessories;
- electric jigsaw, drill or screwdriver;
- level, tape measure, square, pencil;
- wedge-shaped bars.
If the board is joined lengthwise, use rectangular cut or fillet weld connectors. Ventilation grilles are inserted into the body of the window sill for the passage of heated air flows when mounted above the radiator.
They put mounting brackets, plates for taking out the window sill in width and correctly fixing the board horizontally.
On polyurethane foam
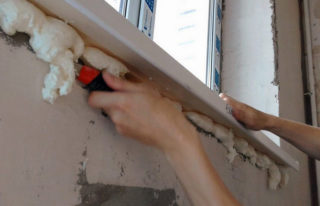
Use conventional tube cylinders or use professional pistols to accurately dispense material and create a homogeneous porous structure. Foam increases its volume when solidifying, therefore it is recommended to use products with a low expansion coefficient, for example, Baumaster, Soudal or other similar materials.
A window sill board is placed on the foam if its width is small and it does not protrude much beyond the vertical plane of the wall. Fill in the gaps between the window sill and the wall parapet. Weights are placed on the surface of the panel on both sides and in the middle so that the board does not rise while the foam solidifies. Relieve stress after drying (in a day).
The protruding excess foam is cut off with a knife to level the planes. When the material dries, a protective film forms, which prevents the foam from breaking down. If you cut off the film, the cut must be putty and trimmed to match the overall coating.
On clips or mounting strips
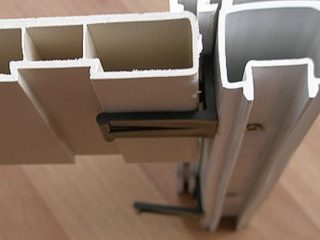
A U-shaped profile is placed under the board, which is often plastic. The part is used to insert the longitudinal end of the trimmed panel. The profile is fixed horizontally, does not allow sagging and tilting; for this, a level construction, water or laser device is used. Sometimes a slight inclination of the plane towards the room is provided so that moisture does not accumulate on the windowsill.
The rigidity of the long sill board is given by inserting wooden wedges, which are placed in increments of 25 cm along the length of the opening. The bars are fixed with dowels, self-tapping screws or a mortar of cement and sand (1: 3) so that they do not reach the edge of the retainer by 1 - 2 cm.
Before work, the top of the wall is cleaned of debris, mortar, excess foam that remains after the installation of the frame. The sill should fit snugly against the top of the wall.
The latch is made of durable PVC, the structure is reinforced with stiffening ribs. The part has a hole for fixing it to the support profile with screws.
Using brackets
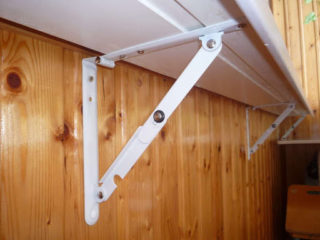
Window sills with a large overhang experience significant loads during operation, therefore, support brackets are placed under them. Be sure to put a support profile, which, together with the bracket, adjusts the position and provides a tight fit to the bottom of the frame.
The brackets are fastened with self-tapping screws with a fine thread pitch and a press washer to the supporting profile. The length of the hardware depends on the thickness of the support element and the number of partitions inside it. The number of supports depends on the severity of the window sill and its characteristics. As a standard, there are 5 - 7 pieces with a window width of 1300 mm.
The installation site is foamed. If the space after installation does not allow inserting the spout of the foam cylinder pipe, foam treatment is done before installing the window sill, then brackets are installed. If the structure of the supporting profile and supporting elements are installed correctly, the installation of the window sill includes neat routing and snapping into the installation position.
The nuances of choosing and installing window sills
The window sill is chosen so that it is convenient to operate a small room of a loggia or balcony. Too narrow has limited functionality, and a large stem will interfere with the movement of people.
Sill boards are installed only after replacing the window, otherwise the new frame in thickness and dimensions may not match and the lower frame of the opening will have to be reinstalled. The method of fastening is chosen taking into account the material of the window sill and its weight.
Installation of a board of complex configuration (with bends, corners, semicircular) requires preliminary calculation and drawing a sketch with dimensions. Docking corner and straight elements are selected, the number of brackets and plugs is determined.
If the window sill is heavy, the base (top of the wall) is reinforced with a cement belt, for which receiving formwork is made along the contour of the vertical fence.

