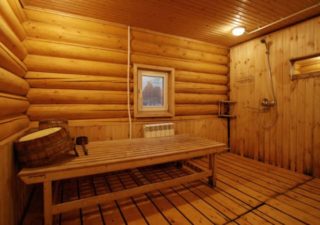
The construction of a bath requires a serious study of various aspects that are uncharacteristic for a typical development of suburban land plots. This is due to the specific operating conditions of the baths - high temperature indicators, high humidity, contact of various materials with hot and cold water, strict sanitary and hygienic requirements. In each of the rooms in the bath, it is necessary to maintain a special microclimate, which is also not easy to accomplish. One of these aspects is the arrangement of the floor in the bath, which can be an integral part of the sewer system.
Types of sauna floor

Setting up a concrete floor is time consuming and expensive. It has served for more than 50 years, and with proper operation, replacement will not be required at all.
A plank floor structure in a bathhouse will cost significantly less than a concrete floor and lay it much faster. The boards will have to be changed every 5-10 years. Structurally, a plank floor can be of two types:
- flowing (crevice);
- non-leaking.
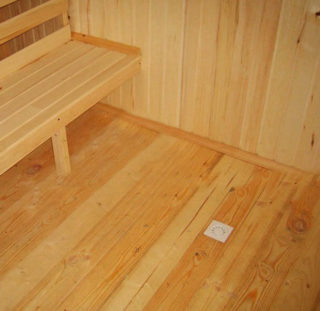
A slatted floor is a set of boards laid at a distance of at least 3 mm from each other. Water flows through these cracks. Such a structure is usually equipped in regions with a warm climate - in the cold season, the floor will be cold.
The non-leaking structure with water drain provides for laying the sub-floor and carrying out heat and waterproofing works - this is the only way to make the floor in the bath dry and warm.
Features of the device of a wooden and concrete floor
The floors in the bath are conventionally divided into simple and complex. The simplest is considered to be a slatted floor with a natural drainage of water (into the ground or into a drainage system), and the most difficult is a concrete multilayer structure, which provides for lining a concrete surface with ceramic tiles and decorating the latter with a slatted wooden ladder.
Wood

The choice of the construction of a wooden floor begins with an analysis of the soil on which the bath will be erected.
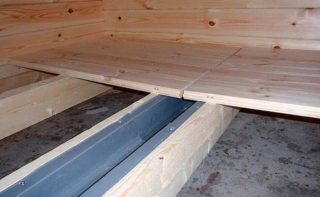
If the soil is sandy, to drain the water flow, it is enough to equip the drainage, which is a layer of bulk crushed stone approximately 25 cm thick. This will accelerate the absorption of water into the soil and prevent decay of boards and logs. At the same time, the plank floor is installed on wooden logs, which are laid on support posts. Each column requires the laying of a small monolithic area of concrete. The length and width of the site must correspond to the dimensions of the support column (15x15 cm), increased on all sides by at least 5 cm. The depth of the pit into which the concrete is laid is 40 cm. 10 cm of sand and 15 cm of crushed stone are successively poured into the pit. Each layer is carefully tamped and only after that the formwork is mounted, into which 2 layers of concrete are poured. It is advisable to lay a reinforcing mesh between the layers. All support posts must be of the same height. After the concrete has set, waterproofing (oil bitumen + roofing material) is carried out and laid on the support posts.
Wooden joists for a leaking floor should be laid at the same level, and for a leak-proof floor - with a slope of 10 °. The slope is made using cuts in wooden blocks, the number of which increases as you approach the pit.
The leaking floor is laid from edged boards, and the non-leaking floor is made of grooved boards.At the same time, first equip the subfloor - the surface of the subfloor is covered with glassine, covered with expanded clay and covered with waterproofing material.
If the soil does not have sufficient absorbency, it is necessary to arrange a more complex water drain. It is necessary to build a pit and lay a pipe through which water will be discharged from it to a cesspool, septic tank, etc.
To prevent the floor in the bath from rotting, the boards are raised 10 cm above the ground.
Wooden floors in the bath must be treated with special impregnations, otherwise woodworm and / or fungus may start in the boards, which can subsequently cause rotting. Fire retardants are needed to protect the boards from fire.
Concrete

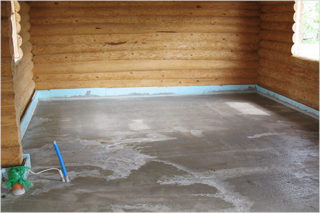
If you have to make a floor with a slope, it is best to make a concrete screed under the wooden flooring. It is given a slope of 5 °, a collecting neck is equipped at the lowest part and water is drained into a pit or sewer. Such a floor can also be used as the main floor, but it is not particularly pleasant to constantly feel cold concrete (even polished) under your feet. First, it is necessary to insulate the structure by covering the subfloor with expanded clay or slag, then fill it all with a concrete screed. Ceramic tiles or lining are laid on top, a wooden ladder is laid on top.
Floor in the steam room with a do-it-yourself drain
To independently build a solid wooden floor in the steam room, you will need:
- container for mixing the building mixture;
- shovels (shovel and bayonet);
- hydro level;
- a set of trowels;
- mallet;
- gas wrench;
- a set of hammers;
- pliers;
- roulette;
- carpentry meter;
- set of screwdrivers.

Depending on the area of the steam room, the calculation is carried out and the necessary materials are purchased:
- cement M400;
- fine river sand;
- fiberglass polypropylene;
- expanded clay;
- liquid glass;
- sand and crushed stone mixture;
- PVC pipe with socket;
- shower drain with dry closure;
- perlite;
- reinforcing mesh.

It is not difficult to build a floor in the steam room with your own hands for those who have the skills to perform construction work. The main thing is to follow the sequence:
- The underfloor is slightly deepened, leveled and tamped.
- A drain is mounted with a lattice ladder, a water seal and pipes. The drain pipe is temporarily plugged.
- Pour expanded clay, level it in the form of a bowl with a slope towards the drain and cover with polyethylene.
- The backfill is poured with concrete mixed with waterproofing and fiber additives so that the bowl is preserved. The thickness of the fill is 5 cm. The fill can be reinforced.
- After the screed has dried, it is "ironed" with liquid glass and wait until the solution is finally hydrated.
- Brick columns with a section of 15x15 cm are built, which will serve as supports for wooden logs. The distance between the floor and the concrete screed must be at least 40 cm.
- Roofing material is laid on the posts and fixed with bituminous mastic. Then the lags are laid. They should not be fixed to the walls.
- A rough floor is laid from an edged board, and a vapor barrier film is laid on it.
- A heat insulator is placed on the film and roofing material is rolled out. There must be a distance of at least 3 cm between the roofing felt and the finished floor.
- Grooved boards are laid on the logs and carefully rallied together with special clamps and fixed through the grooves to the logs with self-tapping screws with countersunk heads. There should be a small gap between the wall and the floorboards, which is covered with a plinth at the end of the work.
A special resistant varnish is used as a finishing coat for the bath floor. In order for the coating to be reliable, the surface of the wood must be sanded, after which debris and all dust must be carefully removed.
The varnish is applied to the floor with an ordinary paint brush. In the steam room, it is recommended to apply at least 4 layers on the floor, waiting for each to dry completely. The brush, during the application of each next layer of varnish, should move perpendicular to the previous one.The service life of the topcoat directly depends on the number of layers.
At the end of the work, the steam room must be thoroughly ventilated. In a few days, harmful chemical vapors and all unpleasant odors will be completely removed. After the first warm-up, the steam room must also be ventilated. Only then is the operation of the steam room permitted.
An equally important procedure after each use of the steam room is cleaning the floor. Use special detergents for this. Typical detergents are not completely washed off from the floor surface, which can later serve as a source of fumes that are harmful to health.


I saw a lot of baths with a pouring floor ... the first time I see boards being nailed