Country houses are used for the purpose of periodic rest or for permanent residence. Depending on the main purpose, different requirements are imposed on the building elements. It is not difficult to make a floor in a house in a country house on your own, having studied the properties of building materials and methods of laying the coating.
Possible operating conditions
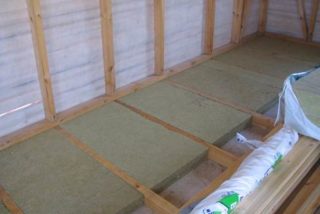
Options for floors and materials for their manufacture are selected based on the expected operating conditions.
For summer infrequent living, the simplest option is suitable with laying boards on wooden logs. The same decision is made for utility rooms, storage rooms for household equipment. Finishing consists in painting or laying linoleum.
For comfortable overnight stays in the off-season, minimal insulation is carried out, for example, expanded clay, covered between the logs.
Increased attention is paid to the floors in residential country houses, intended for use in the winter. They make a rough and final floor, high-quality insulation, steam and waterproofing, take into account the possibility of installing an electric or water floor heating.
Floor requirements
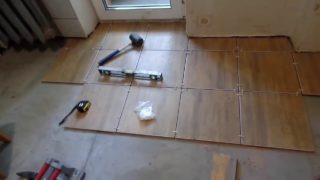
In large capital houses, floors are equipped in accordance with all construction rules.
Country buildings are operated in a different mode, the following requirements are imposed on the coating:
- low cost and availability of materials;
- manufacturability in laying, requiring minimal skills and tools for work;
- reliability and durability of the topcoat;
- ease of care and cleaning;
- attractive appearance;
- protection of the premises from drafts and rodents.
A visit to a summer house involves constant movement from home to street, so the coating must withstand moisture and not be soiled. Cleaning should take a minimum of time and manual labor.
Concrete floor
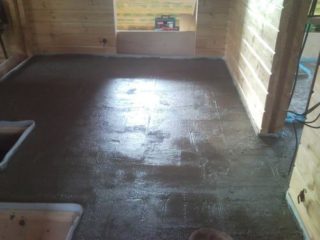
Filling the screed with subsequent finishing is a popular method of arranging the floor in brick and block houses.
The advantages of such floors include:
- durability, reliability and practicality;
- perfectly flat surface;
- availability of finishing with any materials;
- the possibility of arranging a water or electric underfloor heating;
- resistance to mechanical stress, stress and moisture;
- ease of maintenance and the possibility of renewal by re-staining;
- fire safety.
When choosing a method of arrangement, the disadvantages inherent in concrete are taken into account:
- laboriousness of laying, requiring a lot of manual labor;
- mandatory finishing, since regular use leads to the destruction of the top layer and the appearance of dust;
- the material is cold for staying in the off-season and in winter - heating or "warm" topcoat is required.
SP 29.13330. "Floors" does not allow the use of concrete floors in residential buildings without finishing. If the dacha is planned to be arranged for living, it is necessary to lay linoleum, boards, laminate, parquet or parquet boards.
Considering the advantages and disadvantages, concrete is considered an excellent base to make a practical floor in the country.
Types of concrete floors
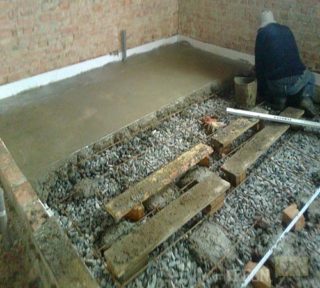
Depending on the materials used for pouring, cement, silicate and polymer concrete bases are distinguished. Each of the types has advantages and disadvantages, but the simplest and most affordable for self-production are cement-based mixtures.
By design, single-layer and multi-layer floors are distinguished. The first option is suitable only for summer cottages - due to poor thermal insulation, the floor freezes from contact with the ground. The multi-layer type involves pouring a rough base and a finishing screed with insulation between them.
Depending on the size of the rooms, unreinforced floors are chosen for small rooms. For rooms with an area of 20 m² or more, it is advisable to lay the reinforcement before pouring the screed.
All requirements for the arrangement of floors can be studied in the Codes of Rules: SP 29.13330, SP 54-13330, SP55-13330 and SP 118-13330.
Arrangement of a single-layer concrete floor
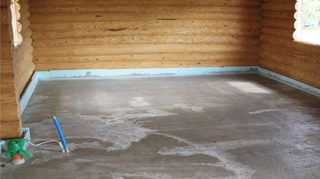
Single-layer floors are used in summer cottages. This is a simplified version of the bases for finishing.
Work begins with soil preparation. The surface of the earth is leveled, debris and stones are removed. Carefully remove the remnants of vegetation, pay attention to the fact that there are no remnants of roots. For a guaranteed result, remove the fertile soil layer.
A layer of waterproofing is laid on top of the soil to protect against groundwater and to prevent water from entering when watering plants near the house. In the simplest version, a polyethylene film with a thickness of at least 200 microns is used for waterproofing. Builders also use PP, PVC and synthetic rubber films. Reinforced polypropylene is considered the best option. Such a substrate has a long service life and is less likely to be damaged during installation.
A cushion of sand or sand and gravel mixture is poured over the waterproofing. Thickness from 100 mm and more, which will prevent displacement and destruction of the screed during winter frosts and thaws. The pillow is spilled with water and rammed using an electric, gasoline-powered tool or manually using wooden blocks with handles.
It is forbidden to use peat, vegetable soils and chernozem for a pillow.
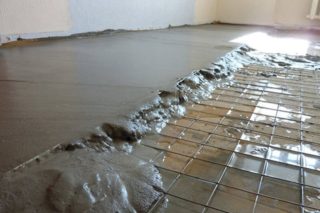
The next stage is reinforcement and screed filling. Ready-made meshes are used as a reinforcing layer. The thickness of the bar should be more than 3 mm, and the cell should be 50x50 mm. Filling is carried out with a concrete solution of a grade not lower than M150 (B12.5). For self-production, the components are measured with buckets. The ratio by volume to obtain the required mixture of cement: sand: filler is approximately 1: 3.5: 5.5.
Crushed stone, gravel, expanded clay are used as a filler. The latter option is preferable based on the properties of thermal insulation and ease of use. The amount of water is selected empirically, since its quantity is influenced by the quality of the sand and the degree of its moisture. Unwashed river sand is flexible enough for easy mixing and laying. Washed natural material or quarry sand in the mixture quickly settles, the cement-water emulsion is separated from the filler and sand. To prevent this phenomenon, red oily clay or plasticizers are added to the composition. The clay is soaked two days before concreting and added in the required amount. Plasticizers are used in the proportions indicated in the manufacturer's instructions.
For the convenience of pouring, beacons must be installed in the room.
On hot days, the screed is covered with plastic wrap to prevent rapid evaporation of water and the loss of concrete strength. In cool weather, after setting the top layer of the solution, spill water 2-3 times a day. This will eliminate surface cracking and contribute to the strength of the concrete mix.
Single-layer screed with insulation
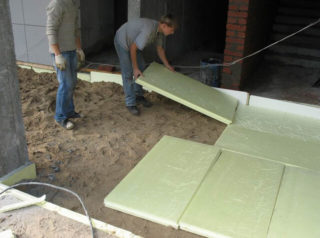
Another way to simplify the manufacture of floors involves the use of a layer of expanded clay before pouring the screed. The material helps to retain heat and serves as a sound insulator.
The operations are performed in the same way as in the previous version, but the order of the layers is different.
- Prepare an earthen base.
- A layer of waterproofing is covered with a 10-15 cm approach to the surface of the walls.
- A layer of expanded clay 15–20 thick is poured, the insulation is leveled.
- Reinforcing mesh is laid.
- Before pouring the screed, moisten the heat insulator.
- A concrete mixture is prepared, which is poured with a layer of 10-15 cm.
It is advisable to fill one room within one working day. So it is easier to maintain the floor level, the screed will turn out to be monolithic.
The concrete gains its full strength within 28 days, and you can walk on the floor in 2–3 days.
Multi-layer permanent floors
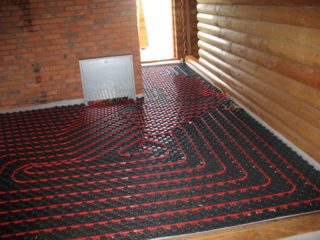
Capital floors with rough and fine screed are equipped in houses where they are supposed to install heating and live in winter.
The order of work is as follows:
- Prepare an earthen base.
- Cover the waterproofing.
- Pour 12-15 centimeters into a layer of rough screed. Concrete grade not lower than M100, proportions of cement, sand, filler by volume - 1: 4; 5.
- Concrete is allowed to gain strength within 10-15 days. Covering a vapor barrier film - use special roll membranes.
- A 15 cm layer of expanded clay is poured or solid insulation is laid. Use material such as Penoplex or expanded polystyrene (polystyrene) with a density above 25 kg / m³. You can walk on it carefully, and the strength is enough to withstand the mass of the final screed.
- Covering a layer of waterproofing with an approach to the wall. The joints are glued with tape.
- A damper tape is glued around the perimeter to prevent the screed from collapsing under the influence of temperature fluctuations.
- Reinforcement mesh is laid with a cell of no more than 100x100 mm.
- Beacons are installed in increments of 100-150 cm.
- Pour a finishing screed with a thickness of at least 60 mm, according to the joint venture. The grade of the solution is not lower than B12.5. The proportions of cement and sand are 1: 3.5.
- As it dries, the surface is moistened.
After the screed has hardened, proceed to the finishing.
Finishing of concrete floors
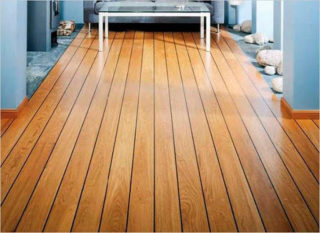
To protect the concrete surface from destruction, prevent the appearance of dust and give an aesthetic appearance, finishing is carried out:
- painting;
- ceramic tiles;
- laminate;
- linoleum;
- lay a wooden floor.
Painting
For painting, enamels based on organic or polymer compounds are used. It is better to carry out work immediately after the concrete has dried, until it has been mechanically affected and there is no dust.
The concrete is cleaned, treated with a deep penetration primer. The composition will fill the pores of the screed, which will reduce paint consumption and ensure uniform distribution over the surface. If the floors are dusty, reinforcing primers are used, they bind dust particles, which will ensure high-quality adhesion (adhesion) of the paint to the concrete.
Paint at least 2 times, keeping the time necessary for the first layer to dry.
Linoleum
If the linoleum is laid immediately on a concrete screed, the mixture will gradually collapse, and depressions will appear on the surface of the linoleum. Before laying the linoleum, a fiberboard or cork substrate is mounted.
If the size of the room does not allow picking up a whole sheet of linoleum, the seams are welded. To do this, rent a special power tool or use adhesives.
Laminate
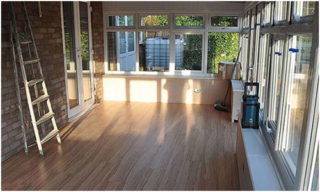
The least successful coating for the floors of country houses. Relatively cheap classes (31 and 32) of the laminate are not resistant to mechanical damage and moisture, and high-quality products are expensive.
To change the damaged part, you will have to dismantle the entire coating.
Covering the floor in the country with laminate is permissible only in bedrooms.
Stacking algorithm:
- Thoroughly remove dust and dirt from the screed surface.
- Impregnate the surface with a primer.
- Lay a substrate with a thickness of at least 2 mm.
- Starting from the long wall, the laminate is laid, cutting the outer strips to size.
- Skirting boards are installed.
Before work, it is necessary to study the instructions of the manufacturer of the laminate - glue or clamps are used for laying some models.
Ceramic tile
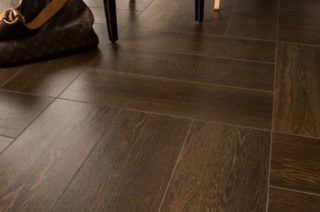
For floors in the country, tiles with a non-slip coating are chosen. Otherwise, even a small amount of water can lead to falls and serious injury.
Porcelain stoneware is best suited.
The tiles are laid on special glue. For unheated summer cottages, it is necessary to cover with adhesives for outdoor use.
To reduce the cost, experienced craftsmen prepare a solution on their own, using 1 part of cement and 2 parts of sand. For convenience, a plasticizer is added in an amount of 0.1–0.5% of the solution volume.
Wood
For the installation of wooden floors, logs from a bar of 50x80 mm are installed, which are pre-treated with an antiseptic and fire retardant. Grooved boards are used. Fastening is done with nails, self-tapping screws or clamps are used. The floorboard is pre-treated with protective compounds. The material must be completely dry before laying in a place protected from sunlight.
Wood floors
There are two options for arranging wooden floors: on the ground or on a rough screed.
In the first case, the earthen surface is prepared - it is leveled, debris, vegetation and a fertile layer are removed, which may contain plant seeds and roots of trees and shrubs. Every meter and a half, support posts made of brick or concrete are installed, which will prevent the lags from sagging under load. Lags - timber 50x100 mm - are treated with an antiseptic and fire-fighting fluids. Waterproofing is laid on the ground.
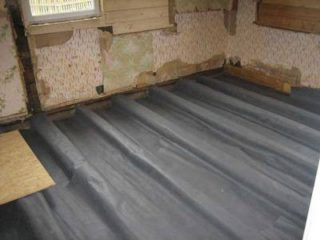
Another way is to mount a lag between blocks (bricks) with support on a foundation or wall. The distance between the beams is 50-60 cm.
The next stage is the installation of floorboards. In addition to tongue-and-groove boards, moisture resistant plywood or special floor coverings can be used.
Finishing is done by laying linoleum, carpeting or conventional painting.
In houses for winter residence, the composition of the "pie" of the wooden floor is as follows (from the ground):
- waterproofing;
- insulation between the lags;
- rough floor;
- vapor barrier;
- counter-lattice;
- finishing coating.
Making the floor in the country house with your own hands is a simple task that will take a little time and save money on the wages of builders. It is important to correctly determine the modes of operation of the premises, select the necessary materials and observe the installation technology.


