The range of plastic products for finishing works is increasing every year, new production technologies appear. Installing PVC panels on the ceiling is a productive method to flatten the top coat and give a beautiful and elegant look to the room. Structural elements are easy to assemble, so it is possible to install the finish yourself.
Properties of plastic panels
The starting material is polyvinyl chloride, the raw materials are classified as environmentally friendly species, since the composition does not emit harmful components. During production, dyes, plasticizers and other technical additives are added to the mass.
Positive aspects of plastic ceiling covering:
- structures are of the suspended type, therefore, they do not require preliminary leveling of the surface, electrical wiring, ventilation, and other communications are hidden under the plastic;
- waterproof material can be easily washed with water using classic cleaning products;
- fungi and microorganisms do not grow on the surface.
Installation of PVC panels on the ceiling, together with the installation of the frame, takes 1 - 2 days, depending on the size of the room. The cost of finishing material and structural elements of the base is lower than that of other decorative coatings, so the price is the main argument in favor of plastic.
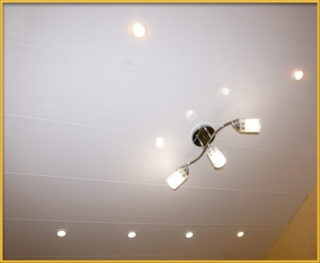
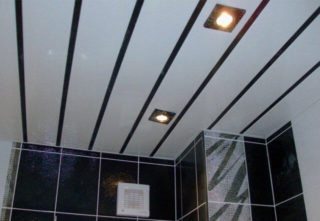
Lamps of different types are inserted into the structure of the ceiling, the location is chosen arbitrarily. The frame with a finishing layer eats up 3 cm of the height of the room if mounted appliances are installed. When installing built-in lamps, the ceiling will be lowered by 8 - 12 cm.
Varieties of plastic ceiling panels
PVC panels are divided into wall and ceiling panels. The first type is produced with thicker walls that can resist shock and pressure. On the ceiling, the mechanical strength does not matter, rigidity is provided by fastening to the frame, therefore the material has thin shells and fewer internal bridges.
You can attach wall panels to the ceiling, but the increased strength will not be in demand, you will get an overrun.
Plastic products are produced with a thickness of 5, 8, 10 mm. Sizes from 8 to 10 mm fall into the same category because they use moldings of the same size in thickness.
Rack
There are varieties:
- panels with narrow recesses and wide projections made in the same color;
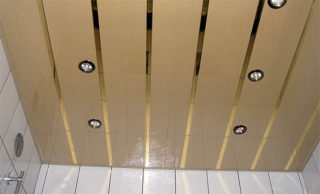
- stripes with depressions in a different color, such as gold or silver, to give the effect of separate raised stripes against a mirrored background.
The panels can have several similar recesses with chrome or gold recesses along their entire length, so there is an opportunity for different types of design developments. It is better not to join such options along the length, if necessary, put connecting strips.
In the rack system, universal bearing elements (stingers, traverses, combs) are used, the material for which is galvanized steel. The lamellas are fastened by snapping.To adjust the height, ceiling hangers with rods are used, to which the profiles are attached. The standard distance from the lowest point of the ceiling is 5 - 12 cm, depending on the type of luminaire.
Seamless
Two types of coatings are produced:
- glossy;
- matte.
The first variety looks good on large areas with high ceilings. Chandeliers, window openings are reflected in the shiny surface, the effect of a mirror coating is obtained. But the material requires careful alignment of the frame elements along the plane, since the smallest irregularities immediately become noticeable, emphasized by the glossy surface. The matte type is not so demanding, this is the material that is used in bathrooms, small corridors.
It is necessary to purchase brands from well-known manufacturers, since Chinese fakes do not fit together so that a seamless coating is obtained. The result is a flat ceiling, on which joints up to 1 mm wide are visible, while their size changes along the length. The skill of a specialist does not play a role here, it's all about the discrepancy between the spike and the groove for it, which is obtained due to production on poor equipment.
Sheet
Production assumes 2 options:
- sheets are obtained by pressing;
- panels are made by extrusion.
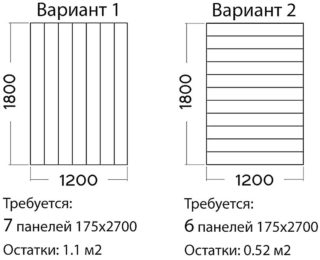
The installation of the sheets begins from the middle of the ceiling, so that the same remains are obtained to the edge, otherwise the necessary symmetry will be violated. The material is chosen taking into account the dimensions of the room, the dimensional options are compared in order to obtain the smallest amount of scraps.
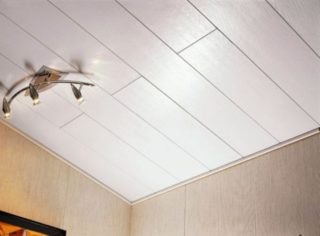
Plastic sheets are obtained with a uniform texture, are produced in white or colored, there is a variant of transparent or mirror products. Dyes are added to the total mass during production, so the material does not fade during operation.
Calculation of the required amount
For the frame, the profiles CD and UD are taken. The first type is considered along the length of the room with an interval of 0.7 m, and the length of the second type is considered along the perimeter of the room. Suspension brackets ES are calculated so as to fix the profiles to the ceiling with an interval of 0.5 m. For each bracket, use 2 dowels with a self-tapping screw (8 x 100), and the profiles to the suspensions are fixed with a self-tapping “flea” screw.
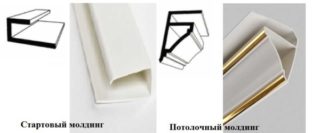
Starting strips for plastic are taken around the perimeter of the ceiling; for this, type L-strips are used. If you need to join along the length, use H-strips. Corner ledges on the ceiling are framed with external corner or internal moldings, the length of which is measured in fact.
The number of plastic panels is found by dividing the transverse dimension by the strip width.
The length is taken on the basis that one panel has a length of 6 meters and it must be cut so that the remainder becomes in the next row and there is little waste. Sometimes for this, the direction of the finishing stripes on the ceiling is changed.
DIY installation instructions
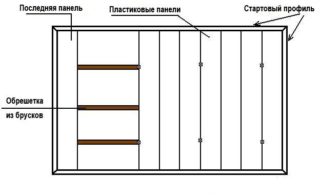
The ceiling made of plastic panels with your own hands can be fixed on a wooden or metal frame.The device from the rails requires preparatory work, for example, treatment with linseed oil or special preparations against decay and damage by bugs. The procedures increase the run time, but are necessary. In exceptional cases, wooden bars are perfectly even, so you will have to tinker with them to lay them in the frame and display them in the same plane.
Galvanized metal profiles are ideal for cladding with plastic paneling. The profile surface is not bent in length, width and is firmly fixed in the suspension. Over time, such elements do not deteriorate, so the sheathing will last a long time.
According to the instructions, the UD strips are first placed around the perimeter, maintaining the correct level on all walls, while checking the diagonals. The intermediate strips CD are fixed so that their ends go into the space of the starting profile, and the main body is supported by suspensions.
Installation of initial moldings
For fastening take self-tapping screws or you can glue "liquid nails" on the glue. Before applying the composition, the surface of the metal profile and the strips are degreased, then the composition is applied and pressed tightly. The correctness of the installation is checked with a level with a long, even bar.
If necessary, the starter strip is repaired while the glue is still fresh. In the case of self-tapping screws, they are unscrewed and, after setting the level, they are twisted side by side. The glue creeps out of the cracks, but it is not rubbed, but wait for drying and carefully cut with a knife. The hardware is fixed every 20 - 25 cm.
Before installing the panels, immediately install connecting moldings, corner elements in order to trim the strips to a given size. It is advisable not to cut all the stripes with the rhinestone, but to shape them as they are installed, so as not to miscalculate if there is a difference in the dimensions of the room.
Installation of plastic panels on the ceiling
They cut plastic with a grinder, an electric jigsaw or a manual hacksaw for metal. The first panel goes with three sides (long and ends) into the starting molding. Spatulas are used to install and set in the profile, taking care not to damage the surface of the strips. The panel must completely enter the starting strip, after which its special edging is attached to the profile with a self-tapping screw.
The following panels are placed in the same way, now the strip enters the starting molding with its ends, and the spike on the side is inserted into the groove of the previous element. It is impossible to stretch the strips, they must be freely located on the frame. In the process of work, holes are cut out for the lamps and wires are released there so as not to look for them later. After installing the adjacent panel, the device is connected, its action is checked.
When installing the main strips, no glue is used so that it is possible to disassemble the structure if necessary.
Securing the last lamella
The last strip is usually trimmed to its full length so that it fits into the remaining gap between the starter bar and the adjacent plastic panel. The width distance at one and the other end of the ceiling may differ, in which case the longitudinal cut is made along an oblique line. It is better to cut off with a margin, so that later it can be corrected after trying on.
The last strip is cut 5 - 7 mm shorter in width, otherwise it cannot be inserted. One edge is immediately placed in the starting strip and then the second side is brought into the adjacent plastic panel.Help with a screwdriver, spatula. It is more convenient to install the last lane with two people. Some masters do not fix it at all, since its position is already strong, others use glue. It is not the strip itself that is lubricated, but the gap in the persistent molding. The use of glue eliminates the need to disassemble the ceiling to replace a damaged strip, such as a champagne cork hole.
Sealing with acrylic

Surgery is not required if the plastic is of Belgian or French origin. Such panels fit perfectly and do not sag at the seams. Sealant treatment is necessary if the corner has been incorrectly drawn up and a black gap is observed there. To squeeze out the acrylic composition, a pistol is used, into which the balloon is filled.
The seams are processed in sections of 30-50 cm, as well as the junction of the starting molding and plastic. After squeezing out, immediately remove the excess with a wet rag until the composition has set. Acrylic dries for 6 - 8 hours, during this time it is better not to wash the surface. If the gap is large and the sealant is drawn into the seam after drying, the treatment is repeated, usually two times is enough.
The stains on the plastic are removed with a damp sponge or wet soft cloth, then the area is rubbed until a characteristic shine appears.
Other jobs
If the frame is not made, the starter planks are placed directly on the ceiling surface. Before sheathing, they check the strength of the previous layer, dismantle the weak points and go through with a primer. They are fastened to the tree with nails, a stapler, concrete must be finished using dowels.
If the installation of a step-down transformer for luminaires is required, it is mounted in the body of the frame. Only standard incandescent lamps work without the unit, which are almost never used recently. LED and halogen appliances require a special mode of operation. In the bathroom, the lamp housing is protected from water jets and steam. For fixing the luminaires, additional slats or profiles are provided as part of the ceiling frame.

