Installation of a beautiful ceiling can be done independently. There is no need to build a complex structure. The installation of a slatted ceiling is becoming more and more popular. It can be made from different materials, it is easy to maintain, and fits perfectly into modern interiors.
The device and design features of the rack ceiling
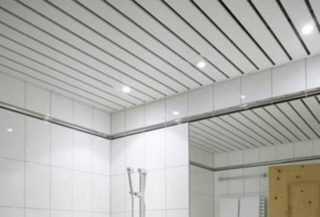
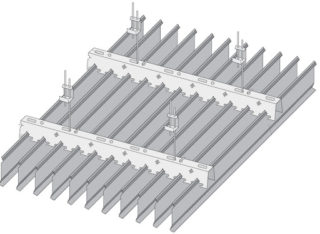
Rack ceiling is a prefabricated structure consisting of the following elements:
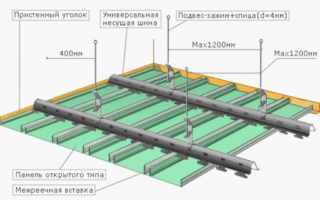
- Combs. They are a bent profile equipped with teeth. A frame is made of them, on which decorative strips are attached.
- Metal slats. Made of aluminum alloy. The thickness of the products is 0.3-0.6 mm. To improve the decorative properties, the elements are varnished. The slats have a springy structure, so the connections between them are strong.
- Inserts. Needed for sealing the rails. Elements can be matched to the main material or contrasting.
- Wooden corner profile. It is installed at the junction of the ceiling and walls along the perimeter of the room.
Installing a slatted ceiling allows you to decorate the room and quickly hide flaws in the surface of the base. Such a suspended ceiling can be mounted in rooms with high humidity levels. Curvilinear decorations can be built from the specified material.
The fastening of the structure depends on the dimensions of the strips. Before starting work, you need to calculate the required amount of material.
The hangers for fixing the rails can be equipped with spokes or springs. The materials used are lightweight, so they do not increase the overall building load on the foundation.
The material must be properly transported and stored. If dents or kinks appear on the planks, the decorative effect of the future structure will suffer.
Advantages and disadvantages
Before installing a rack ceiling with your own hands, you should understand its advantages and disadvantages.
Advantages:
- High resistance to moisture. The structure can be mounted in the bathroom, in the kitchen, in the bath, therefore such ceilings are universal.
- Environmental Safety. Dust does not accumulate on the surface of the ceiling, mold and mildew do not appear, the product does not emit toxic substances into the atmosphere.
- Flame retardant: the material is not flammable.
- Ease of maintenance: the panels should be periodically cleaned with a damp cloth.
- High level of strength of parts. The material is covered with several protective layers, but if damaged, the panel will begin to rust.
- Aesthetics of finishing: the structure can be used in any interior, regardless of the size of the room.
- Duration of use: if used correctly, the ceiling will last up to 20 years.
- If the coating is damaged, the broken elements can be replaced without dismantling the supporting structure.
- Possibility of leveling the base without using plaster mixtures.
- Providing high quality sound insulation.
- High speed of installation of a slatted aluminum ceiling.
- Possibility to install ventilation ducts, lay electrical wiring, install additional lamps.
There are few disadvantages. Despite the fact that the supporting crate does not need to be disassembled during the repair, the entire sheathing will have to be removed. The ceiling frame will reduce the height of the room.
Varieties of rack ceiling
Open
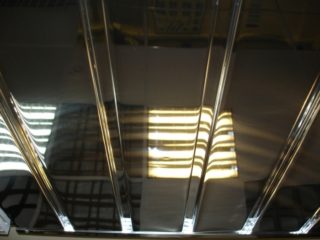
The peculiarity of the open type fastening is that there is no connection between the casing elements. They are fixed to the supporting frame separately. This option is best suited for rooms with high ceilings. The design looks original and beautiful. Inserts of the same color or contrasting ones are used between the main elements. They can be mounted flush with the slats or recessed a little deeper.
Closed
The assembly of a closed slatted ceiling assumes that there are no gaps between the slats. This design looks solid. Joints are visible on its surface, but they can be masked. The strips can be fastened using the tongue-and-groove system. In such a system, the slats are of the same width or different.
The disadvantage of the system is poor ventilation of the interior space between the sub-base and the trim. The structure can be installed in technical rooms. At the same time, the base, as well as the laid communications, are reliably hidden.
DIY installation instructions
Before you mount the rack ceiling, you need to decide on the type of room lighting, and also draw a detailed design of the circuit with an exact indication of all its dimensions. The height of the lathing depends on the use of insulation, the laying of electrical wiring and communications, the type of lighting fixtures. After taking into account all the nuances, you can start counting the number of materials. To do this, you need to know the area of the room, the length and width of the slats. If the room is small, it is sufficient to use material up to 3 meters long.
Typically, the finish drops 10-15 cm below the rough base. You cannot make the joints of the planks along the length, as they will spoil the appearance of the ceiling.
For work, you will need tools and materials:
- traverses (bearing profiles): for a small room you need 2 elements;
- slats of appropriate length;
- suspensions (steel wire on which traverses and strips are fixed);
- guide profiles;
- pencil or marker for marking;
- building or laser level;
- self-tapping screws and a screwdriver for tightening them.

Step-by-step instruction:
- Preparation of the base. Provides for cleaning the surface from old finishing material and sealing cracks. If necessary, insulation and waterproofing are attached to the rough ceiling.
- Base marking. A line is drawn on the walls on which the guide profiles will be attached. The locations of lamps and chandeliers are determined.
- Wiring laying, wire insulation.
- Fastening the guide profile. Fixation points are marked on the walls. For this, it is better to use a laser level. If it is necessary to cut the profile, use metal scissors. The product is applied to the wall along the mark and holes are drilled in it. After that, it is screwed on with self-tapping screws. The step between the fasteners is 40-60 cm. If there are internal corners, the profile is matched end-to-end, and on the external corners - at an angle of 45 degrees.
- Installation of suspensions. The first is fixed at a distance of 40 cm from the wall. The step between the following elements does not exceed 1 m. During the assembly of the structure, it is necessary to ensure that the rows of suspensions are located strictly parallel.
- Fastening of load-bearing elements. The traverses are installed so that the distance between them does not exceed 1.2 m. They are screwed perpendicular to the decorative strips. The tires must be installed flush with the profile fixed to the walls. When screwing the traverses to the hangers, you need to check their level. The geometric correctness of the ceiling depends on this.
- Assembling the decorative part. This stage is the simplest and involves connecting the rails to the traverses using latches. It is better to work with gloves so as not to damage the surface of the ceiling. If the outer strips need to be cut in width, use a knife.
Finally, a decorative plinth is installed, which will make the structure complete and neat.
Operating tips
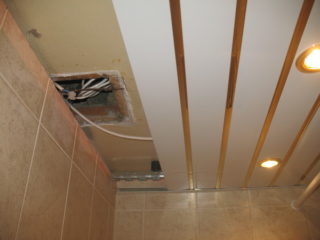
In order for a ceiling made of slats to serve for a long time without losing its decorative qualities, it is necessary to properly care for it. The recommendations for the operation of the structure should be observed:
- When installing a slatted ceiling in the bathroom, forced ventilation is installed in parallel so that condensation does not appear on the surface.
- It is forbidden to use chemicals with abrasive particles to clean the ceiling, otherwise it will lose its gloss, the panels themselves may be damaged.
- To improve the sound absorbing effect of the ceiling, perforated battens can be used, however, their cost is much higher than usual.
- When cleaning the structure, it is better to use gloves and goggles.
- When arranging the ceiling, it is allowed to install lighting devices of any type.
- Do not put any mechanical pressure on the structure or install heavy household appliances on it.
Rack ceilings have recently become very popular. This is a fresh solution for both living rooms and office premises, technical buildings. Installation of such a structure is not difficult even for a novice master. You can combine it with any interior.


