Heating is organized in different ways, focusing on local conditions and the availability of fuel. The Russian stove, built with your own hands, will provide the house with warmth in any weather. It is necessary to start construction only under the guidance of an experienced stove-maker, since an incorrectly read and executed order will most likely lead to the need to redo all the work again.
Why are Russian stoves so popular
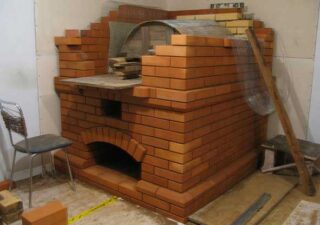
The variety of designs allows you to get many qualities, which were the reasons for the return of fashion to Russian stoves.
The device heats up slowly, but at the same time, massive brick walls give off heat for a long time. Thanks to this quality, the house is heated only twice a day, which reduces the maintenance time. Modern building materials only improve efficiency and properties for maintaining a comfortable microclimate.
If it is supposed to regularly cook food, in addition to the obligatory furnace, the design includes a hob and a small oven. For the use of these elements, separate fireboxes are provided so as not to heat the house in the summer.
For small buildings, as well as for rarely visited summer cottages, it is advisable to build a Russian stove with a stove bench, which will warm up and become a comfortable resting place.
The walls of the structure do not heat up to high temperatures, so it is safe to dry clothes and shoes made of any materials on them.
In addition to fulfilling practical goals, the Russian stove can be a decoration of the house. To do this, use tiles, tiles, and sometimes just whitewashed walls add color.
Options with built-in fireplaces are popular. Heating and cooking takes place in the kitchen, and on the side of the room there is a portal with an open fire.
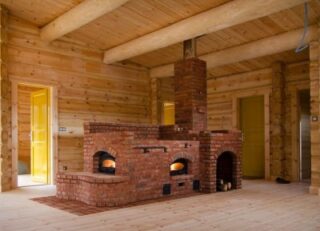
The popularity is added by the positive qualities of the structure:
- fire safety - surfaces do not heat up to high temperatures, which excludes the ignition of walls, ceilings and surrounding objects;
- long service life before overhaul, provided by the use of durable materials;
- uniformity of heat distribution due to the large area of the heated walls;
- versatility, the ability to integrate the structure into various options for room designs;
- ease of maintenance.
Among the negative sides are:
- the complexity of self-construction for an inexperienced user;
- the need for a massive foundation;
- high cost due to the large number of building materials and payment for the work of professional stove-makers;
- high consumption of firewood, which must be stored in a place protected from precipitation.
Having made the decision to fold the Russian stove with their own hands, they begin to choose a project, prepare materials and go directly to work.
Varieties of Russian stoves
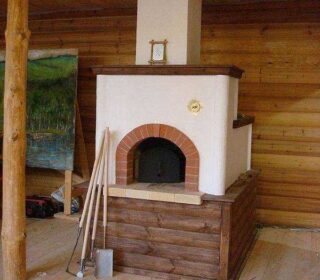
When selecting a project, attention is paid to the classification of heating devices.
Furnaces differ in several ways:
- The size. An economy version with dimensions up to 1500x1700 mm is most often built in a bathhouse or a summer kitchen. Medium-sized with sides from 1500 to 1700 mm are used in small houses, in the kitchen. The composition may include a stove, fireplace, ovens.Large forms from 1.7 m are used to heat large houses or as kitchens in public catering. Constructions are equipped with full-fledged stove benches, baking cabinets and hobs.
- Location. Distinguish between free-standing or combined models with fireplaces, hobs, barbecue area, etc.
- Device. The traditional look has unheated elements at the bottom. Modern structures are warmed up along the entire height.
- Heating method. Black and gray are now used extremely rarely. Modern constructions are drowned "in white".
Before construction, they carefully consider the options for using the device, which will save money on construction and choose the optimal location of the stove in the house.
Structural elements
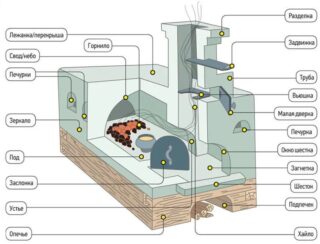
To understand the drawings, explanations to them and understand the order, you should study the terms used by specialist stove-makers.
- A firebox or crucible is a part of a structure in which fuel is burned and, in some cases, food is cooked by baking or simmering.
- The vault is a massive element that bounds the top of the crucible. The laying is carried out without voids. Due to the large mass of stone, the vault accumulates heat during the firebox and heats the room for a long time between laying firewood.
- Under (bream) - the bottom of the firebox, which is necessary to give the structure strength.
- Cheek (ochelok) - the facade of the furnace, which unites the under, the furnace and the vault.
- The mouth is the opening of the furnace through which the fuel is put in and the dishes are loaded.
- Pole is a horizontal surface that makes it easy to work with utensils. Utensils are placed on the platform before placing it in the furnace and after removing it.
- The pad is used to store dishes, fuel and other accessories. The element is located under the six and does not heat up.
- Podpechie - the space under the hearth in which a stock of firewood is stored.
- Khailo is a device that connects the crucible and chimney.
- Stoves are niches that increase the wall area and improve heat transfer. The recesses are used to dry herbs and small items.
- Gate (tooth, gas threshold) - arched roof overlap to retain hot flue gases and increase the heat transfer area, thereby increasing efficiency. Sometimes the element is called an overtube or a shield.
- The overlap is the part of the stove on which the stove bench is installed.
- The hearth is a hollow space for increasing the combustion time of flue gases.
- Podtopok - a small stove located under the pole or on the side of it.
To adjust the operating mode and the rate of fuel combustion, the valves of the smoke collectors and the lower chamber section, the ash pan door are built into the furnace. Be sure to prepare a damper - an iron part that closes the crucible during the fire.
Sizes and orders
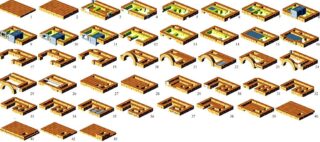
The heat output of the furnace depends on the area of the surfaces that give off heat. At the first stage of the calculations, the possible heat loss of the house itself is determined. The parameter depends on the material, wall thickness, insulation quality.
If you don't want to go deeper into the topic, you can apply a simple option, suitable for average buildings:
- Measure the length, width and height of the interior of the house.
- Multiplying the data obtained, the total volume is obtained.
- Multiply the volume by 40 W / h, getting the average energy loss of the building.
Example. The house is 10x10 meters with a wall thickness of 40 cm and a ceiling of 2.6 m. The internal volume is 9.6x9.6x2.6. We get 240 m3. Heat loss will be (240 m3x40 W / h) 9600 W / h.
For heating, it is necessary to build a stove with a heat transfer of about 10 kW / h.
Builders recommend another way of calculating. On 10 m2 of area, the power of the heater is 1 kW / h. If you multiply 9.6 x 9.6 m, you get 92 m2. This also gives an approximate furnace power of 92/10 = 9.2 kW / h.
Operating experience shows that a square meter of the surface of a Russian stove is capable of giving off 0.5 kW / h of heat. For calculations, only side walls are accepted, excluding the base and overlap.Therefore, with ceilings of 2.6 m, the perimeter of the furnace should be 20 / 2.6 = 7.69 m. Such a perimeter will be provided by a 2x1.7 meter device.
Based on the dimensions, a suitable working drawing of a Russian stove with an order is chosen. The diagrams can be found on the Internet and published by professional stove-makers and specialized organizations.
Required tools
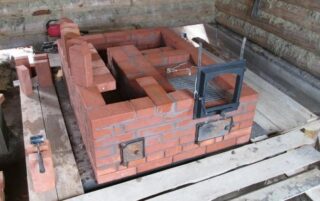
Devices and tools for construction are in the arsenal of any home craftsman.
You will need:
- bayonet shovel for digging a foundation pit;
- shovel for mixing the solution;
- level and plumb line;
- square and string for setting right angles;
- ruler or tape measure;
- trowel or trowels for masonry and plaster;
- hammer-pick for masonry and adjustment of bricks;
- container for mixing the solution, buckets.
For accurate selection and sawing of bricks for the arch, it is better to use a grinder with a stone cut-off wheel.
Choosing a place in the house
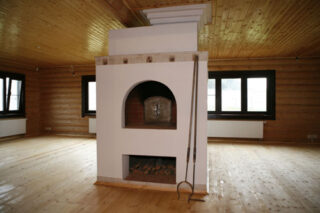
As a rule, a Russian stove is placed against one of the walls or in the corner of the room, so it takes up less space. However, it should be borne in mind that a gap must be left from the walls. In this way, an increase in the useful (giving off heat) area is achieved.
In houses with several rooms, the stove is positioned so that the walls of the heater are in each room.
The mouth of the furnace should be illuminated by light from a side window. The firebox is located in the room closest to the entrance to the house, in this way the delivery of firewood and the removal of ash is facilitated.
Important nuances when choosing a place for the oven:
- chimneys are located near internal load-bearing walls;
- no floor beams should pass over the oven;
- a foundation with a depth of 40-50 cm is arranged under the stove;
- the width of the gap to the walls should be at least 15 cm, which will ensure air circulation;
- the stove bench is equipped in the bedroom;
- the dryer is equipped in the hallway, which will eliminate unpleasant odors in the living quarters.
In one-room buildings, the location of the stove does not matter, they take into account the ease of use and the minimum occupation of the usable area.
Construction stages
There are three main stages of construction:
- arrangement of the foundation;
- erection of the "body" of the furnace;
- chimney construction;
- Finishing work.
In each case, you will need your own building materials. The composition and proportions of the solutions are important.
Arrangement of the foundation
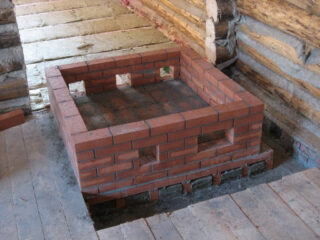
Russian stoves are built from solid bricks. The mass of the building is large, so a solid foundation is required.
Step-by-step foundation erection algorithm:
- They dig a foundation pit 40-50 cm deep.
- The bottom is covered with a mixture of sand and gravel in a 1x1 ratio. Smooth the surface, spill the pillow with water and tamp thoroughly.
- Equip the formwork so that the height of the concrete base is 30-40 cm.
- Reinforcement with a diameter of 8 mm or more is laid with a lattice pitch of 15x15 cm.
- Concrete mix is poured. Mortar grade M150 – M200. To do this, take cement (M500): sand: crushed stone of the middle fraction in a ratio of 1: 2.5: 3.5. Another method of construction is the arrangement of a rubble foundation, when large stones are laid, and the space between them is filled with cement-sand mortar of the M150 brand (cement 1 part, sand 3.5-4 parts).
The period for the full strength of concrete is 28 days. They can be spent on the preparation of bricks and components of the masonry mixture.
After the mortar gains strength, continuous layers of solid ceramic bricks are laid on the concrete pad, so as to bring the base to the floor level of the first floor.
Furnace body construction
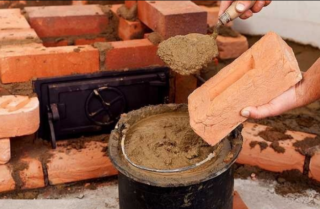
Before buying a brick, they carefully study the ordinal scheme of masonry, based on which the number of necessary bricks is calculated.
The inner walls in contact with the flame must be lined with refractory bricks.For the walls and chimney, solid ceramic is used, and for external walls, finishing or the same ceramic, if the finish is in plaster or whitewash.
For masonry, use purchased mixtures or prepare a clay-sand mortar on their own.
Depending on the clay used, the ratio is chosen:
- for oily clay - a bucket of clay and 2.5 buckets of sand;
- for medium - 1x1.5;
- for skinny - 1x1.
Mortar preparation instructions:
- Clay is crushed, cleaned of impurities, sieved.
- The amount of the received component is measured.
- The clay is poured with water for a period of at least 3 days.
- Sand is added to the container based on the required proportions.
- Stir the mixture until smooth.
Experienced stove-makers recommend a practical way to check the readiness of the masonry mix. It is necessary to put the solution on a bayonet shovel. If it slips when tilted about 45 °, the consistency is correct.
Using the selected order, the furnace is erected. Doors, dampers and latches must be installed and fixed with a solution.
It is not recommended to lay out more than 2-3 rows in one day, since the solution is plastic and may not withstand the mass of bricks.
For the manufacture of the hob, it is advisable to use cast iron parts with concentric ring covers. They allow you to pick up and open fire under pots of different sizes.
Chimney features
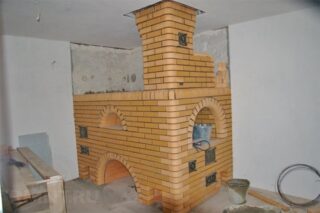
Before 3 bricks reach the ceiling, they begin to equip the cutting - an increase in the thickness of the pipe, which is necessary to ensure fire safety. The rule is especially important for wooden floors.
After entering the attic, the pipe is returned to its original dimensions. Laying pipe bricks is allowed on a cement-sand mortar of grade M 200.
As the construction proceeds, the inner surface of the pipe is plastered and carefully leveled, so less soot will be deposited.
The top of the chimney is protected with a cap.
For residential premises, a mandatory rule applies: the height of the chimney cut from the bottom of the firebox should not be less than 5 m, and the cut itself must be located above the ridge of the roof.
Putting the heater into operation
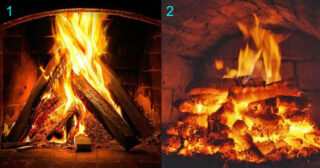
It is unacceptable to heat a newly built Russian stove in the usual way.
The technology is as follows:
- Open all the dampers so that excess moisture evaporates.
- For the first firebox, they take no more than 3 kg of firewood.
- Stacking fuel.
- They try to light the upper rods so that the fire spreads gradually and does not cause rapid heating.
After burning the wood, open all the dampers to dry and remove the remaining smoke.
Further drying of the oven takes an average of a week. The furnaces are carried out twice a day, avoiding strong heating of the walls. On average, they use about 5 kg of firewood.
The readiness of the oven for operation is determined by the condensation on the doors after the oven has cooled down. If the condensate has stopped falling out, the Russian stove is ready for full operation.


