Porcelain stoneware has recently appeared on the market, but has gained popularity due to its long service life, attractive appearance and high strength of the finished coating. However, the tiles themselves are fragile. Correct laying of porcelain stoneware on the floor requires strict adherence to technology.
- Choosing porcelain stoneware tiles on the floor
- Technical
- Polished
- Matt
- Structured
- Lapped
- Glazed
- Satin
- Preparation with calculations
- Advantages and disadvantages of porcelain stoneware
- Required tools
- Installation methods
- Using fixing structures
- Special glue
- Laying porcelain stoneware on the floor with your own hands
Choosing porcelain stoneware tiles on the floor
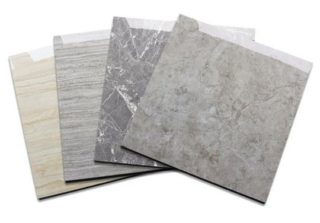
The material is produced in a wide variety of designs that differ in texture, appearance and some features that appear during operation. It is important to keep these differences in mind when choosing your home tile.
Technical
The laying of such material is practiced when decorating industrial and technical premises. It looks like a simple natural granite, does not have a catchy appearance, but it is very practical and inexpensive. Even with the constant walking of people on the surface, such a floor will last for several decades. Unlike most other options, it resists the effects of acids, alkalis and other aggressive substances.
Polished
The material is polished with abrasive materials, so the surface is glossy and looks expensive. Sometimes you can find its use for finishing the floor due to its status appearance, but this is dangerous, especially if it is wet: you can slip and get injured. Much better suited for wall cladding.
Matt
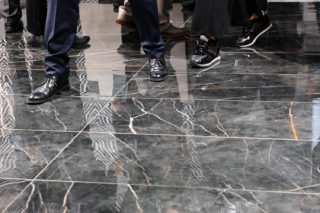
Such tiles are not exposed to special influences after the stove. It is not very decorative, but it is wear-resistant and extremely durable, only slightly inferior in this parameter to diamond. It is almost impossible to accidentally damage it while using the floor. Suitable for various types of premises, including technical ones. Due to the roughness of the material when moving, you can not be afraid of slipping.
Structured
Differs in the relief of the texture. You can find options for tiles that imitate marble, wood and other materials, which provides a wide scope for the designer's imagination. This feature also prevents slipping.
Lapped
The surface is subjected to fragmentary grinding, resulting in a combination of rough and smooth areas. The composition can be random or subordinate to the artistic intent.
Glazed
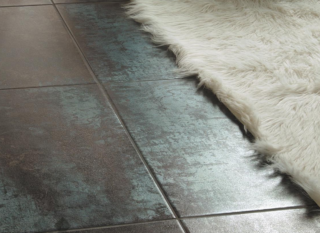
Outwardly similar to the usual ceramic floor products. The material consists of a base and a special enamel covering it. Laying porcelain stoneware tiles on the floor is possible, but it is better to use glazed products for the walls. In public places, surfaces cannot be coated with them.
Satin
Outwardly, such a tile may seem soft and velvety. To achieve this effect, mineral salts are introduced into the surface layer. The product has good performance properties, but is not suitable for public places due to its not very high strength. It is decorative, wear-resistant, almost non-slip.
Preparation with calculations
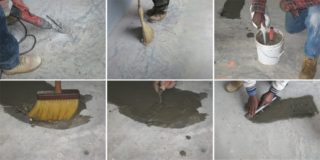
Before laying the porcelain stoneware, it is important to take care of the preparation of the floor. Debris and adhering pieces of cement must be removed.This is best done with a rotary hammer with a spade nozzle. If iron bars or similar parts protrude, they are cut off with a grinder. Then they carry out cleaning with a vacuum cleaner. Tiles fit best on a clean surface. After that, a primer is made and a leveling screed of the surface is made to level the differences. On the packaging of the formulations used for this, detailed instructions for use are given. It is important to comply with the curing times indicated by the manufacturers.
Beacons and a level are useful for leveling. It is possible to lay porcelain stoneware on the floor with your own hands and on top of the existing tiles, which they chose not to remove due to strong adhesion. In this case, surface preparation work is carried out in a similar way; concrete contact with quartz inclusions is suitable for priming.
To determine how much porcelain stoneware you need to buy, you need to know the dimensions of the room and the dimensions of one product.
Since the tiles are fragile, they must be transported and manipulated very carefully. If possible, do not cut products unnecessarily (especially diagonally).
To lay large tiles, you will need a thicker mixture and, accordingly, a larger volume.
Advantages and disadvantages of porcelain stoneware
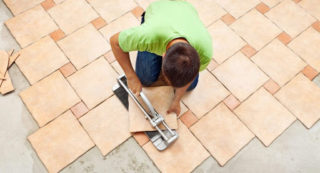
Porcelain stoneware tiles provide a very strong and durable finish. It tolerates most environmental factors well - moisture, frost, temperature changes, is fire resistant. There are no chips or cracks on the products, they can withstand the fall of rather heavy objects. At the same time, the material has a quite affordable price, which is mostly related to the unpolished products of Russian firms.
The disadvantages of the coating include, first of all, its fragility, because of which it has to be laid very carefully. Although the finished coating is very durable, individual tiles can be broken. It is also not easy to cut - corners are often chipped in the process. Therefore, it is better not to resort to this procedure unnecessarily and choose the dimensions of the products so that the surface can be covered with a whole number of elements. Another feature is the susceptibility of some models to sliding, which, together with its high hardness, makes the material traumatic when falling. If small children regularly walk on the floor, you should not use porcelain stoneware. This even applies to rough grades, since all forms of material are hard.
Required tools
To cut products, you need a special electric tool with a motor located on top. When using it, chips almost do not appear on the products. Manual tile cutters are not suitable for the task. If the presence of chips is not so important and they are going to be hidden (for example, with baseboards), you can use a grinder.
You should stock up on a mixture for preparing a solution on which you plan to lay tiles. For application, a comb bevel is best suited - it allows you to get a layer that is even in height. You should also purchase a hammer drill - it can perform many tasks using different attachments. Layout work is done with a ruler, triangle and a simple pencil.
Installation methods
The choice of laying method is determined, first of all, by the qualifications of the contractor. The type of floor surface also affects.
Using fixing structures
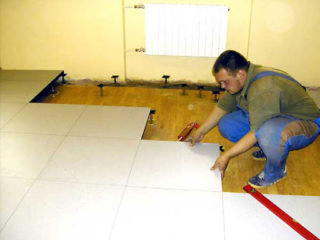
This arrangement requires a fairly serious qualification skill. It is not recommended to carry it out on your own. The method involves the installation of cladding products on a raised floor using special fixing structures.
Special glue
This method is quite suitable for self-execution. In this case, the glue is used the same as for other types of tile structures. Usually cement-based formulations are used.
When buying a mixture, it is important to pay attention to which conditions it is intended for use. For example, outside the premises, only the compositions intended for this are used.
Laying porcelain stoneware on the floor with your own hands
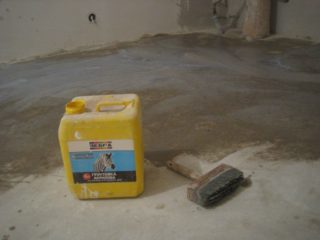
Before laying the porcelain stoneware on the floor, it is recommended to lay out the tiles for fitting in order to assess how they fit on the surface. This is influenced by the presence of ornamental or other artistic compositions, as well as a linear or diagonal layout. Whenever possible, the elements should be positioned so as to minimize the amount of waste. One of the walls acts as a reference point, and the one adjacent to it is used for adjustment.
Instructions:
- The base is quickly primed with a roller and allowed to dry. At the end of this gap, you can prepare the glue.
- A small volume of water is used for mixing. The consistency should be such that the mixture slides off the nozzle slowly, with a delay. With a quick descent, add more composition and stir again. Having achieved the required consistency, the mixture is allowed to settle for 5 minutes. After that, it is stirred again. This composition must be used within 3 hours.
- Move on to glue application. This can be done both on the floor surface and on the back of the facing products. The first method is attractive for its speed and reliability of the resulting connection, but its high-quality execution requires a certain dexterity. First, you need to achieve an even layer of glue. Therefore, the angle of inclination must always be the same. A spatula is suitable for applying the composition. Secondly, you need to have time to lay the tiles on the surface lubricated with the mixture in 5, maximum 10 minutes, since the applied layer dries quickly. If by the time the next tile is laid out, the glue does not set well, a thin layer is applied to the inner side of the product. Thirdly, the composition stains the front of the coating and protrudes between the seams. To level this effect, grout the gaps.
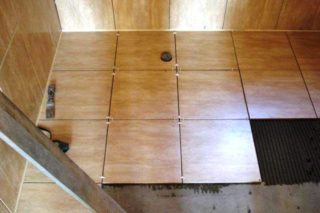
For inexperienced people, it is recommended to cover the area where 2 tiles will fit with glue, after completing their layout, apply a layer under the next similar group. The horizontal is checked against the bubble level. The last cladding in a row often has to be cut to width. Further rows are laid out in the same way, in this case the three adjacent corners between the adjacent tiles act as landmarks. If, during the installation of the next element, it was noticed that it lay lower than the others, it should be lifted and more glue should be put.
At the end of the laying out, the floor is left for at least a day for the glue to set. After that, you can start rubbing the seams. Excess glue is cleaned off with a knife and a metal brush. The surface is then swept and the seams are vacuumed. Grout is prepared according to the instructions. Because of its quick drying, it is best to cook it in small portions. After processing several squares, wash with a damp sponge. If the seam is exposed, it is rubbed over again. After the composition has dried, the floor is treated first with a dry sponge, then with a vacuum cleaner, and at the end - wet cleaning.
Porcelain stoneware is not whimsical, but the material of the seams can not tolerate acids well. When choosing a detergent, you should take this point into account and purchase formulations that do not contain these components. The surface can be cleaned with a brush, but it should not be too hard. If dirt has accumulated between the tiles, it is removed dry, and then the floor is washed. Tile tolerates wet cleaning well due to its low porosity, but it does not affect the seams in the best way.


