The scope of application of arched structures is wide: inside a room, they are usually used for zoning or separating some space that has a specific functional purpose. Sometimes they are also used to decorate windows. Installing an arch in the doorway helps to organize a smooth transition between two rooms.
Varieties of arches
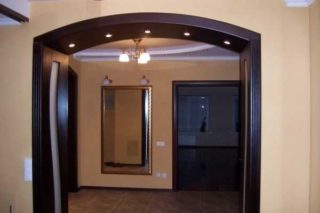
Before proceeding with the installation of the arch, you need to choose the appropriate design option. They differ in the execution of the upper part.
Modern
Such an arch looks like a fragment of a circle with a small bend radius. Due to its shape, the structure is suitable for implementation not only in private houses with high ceilings, but also in urban standard apartments. But there is a limitation: the room must be at least 2.5 m.
Classic
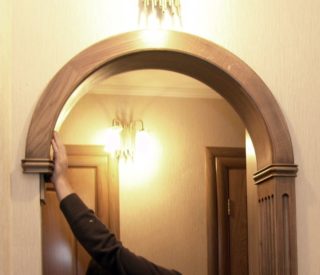
There are two ways to define this architectural element. The first is based only on the type of top. The arch of a classic arch should have the form of a semicircle, the radius of which is half the width of the opening where the structure is located. Based on this definition, any arch of this shape can be called classic, even one whose material or surface design does not at all match the classic style. The second option is based on the interior features. The design should be in the style of classicism, with stucco patterns on the trims and columns in the Ionic, Corinthian or Doric style. In this case, the shape and dimensions of the upper part may differ from the strict canons given. Before installing the arch, you need to check that the ceiling height in the house is at least 3 meters.
Romantic
The opening with this design has symmetrically rounded corners. In this case, the top of the arch is in a position parallel to the floor plane. The corner radius can be different. Since the vault has a low height, the installation of an interior arch of this type is possible in any room, even with a low ceiling.
Ellipsoid
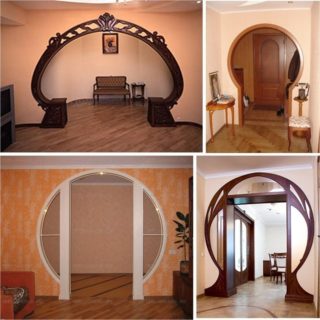
In many ways, this shape is similar to the previous one, but the curvature in this case is more pronounced, due to which the vaulted part is slightly higher. To use it, the opening must be of sufficient width (while the height may be small).
Arbitrary
The homeowner can implement a more sophisticated arched design to his liking. You will need to think over the shape, make measurements and prepare a configuration drawing indicating the dimensions of its components.
Construction device
Before you install the arch in the doorway with your own hands, you need to decide on the shape and features of the structure. Structures differ in the radius of the arc, the height of the rise, the shape of the vaulted part. The vault is supported by a pair of vertical supports. Sometimes they are designed in the form of columns. The design takes into account the thickness of the wall structures, the dimensions of the span. It also matters whether you plan to install a door. If it is intended, the arched frame must be reinforced with additional stiffeners.
Having decided on the shape and taking measurements, you can draw a design drawing. For a vault, especially one with a complex shape, it is worthwhile to prepare in advance a template according to which the details will be cut.
Arch materials
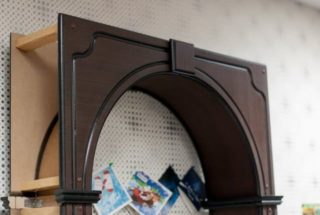
Arched structures are made from different types of materials. They are selected in accordance with the characteristics of the interior and the purpose of the room.
Wood
The structure of wood will make the room more comfortable, well suited for interiors where this material is actively used. It can be varnished to highlight its natural texture, or veneered with stone or cork. The main difficulty in installing an arch of this type is the creation of a curved vault: wood does not belong to materials that are easily bendable and hold such a shape. The way out is to assemble the structure from several fragments, sawn out separately and connected with special glue. If there are wooden beams in the opening, the vault and supports are often nailed to them. You can close the caps of the fasteners with platbands or other decorative details.
MDF or fiberboard
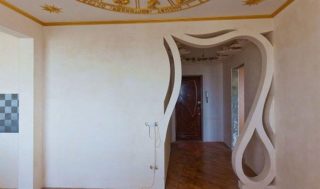
These materials are more flexible than natural wood. It is practiced shaping a thin sheet of MDF with subsequent gluing of parts. Special sheets of increased flexibility with transverse holes 0.8 cm thick are also suitable. First, a frame is created from a metal profile or wood bars, which is then installed in the opening. After that, it is sheathed. Self-tapping screws are used for fastening.
Drywall
This is a material of mixed composition: a mixture based on gypsum is laid between two layers of cardboard. It is released in sheets that are easy to cut and assemble. Due to its flexibility and lightness, it is also suitable for arches of complex shapes. The method of operation is the same as in the case of MDF: on the mounted frame made of a metal profile (most often aluminum is used), the coating elements cut into the blanks are fixed.
The arch can also be assembled from plastic profiles. On sale you can find ready-made sets of elements, from which it is easy to assemble a structure at home. The packaging usually contains step-by-step instructions for assembling it.
Preparing the doorway
Before you put the arch, you need to stock up on raw materials and tools. If you decide to make an arch out of wood, you will need a jigsaw for cutting out parts and sandpaper for grinding. If the structure is based on a frame, you need to purchase the required number of profile or bars, as well as a cutting tool (for example, metal scissors). Self-tapping screws are selected in accordance with the types of materials with which you will have to work. For fasteners, it is best to use a screwdriver. For marking procedures, you will need a pencil, a square and a construction tape. It is advisable to stock up on protective equipment for the face and respiratory tract (glasses, respirator).
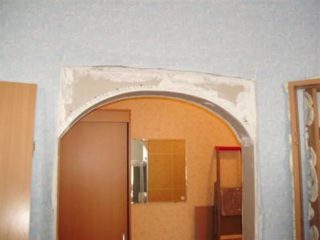
Before assembling the interior arch, you need to prepare the opening. The boxes and the doors themselves must be dismantled. The same applies to platbands. The opening must be cleared of wallpaper fragments and other debris. From the inside, the surface can be leveled with a putty.
Do-it-yourself arch installation
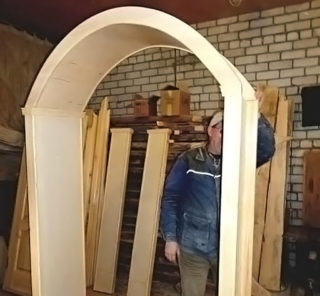
You need to start by making templates for the curved part of the structure. If it is decided to make the arch from solid pieces of wood, the constituent parts of the arch are cut out according to the patterns. Then the sequence of work looks like this:
- Saw out the vertical supports of the system.
- All components of the arch are sanded with sandpaper.
- The parts are treated with compounds that prevent rotting and fire.
- They begin to put the arch in the opening from the vertical parts. Evenness is controlled by the building level.
- Curved sections are mounted and fixed in accordance with the project.
If desired, you can mask the joints with the wall with platbands. The finished structure is coated with varnish, plaster mixture, or revetted with a decorative coating.


