After the installation of plastic windows, open openings remain around the perimeter of the structures, which will have to be beautifully and efficiently repaired. The installation of slopes on plastic windows can be done independently, saving up to 20% of the repair budget. To do this, you should study the materials used for these purposes and how they are used. With the right approach to the installation of window slopes, the end result will not yield to the work of professional builders.
Functional value of slopes
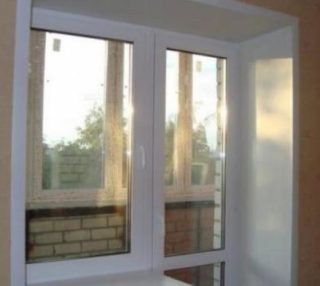
Each owner strives to ensure that his home is functional and beautiful. Harmony is achieved by the fact that each element of the interior is in its place, organically combined with other objects and surfaces.
The functional significance of the slopes is as follows:
- Aesthetic component. With the right choice of surface design (color, texture, texture), they can become a real decoration of the room.
- A place to place insulation. After installation, a large opening remains, which it is advisable to use for good business, and not seal up with mortar or leave it empty.
- Nice transition between wall and frame. These two objects must be connected as efficiently as possible in all respects. The planes should look good, have sufficient strength, and be easy to clean. Of no small importance is resistance to mechanical stress, moisture and ultraviolet light.
As a rule, slopes are made under the surface of the frame or window sill. Sometimes they are adapted for wall cladding.
Material selection
There is a fairly wide selection of materials from which high-quality slopes can be made. Priority is given to the properties and characteristics of each specific project and construction conditions.
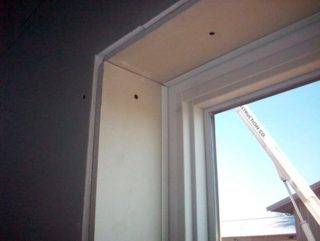
As a decoration, you can use the following materials:
- Plaster. It is a versatile option suitable for both indoor and outdoor applications. To fill the joints, a starter putty is used, which has good strength and fast hardening. The top layer must be made from the finishing putty. After crystallization, it is softer, easy to grind. The method is simple, but requires certain skills. You will have to work hard to achieve a smooth surface. A primer is applied on top of the plaster, then paint or wallpaper. If the repair is carried out in a damp room, varnish is additionally used.
- Drywall. The use of plasterboard strips is the most common solution when carrying out repairs in private and public buildings. Experts recommend installing waterproof models, since the windows are constantly open and there is a possibility of rain drops on them. Drywall forms a perfectly flat surface, but it is only the base. Primer is applied on top, then paint and varnish. Some craftsmen choose non-woven wallpaper, film or oilcloth. It should be borne in mind that the gypsum board is easily destroyed by impacts, however, repair is not particularly difficult.
- Plastic. It is a quick, inexpensive but very effective method of closing the space between the window frame and the base. PVC panels are affordable, easy to cut and look good. The material is available in a wide range of colors, it is easy to choose it for any style of the room.The disadvantage of the polymer coating is that their surface is easily damaged, and they cannot be repaired. Replacement will not cause any special problems, except for finding a suitable model.
When choosing a material, it is necessary to take into account the labor intensity, durability and strength.
Preparatory work
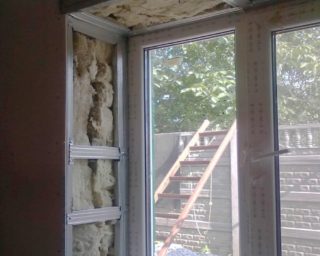
It is advisable to start the installation of slopes on plastic windows immediately after the end of the hardening of the polyurethane foam, with which the openings between the box and the wall were sealed.
First you need to close the seam from the side of the street. The foam has excellent insulating properties, but it degrades when exposed to ultraviolet radiation. Therefore, it must be covered with a thin layer of putty or cement mortar. Another option is to install platbands. Any material that is resistant to temperature, humidity and UV changes is selected. It can be polymer, deck board and even powder coated steel profile.
Further actions are recommended to be performed in the following sequence:
- Remove the double-glazed windows, if this was not done during the external finishing.
- Remove the protective film from the box. This must be done from both sides, since over time the film literally sticks to the plastic and it becomes extremely difficult to separate it.
- Inspect the condition of the openings. Remove debris and dust. Remove loose bricks, grease with glue and insert into place.
- Cut off strongly protruding beads of polyurethane foam. Smooth out the interior walls of the opening destroyed during the installation of the windows with cement mortar. Surface treatment with an antiseptic and a primer for concrete (brick).
- Take measurements. The initial data are the height and width of the opening on the outside. Based on the result obtained, the need for facing material is determined.
In conclusion, you need to take measures to preserve the furniture and existing finishes. Interior items are covered with a special film. The same is done with glass if it is decided not to get it out of the frame. A large sheet of cardboard, fiberboard or plywood should be placed on the floor so as not to damage or stain the floor covering.
Required tools and materials
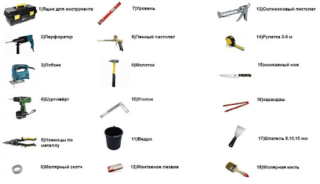
The installation of slopes on windows is carried out with devices that are in the closets of most home craftsmen.
Depending on the chosen method, you will need to work:
- puncher, screwdriver;
- hacksaw for metal;
- scissors, stationery knife;
- tape measure, level, square, miter box;
- a hammer;
- putty knife;
- marker;
- protective goggles and gloves.
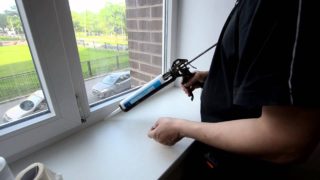
From the materials you need to prepare:
- plastic dowels and the corresponding self-tapping screws;
- wooden lath 10x30 mm;
- insulation (basalt wool or foam);
- starting and finishing putty;
- cement, sand;
- silicone, sealant;
- serpyanka mesh;
- primer for wood;
- plastic profile.
Materials should be purchased with a small margin of up to 15% based on its damage during transportation, storage and use, as well as for your own mistakes and oversights.
DIY installation features
Plastering
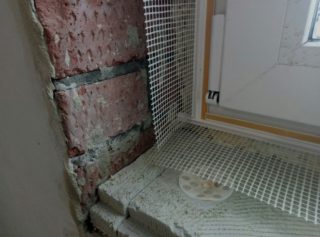
This method is quite simple to perform even for people who have no experience of such work. To complete the task, a minimum set of tools and materials is required.
Sequence of execution:
- Take insulation, cut it into strips corresponding to the parameters of the openings. Try on and adjust them so that at least 1 cm is left on top of the inserts for applying the solution, and in the corners they are tightly joined. Mark the contours with a marker.
- Prepare a sufficient amount of starter filler. Apply it to the strips, smooth and press firmly in accordance with the markings. Align the insulation vertically and horizontally. Wait until the solution is completely set.
- Treat the inserts with a primer, glue a limiting plastic profile around the perimeter of the window frame. Fasten the perforated corner along the outer edges of the opening.
- Knead the finishing putty. Fill all cavities, level the mixture with a wide spatula, using the angle and profile as guide beacons.
- Grind and polish the surfaces with a trowel after they have completely hardened. Wipe off the dust, cover the putty with a primer.
- Apply topcoat. The choice is made in each case individually. Typically, property owners choose paint to match the color of the box.
A good option for giving the finished structure a finished look is to frame the slopes with decorative plastic corners. Their fastening is carried out on liquid nails or a composition similar in properties.
Plasterboard finishing
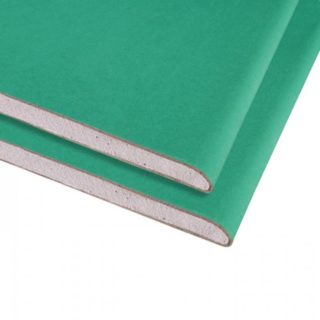
For work, it is recommended to use waterproof models that are resistant to moisture that will get on them during precipitation with an open sash. It should be noted that gypsum boards have rather large dimensions (120x250 cm and 120x300 cm). For the convenience of their transportation, it is better to take the dimensions of the opening in advance and cut the sheets into strips of the desired size directly in the store after purchase.
It is recommended to mount plasterboard slopes in the following sequence:
- Install a plastic profile along the edges of the box and windowsill, in which the edges of the strips will be hidden. A good solution is to use a plastic corner for ceramic tiles.
- Fill the voids with insulation, plaster or polyurethane foam so that the gap remains within 8-12 mm.
- Apply adhesive to the drywall strips and place them in the opening. Align parts vertically and horizontally.
- Drill 4-6 holes in each side. Insert dowels into them, screw in self-tapping screws, drowning them into the surface by 0.5-1 mm.
- Seal the joints with serpyanka tape, then prime the surface and cover it with a layer of finishing putty up to 2 mm thick. After the solution has hardened, polish the surfaces and cover with a liquid primer.
- Apply the final finishing to the strips - oilcloth, paper or liquid wallpaper, paint or ceramic tiles.
At the end, it is recommended to glue decorative corners made of plastic or MDF along the outer borders of the opening. Fragments are joined using a miter box.
Made of plastic
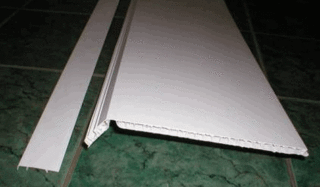
PVC panels are the optimal solution for window finishing in all respects. The material looks great, easy to clean, easy to process. In this case, there is no need to carefully align the openings, since the plastic is attached to the frame. For work, you should purchase wall models with a thickness of at least 8 mm.
Installation must be carried out in the following sequence:
- Prepare bars for the frame. Adjust them in length, drill through holes for the screws.
- Transfer the drilling points from the laths to the walls. Drill holes in them and insert into dowels. Screw the lumber to the base. First, you need to carefully treat it with an antiseptic and a hydrophobic agent to protect it from getting wet and rotting.
- Screw the plastic profile to the inside of the frame in the shape that best matches the frame and panels.
- Proceed with adjusting the panel configuration by configuration, length and width. First, the sides are made, then the horizontal part is made.
- Alternately, starting from the vertical strip, insert them into the starting profiles and screw them to the outer part of the frame with self-tapping screws. Fill up their joints between themselves and the window sill with connecting parts.
The last stage is the installation of a camouflage corner along the outer perimeter of the opening. The product is set on glue or hardware with the subsequent attachment of plugs.


