The safety of living in a private house largely depends on the design of the fence, arranged around the plot of land on which it is built. Any fence has a gate - a wide passage (passage) through which you can get inside the fenced area or leave it. In fences erected around private houses, swing or sliding gates are most often used. Each of the options has its own advantages and disadvantages. The choice depends on the availability of the vehicle and the preference of the homeowner. The construction of any gate is carried out in several stages, the main of which are the selection and installation of support pillars for them.
Varieties of supports
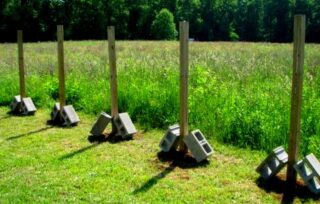
What pillars are needed for the gate is determined by the owner of the site at the stage of erecting the fence as a whole. Their choice depends entirely on the material capabilities and artistic taste of the owner.
Wooden pillars
The cheapest type of support. They are used extremely rarely, due to their short service life, which rarely exceeds 8-10 years. Before installation, the supports are thoroughly treated with an antiseptic or copper sulfate. As a rule, wooden poles are used when arranging temporary fences with gates for the entry of construction equipment into the territory of the site.
Asbestos-cement pillars
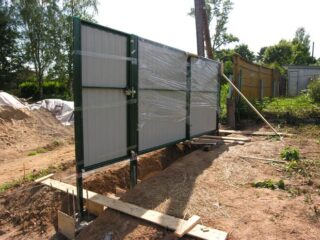
They are considered a good material for pillars when arranging various types of fences. They are inexpensive and durable enough, absolutely not subject to decay. However, their wide distribution is hindered by a number of disadvantages, among which the main one is considered to be a complex installation. To fasten the elements of the fence, it is necessary to invent and independently produce fasteners (grips, clamps, etc.). The poles should be placed in holes with a good drainage pad and covered on top with something like an umbrella. This will prevent water from entering the pipes, which, if frozen, will destroy the pillars.
Metal pillars
Most in demand when building fences. With proper anti-corrosion treatment, they practically have no drawbacks. Metal poles are technologically advanced in installation, capable of serving for a long time and at the same time not subject to destruction when exposed to sudden climatic changes.
Concrete supports
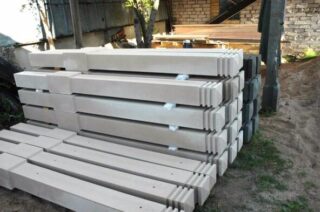
The manufacture of concrete pillars is rarely ordered at house-building factories. Most often they are made by hand directly on the site, which is fenced off. The pillars are durable, and most importantly cheap. However, their manufacture is a long and laborious process.
Brick supports
Brick pillars structurally represent a concreted pipe, which is subsequently lined with bricks. Such supports require at least a shallow foundation that reliably connects them to each other and prevents the possibility of skewing. The use of, for example, clinker bricks will give the pillars additional strength, which is important when arranging the gate, and will significantly improve the appearance of the entire site.
Types of concreting of pillars
The type of concreting of the pillars is determined by the architectural concept and the required capital of the gate and the fence as a whole. The concreting of the gate supports can be partial or complete.
Solution preparation
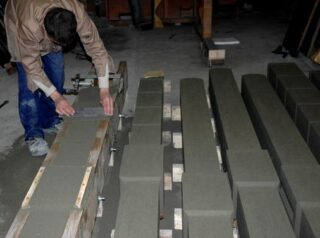
To fill the pillars, you will need a concrete solution, which you can prepare yourself. This will require the following components:
- Portland cement grade not lower than M-250;
- water;
- gravel;
- sand.
All components are mixed in the following proportions:
- cement - 1 part;
- water - 0.5-1 part;
- gravel - 3-4 parts;
- sand - 2-3 parts.
To obtain quality concrete, it is necessary that all ingredients meet certain requirements.
- The shelf life of cement must correspond to that indicated on the package.
- The cement must be dry and crumbly. The presence of sticky lumps is not allowed.
- The sand must be washed and sieved. Foreign inclusions (clay, soil, debris, etc.) are not allowed.
- The gravel should be washed free of soil particles and debris. Must have a homogeneous fractional composition.
The process of preparing the solution begins with mixing the bulk ingredients, then gradually add water as it is mixed. It is better to mix the components with a concrete mixer.
Drilling holes
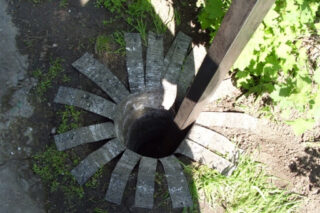
Preparing pits for installing poles is the most time-consuming process. The easiest way to do them is with a motor-drill, which can easily cope with this task, even on clay soil. If there is no such equipment, a garden (manual) drill is used, although the labor intensity of the work will increase several times.
The main parameters of the pits are their depth and shape. The depth of the drilled hole must exceed the depth of soil freezing, which can range from 1.2 to 1.8 m.
Most often, the posts are installed in a regular cylindrical hole. However, on highly waterlogged soils, a cylindrical pit with an extension in the lower part will be needed. You can get it using a special attachment. If it is absent, you will have to drill a hole of a larger diameter and concrete the support base of the post. Only after that, the excess space is covered with earth.
Partial fill
Partially cast concrete supports are used for hanging light gates or wickets that are not subject to severe wind loads. The technology of partial concreting is simple - the pit in which the post is installed is half filled with poured water and a carefully compacted mixture of sand and gravel. The space remaining in the pit is poured with concrete mortar, which is also carefully rammed and air is removed from it by bayonet.
Complete concreting
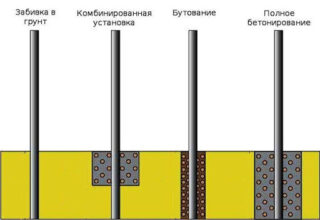
Full concreting differs from partial concreting in that the pit with the installed pillar is completely filled with concrete, having prepared a sand and gravel cushion before this. Such a structure can be strengthened by connecting the pillars into a single monolith with a recessed concrete grillage.
The recessed grillage will increase the reliability of the gate, as it is located below the level of soil freezing. However, such a structure will take a long time to equip, and a lot of building materials will be needed.
Installation of the gate in a single plate
To avoid distortion of the gate, which may appear in a year or two after their installation, it is best to install the gate in a single plate.
Install the supports as follows:
- Dig a trench 0.5 m wide and 0.5 m longer than the width of the gate. The depth of the trench for heaving soils should exceed 1.8 m, and for non-heaving soils - about 1.2 m.
- The thickness of the sand and gravel cushion, which is arranged at the bottom of the trench, is 20–30 cm.
- To prevent the entire structure from falling into the trench during installation, pipe sections are perpendicularly welded onto the bearing supports, the length of which should exceed the width of the trench.
- The frame of the gate is hung on the pillars and the entire structure is installed in place.The welded pipe sections give it additional stability.
- Using the level, the gate is set strictly vertically and horizontally.
- After making sure that the gate is installed correctly, the entire trench is poured with concrete. If possible, concrete is reinforced with reinforcement or mesh before pouring.
- After the concrete has completely hardened, they begin to finish the bearing supports and gates.
If, under the influence of heaving soil, the slab starts to "walk" a little, the gate leaves will still open and close without distortions, since they form a single structure with the slab.
Installation of pillars for gates without concreting
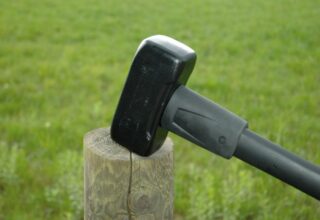
In suburban areas, light wickets (gates) are often used. In this case, the supporting pillars for them are driven into the ground without concreting. Metal poles are best suited for this.
Driving of supports into the ground is carried out to a depth of 1.2 m into a previously prepared hole, the diameter of which is less than the diameter of the pipe. In this case, it is necessary to constantly monitor the vertical position of the latter. Then the installed supports are connected to the rest of the fence. Between themselves, the posts for the gates are connected with a removable jumper. Then the frames of the gate leaves are welded to the supports or hung on the hinges.
Driving pillars has a number of advantages over other methods of installing supports:
- profitability;
- installation speed;
- possibility of self-installation.
Clogged posts can be easily repaired or replaced.
When hanging the gate, gaps are provided between the leaves. They will allow you to open freely with a slight displacement of the supports. Avoiding their complete displacement will allow the installation of a rigid frame along the entire perimeter of the gate.


