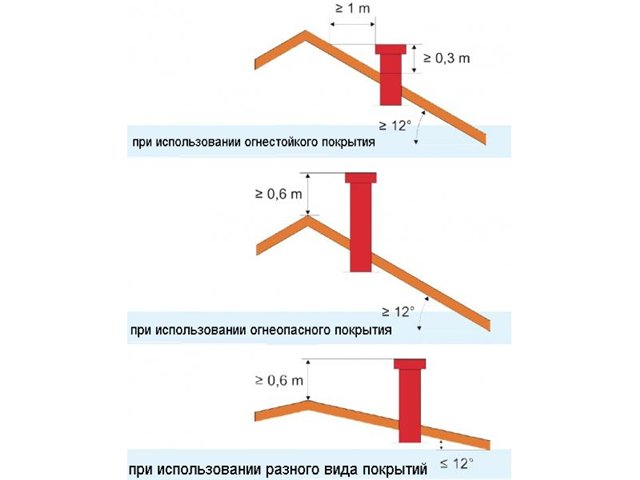
Installing a pipe in a bath through the ceiling and roof is the most important stage in the construction of a chimney. Any, at first glance, the most insignificant inaccuracy can cause fire or destruction of the structure. Therefore, the requirements that ensure the safety of operation of chimneys passing through the ceiling and roof of the bath are strictly regulated by the regulatory documents in force in the Russian Federation.
Chimney installation rules
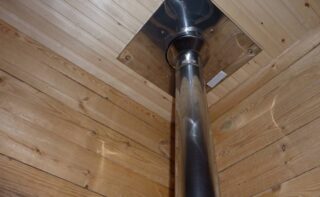
Fulfillment of all specified requirements will ensure the preservation of health, and in some cases, the life of people. Therefore, when designing and installing chimneys, it is necessary to take into account the standard values of the distances from chimneys to walls, structural elements of the ceiling and roof, as well as the height of the chimney.
- The chimney must be at least 130 mm away from flammable structures, and at least 250 mm from uninsulated ceramic pipes.
- The pass-through assembly must exceed the ceiling thickness by at least 70 mm.
- Structural elements of the pass-through unit must be separated from the wooden elements of the ceiling with non-combustible materials.
- The outer surfaces of the chimney should be 260-500 mm apart from walls made of combustible materials, from materials plastered and reinforced with a metal mesh or protected by heat-insulating non-combustible materials by 20-380 mm.
- The chimney must be reliably protected from accidental contact with its surface by the users of the bath and firmly fixed on the walls and ceilings of the structure.
Work on the installation of the chimney must be preceded by accurate calculations, the results of which must be reflected in the drawings.
Types of chimneys and types of chimneys
Chimneys are designed to remove combustion products from the furnace. Correctly selected chimney design increases the efficiency of the fuel combustion process.
Chimney types:
- brick;
- ceramic;
- metal;
- polymer.
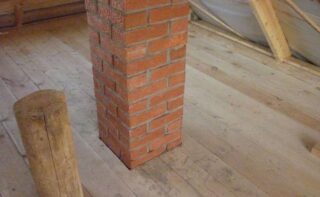
Brick chimneys are installed inside the walls of the building and outside. According to building rules, they need a foundation, and the chimney itself is made of solid red brick. In this case, the seam between the bricks should not exceed 10 mm. Sometimes an asbestos-cement pipe is placed in a brick structure.
An acidic environment must not be created in a brick chimney. In this case, the brick crumbles and, over time, is able to fall into the chimney.
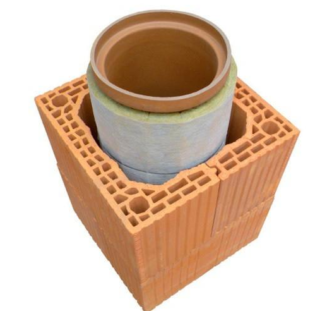
Chimneys made of ceramics are a completely ready-made modular system that is manufactured in the factory. They can withstand high temperatures, are acid resistant and can last for a long time. However, due to their heavy weight, a foundation is required for their construction.
Polymer chimneys are made of special materials with high flexibility and low weight. However, they are used only in cases where the temperature of the exhaust gases does not exceed 250 ° C.
Metal chimneys are made of stainless steel or cast iron. They are a modular system, which includes adapters, tees, bends, etc.Such systems are mounted inside brick channels and separately.
Chimney types
For the manufacture of chimneys, stainless steel is used. Products are:
- smooth single-walled;
- corrugated;
- in the form of a sandwich.
Corrugated and sandwich pipes are only round. Smooth single-wall pipes, in addition to round ones, can also be oval and rectangular. The latter are intended only for installation inside brick chimneys. Steel chimneys are made of steel grades AISI 304, AISI 310 and AISI 316.
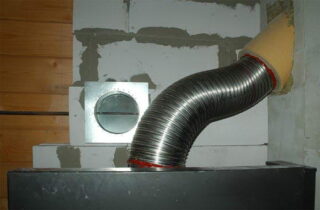
Steel grade AISI 304 is used in the manufacture of single-walled or sandwich structures operating as part of low-temperature heaters. Their feature is high resistance to aggressive gases at temperatures up to 250 °.
Pipes made of heat-resistant steel AISI 310 can be heated up to 1000 ° without changing their shape. However, the resistance to aggressive environments of this material is low, therefore it is used when arranging systems equipped with solid fuel boilers.
The best material for the manufacture of chimney pipes is steel grade AISI 316. Products from this material are highly heat-resistant and resistant to acidic environments.
Corrugated pipes are a wire spring wrapped in thin foil. They are mounted in a fireproof shell, which prolongs its service life.
Single-wall smooth pipes are best suited for arranging chimneys in baths. However, it is recommended to use them in systems with boilers whose efficiency does not exceed 90%.
Sandwich systems are quite expensive, but they are versatile and have a long service life. It is recommended to use them when arranging chimneys inside buildings.
The choice of pipes for the chimney
Choose a chimney pipe based on the characteristics of specific fuels, which differ from each other in combustion temperature, exhaust gas temperature, and chemical composition of the smoke.
If the pipe is paired with a wood-fired sauna boiler, it must withstand a temperature of 700-1000 ° C. When working with a sawdust or pellet boiler, their operating temperature should be between 250 and 400 ° C.
It is also important to choose the correct thickness of the inner wall of the steel pipes. For wood-burning boilers, this value is 0.7-1.0 mm, and for pellet boilers, 0.5 mm will be enough.
Heat insulating materials
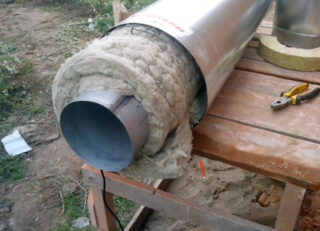
When arranging a chimney in a bath, the type of heat insulator is of great importance. Most often used:
Mineral wool that can withstand heating up to 600 ° C. Among the disadvantages of this material is the release of formaldehyde when heated and the deterioration of the protective properties when wet.
Minerite, which includes cement, cellulose and mineral fillers. The material heats up to 600 ° C without emitting any substances harmful to health and does not lose its qualities when exposed to water.
Asbestos also has good insulating properties, but when heated strongly, it emits substances harmful to health.
Chimney passage through the ceiling and roof
The chimney in the bath must pass through the ceiling and roof through pre-prepared holes. Cutting the chimney in the bath is carried out using special pass-through units - prefabricated boxes with flanges made of stainless steel. They can be both homemade and factory-made. Insulation is placed between the flanges, which protects wooden structures from pipes heated to high temperatures. Otherwise, the wooden structure may char or catch fire.
If, when arranging a transition through the ceiling or roof, you have to cut the floor beams, you will need to install additional fasteners.
Arrangement of the ceiling transition
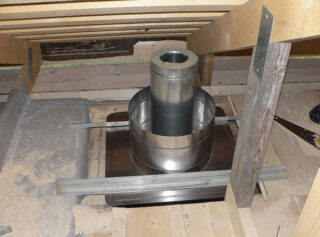
The chimney through the ceiling is displayed in the following order:
- A hole is made in the ceiling, the diameter of which exceeds the diameter of the chimney by 130-180 mm.
- The chimney is taken out to the attic, and the pipes must be connected below or above the ceiling.
- A metal plate is installed at the exit point on the inner side of the ceiling.
- The distance from the metal plate to the attic floor is completely insulated with a heat insulator. Previously, a sandbox was specially mounted for this in the bath, which was filled with sand, clay or expanded clay. This option is rarely used today.
Outlet of the smoke channel to the roof
You can make the passage of the pipe through the roof in the bath in different places:
- On the ridge of the roof, which is considered the most optimal solution, since snow does not accumulate in this place and good traction is provided.
- Not far from the ridge. In this case, you will have to be guided by certain rules.
To remove the chimney through the roof of the bath with your own hands, you need:
- Make a hole in the chosen place, slightly larger than the diameter of the output pipe.
- Reinforce floor beams around the hole (if necessary).
- In the under-roof space of the bath, cut the chimney in the same way as crossing the ceiling.
- Remove the chimney.
- Install a seal (apron) around the output pipe and seal it.
It is possible to flood the stove only after the sealant has completely dried and thoroughly checked all joints of the chimney for leaks.

