For the construction of roofs, soft and hard coverings are used in almost the same proportion. Each material has its own properties, installation and operation features, advantages and disadvantages. All roofs have one problem in common - moisture in the attic space. Dampness penetrates through dormers, microscopic cracks, floor slabs from the side of living quarters. To prevent the development of mold, decay processes and destruction of the rafter system, roof aerators are used - devices that effectively remove moisture from the attic space. Installation of the ventilation system can be done by hand. To do this, you should familiarize yourself with their device, varieties, design and installation rules.
What is a roofing aerator
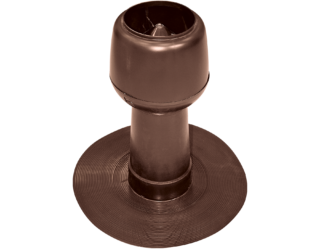
A roofing aerator is a device designed to remove excess moisture from under the roof into the outer space.
Roof aerators consist of the following parts:
- Base (bracket). It is a plate, corners and other devices for fastening to the supporting base. Depending on the type of product, they can be rafter legs, ridge beam or lathing.
- Trumpet. It is needed to create traction - the pressure difference between the attic space and the upper cut of the exhaust duct. Made of plastic, metal or asbestos cement. Choice of round or square section.
- Retaining ring. It is used to fix the pipe and seal the place of its passage through the roofing system.
- Cap. Serves to protect against the penetration of rainfall, debris, birds, rodents and insects under the roof. Additionally equipped with a permanent or removable grill (mesh).
Since the roofing aerator is operated in external conditions, requirements corresponding to similar structures are imposed on it. Products must be durable, resistant to moisture, temperature changes and ultraviolet radiation. The roof aerator must fit optimally into the design of the entire building.
The principle of operation and the main functions of the aerator
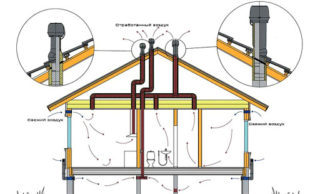
The accumulation of moisture under the roof can lead to damage to the rafter system and screed. High humidity is especially dangerous during the cold season. Penetrating into materials, water freezes, expands and breaks them apart. In summer, the steam in the roof increases in volume and leads to swelling. All this leads to the need for annual labor-intensive and expensive repairs, and subsequently - a complete replacement of the roof. It is not difficult to avoid this, it is enough to correctly install the aerator on the roof.
The principle of operation of the device consists in the movement of air upward under the influence of pressure and temperature differences. It is always warmer under the attic, and due to the vapors, an area of increased pressure is created. Due to this, the heated humid air rises up and is discharged through the channels to the outside.
Aerators perform the following functions:
- steam outlet from the attic, thereby eliminating the formation of condensation and ice;
- preventing soft materials from getting wet, which are used for insulation and vapor barrier;
- elimination of the likelihood of damage to the wooden rafter system by fungus and mold;
- removal of dust, bacteria, unpleasant odors from confined spaces from the premises;
- reduction of internal pressure under the roof, which eliminates deformation of films and topcoats.
With a lot of positive aspects, factory-made devices are inexpensive, installation does not require professional skills. The product comes with detailed instructions, you can do the job with household tools.
Varieties of aerators
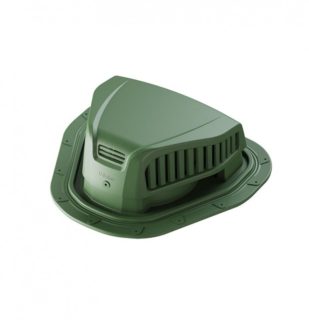
Roof aerators differ in the design of the air intake system and the place of installation.
There are such design options:
- Spot. They are installed over the entire roof area at regular intervals. Each product is autonomous and performs its task independently of the others, drying air within a radius of 6-12 m. The number of devices is calculated based on their performance and the size of the roof.
- Continuous. Such aerators should be installed in one line along the ridge bar or directly on it, if there is an appropriate profile. The air intakes have two levels. The lower one takes moisture from the attic space, and the upper ones - from a layer of soft thermal insulation and wood of the truss system.
Turbine aerators are characterized by increased power and are installed in potentially damp rooms.
DIY installation technology
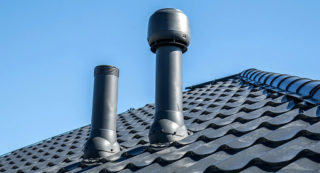
Before you independently make a ventilation system for the roof, you should carry out calculations and draw up a diagram. The norm for a device with a pipe with a diameter of 100 mm is considered to be a serviced area of 100 m². With an increase or decrease in the channel diameter, its working area changes proportionally. At the same time, for each type of topcoat, there are rules and features of the installation of roof ventilation. The use of belay and stable stairs is mandatory in every case.
Installation of aerators on a soft roof is carried out at a distance of 15-20 cm from the ridge.
Sequence of work:
- Measurements are taken, markings are applied.
- The tile is removed, and the roofing material is cut to fit the size of the support and bent to the sides.
- A vertical hole is made in the crate equal to the cross-section of the pipe. A hand or reciprocating saw is used. The edges of the opening are leveled, cleaned and treated with a sealant.
- A pipe with a base is installed. It is screwed to a flat crate.
- The soft cover is installed back, over which the pressure ring is applied and fixed.
- The place where the canal exits into the attic is insulated and decorated.
Installation of aerators on roofs made of metal and corrugated board is best performed using continuous technology. In such structures, a gap is made in the insulation, which is closed by a ridge profile with a flat or semicircular top.
Installation sequence:
- Dismantling the old profile if its configuration does not correspond to the project.
- Marking, cutting holes.
- Securing the new profile using gaskets or sealant.
- Installation of aerators. Fastening is carried out with self-tapping screws with their fixation on the rafters.
The final step in both cases is the installation of the protective mesh and hood. To improve ventilation, air vents are made in the roof overhang.
Consequences of incorrect installation
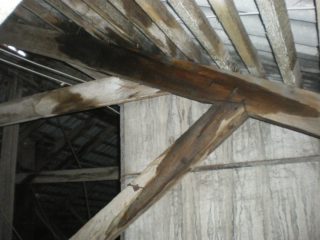
If the aerator for a soft roof is installed incorrectly, this can lead to a violation of its tightness, an increase in the level of humidity and the rapid destruction of the rafter system.
Most often, developers make the following mistakes:
- Insufficient diameter of the exhaust ducts. Because of this, there is no traction or its strength is not enough to fully drain the room.
- Using elbows to connect pipes. This configuration makes it difficult for air to flow, which negatively affects the dehumidification process of the attic space.
- Ignoring the joint sealing procedure.During rain and snow melting, water flows into them, which is absorbed into the insulation, wood, deteriorating their performance.
- No grill or mesh in the hood. This can cause clogging and loss of functionality.
- Insufficient number of devices. If the norm specified by the manufacturer is not observed, the effective outflow of moisture will not be ensured.
Compliance with the planning rules and technology for installing aerators will create an optimal microclimate and extend the life of the roof.


